Catherine Pooler Designs ~ Puppy Hugs


Just a little reminder that the Boho Trends Insta Hop featuring Catherine Pooler Designs is still up over on Instagram and you only have until the end of the day TODAY to leave a comment to WIN a $50 gift certificate to the CP Shop!

To start the hop, CLICK HERE.  All you have to do is visit each designer's Instagram page, like their post and leave a comment at a chance to win!

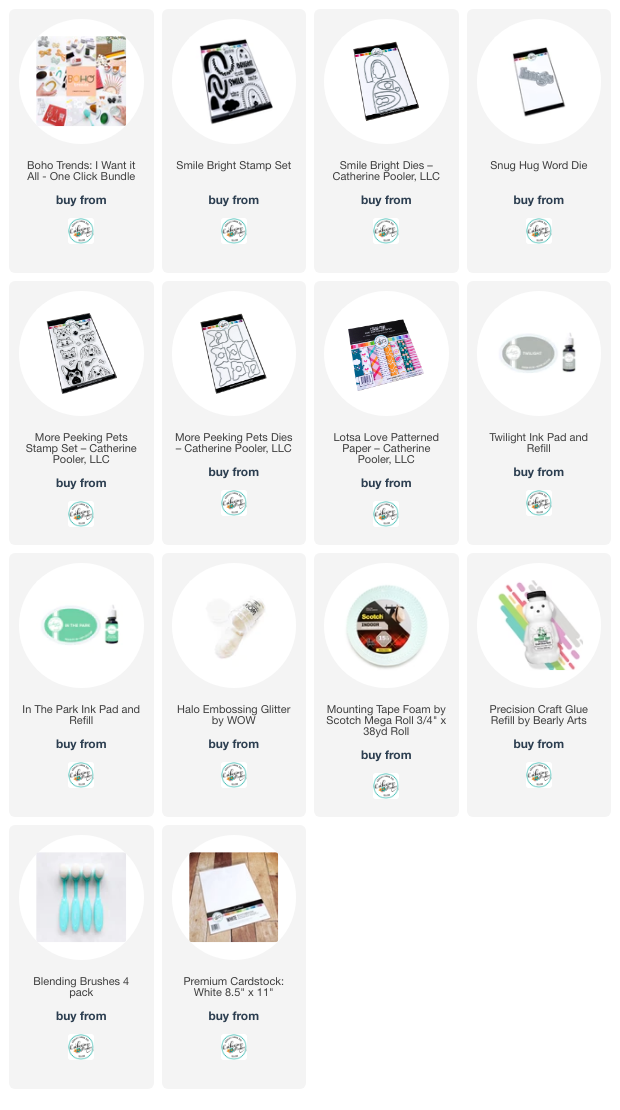
I thought I'd share another fun card featuring products from the BoHo Trends collection today.

Today's card features the "Smile Bright" stamp and die set.  I first stamped my clouds in "In The Park" ink and then layered my "Lotsa Love" patterned paper cut pieces with the "Smile Bright Dies".  I even added some fun zig-zag stitches with some fun yellow thread.

Next I die cut the "Snug Hug Dies" using plain white cardstock and also more of the "Lotsa Love" patterned paper for the actual letters.  I added some sparkle by adding some "Halo Embossing Powder" over top of the pink striped paper.

I needed to add a little bit of cute factor so I stamped one of the puppies from the "Peeking Pets" stamp sets in Twilight ink and die cut him with the corresponding dies.  I even added a "In The Park" colored mini heart from the new "Smile Bright" stamp set.

I just love how fun this card came out!  

Have a fun and creative week!

~ Ally ~

Sweet November Stamps ~ Light Up Birthday Bot!

So I have another fun Robot card for the Sweet November Stamps digital release of "Aliens Vs Robots" this weekend!

I began my card my embossing this cool embossing folder called "Circuits" by Sizzix on some silver cardstock.  Then I painted it with black acrylic paint to catch in all the grooves and wiped most of the paint off to give it a dirty, grungy feel.


Next I printed out the new "Robot QT3" onto some Neehnah Solar White 80lb white cardstock and colored him with some Copic Markers.  I also added some printed birthday sentiments too.


So the extra cool thing about this card is that the eyes and buttons on his chest actually LIGHT UP!  I used some Chibitronic products to create the circuit and light him up!  I will be having a full tutorial on how I did that next week on March 1st.

Until then, here is how my light up card works...

I hope you have a wonderful and creative weekend!

~ Ally ~

Sweet November Stamps ~ It's Robots Versus Aliens!


The Sweet November Stamps team has been playing with Robots and Aliens this week!  It's all in preparation for the newest digital release "Aliens Vs Robots" and we've been having blast!

I decided to play with some of the robots this week as most of the other team members have been creating with the aliens.

And who says robots have to just be for boys!!?!?!  NO WAY!  So I took our little "Robot QT1" (you know... QT = Cutie! So clever!) and made her a fashion forward robot and dressed her in pinks and purples!


I took the "Robot QT1" and made her a mask and then ink blended my Distress Oxide background plus some fun gold splatter.

I removed the mask and colored her up using Copic Markers.  Do you like her little digital face screen?

So much fun to create!

Hope you have a wonderful weekend and head on over to check out the rest of the "Aliens Vs Robots" release!

~ Ally ~

StampNation ~ Floral Heart Bloom

Happy Friday!  I'm over at StampNation today sharing a fun card for the weekend challenge.

This week's challenge is to feature some FLOWERS.

I'm all over this kind of challenge.  I love featuring blooms on my cards.

For today's card I started by die cutting the "Lights on Broadway Cover Plate Die.  I used some silver thread to stitch in some of the holes within the die.

Next I die cut some white arches from the "Smile Bright Dies" and added the sparkly leafy arch from the "Smile Bright" stamp set using Halo embossing powder.  I adhered them together in a heart shape.

Then I stamped some pretty flowers and leaves from the "Sweet Blossoms" stamp set.  I used Apricot, Bellini and a touch of Terracotta for the flowers and Matcha and Hot Tub inks for the leaves.


To finish off my card, I adhered some peachy pink sequins' from the Wintergreen and London sequin mixes.

Plus don't forget that StampNation is offering a FREE class next month; March 7th.  You have to be a StampNation member to participate.


Don't forget you can get a FREE stamp set, our cute little "Hang It There", with a $50 purchase.  Just add $50 or more products to your cart, then add the "Hang It There" stamp set into your cart and add the code shown below and it's FREE!  There is also a corresponding die set for this stamp set if you're interested.


Thanks for stopping by!  I hope you have a fun and crafty weekend!

~ Ally ~


Catherine Pooler Designs ~ Boho Trends Instagram Hop - HOP & WIN!


Happy Wednesday all!  Today some of the Catherine Pooler designers and brand ambassadors are having an inspiration Instagram Hop featuring today's release of the new collection, Boho Trends!

Come and join in the fun!  While you hop around for card making inspiration, you can also get a chance to win a $50 Gift Card to the @catherinepooler shop! Entering is easy as 1...2...3!

My card for the hop today features the sweet little "Butterfly Buddies Dies" and some soft inks; Whipped Honey, Apricot, It's a Girl, Lilac, Tranquil and Matcha. Some of these fun ink colors are found in our newly released "Apothecary Mini Ink" pads.

I started by masking of a strip of CP white cardstock at an angle.  I softed brushed on my "It's a Girl" ink with a CP Blender Brush (comes in 2 sizes).  I removed the masking tape and then allowed the next color of ink masking to slightly overlap the first color of ink.  I proceeded down the card using the next rainbow ordered ink, overlapping each strip.

I then used a toothbrush and splatter a fine mist of black acrylic paint across the card front panel.

Then I die cut each of the new "Butterfly Buddies Dies" 5 times in white cardstock.  I laid the 5 smaller butterflies together and ink blended across them in a row with each of the colors from my ink palette.  For added sparkle, I took all my colored butterflies and added some "Halo" embossing powder on them.

I adhered each colored sparkly butterfly to one of the white larger die cut pieces and adhered them in a row down the edge of the card front.

To finish off the card, I white heat embossed a sentiment from the new "Smile Bright" stamp set.


So make sure to hop along with all the amazing designers today.

Start here!  Click the image below...


Thanks and have a great week!

~ Ally ~

Catherine Pooler Designs ~ Boho Trends Hop Coming!

Coming on Wednesday this week, Catherine Pooler Designs is having a fun "Boho Trends Instagram Hop"! 

Today I'm sharing a fun creation featuring some of the fun products being released on Wednesday in the CP shop from the Boho Trends collection.

Today's card started with the smallest part of the rainbow stamp set "Smile Bright".  I used a color palette of Rouge, Ginger, Apricot, Whipped Honey, Wintergreen and Sea Glass.

Then I stamped out my cloud with a sentiment, the sentiment "Bright" and a cute little heart.

I loved making the wonky background with those two fun shapes!

I hope you'll join us on Wednesday for our Instagram hop.  There will be prizes to be won and lots of fun inspiration!

Have a great week!

~ Ally ~

Sweet November Stamps ~ Fairy Sleepover

Happy Saturday all!  Today is release day for the very beautiful new digital stamp set "Fairy Sleepover" by Sweet November Stamps.

For this little collection Amy has created these 4 darling little fairies that are sleeping within a Foxglove flower.  Each fairy is unique in orientation and is drawn both in the flower and on it's own.

I actually used "Fairy Sleepover: Lacey" earlier this week for my Chibitronics project.  You can see that post HERE plus there's a video on how I made the circuit too!

For today's card I decided I was going to be brave and use the "Fairy Sleepover: Foxglove Accessories Set" which contains the all the fairies inside the flower, the accompanying tiny lantern and fireflies plus the Foxglove flower all on it's own.

I began by printing my image onto Neenhah Solar White 80lb cardstock.  I then created a mask by printing the same image out on Eclipse Masking Paper and fussy cutting it out.

I applied the mask and airbrushed the background to appear like a dappled greenery setting.


Then I proceeded to peel off the mask and colored all my sweet little sleeping fairies with Copic Markers.  I really tried to concentrate on getting depth into my flower this time.  I richened the dark areas and used lots of BV Copics in the shadows.

Make sure to check out all these little cuties today in the Sweet November Stamps Shop!

Have a crafty weekend all!

~ Ally ~

Catherine Pooler Designs ~ Boho Trends

The newest Catherine Pooler Designs release is coming February 22nd!

This month's theme is BOHO TRENDS!

Lots of new stamps and dies and a new collection mini inks will be in the store on Wednesday!  There will be three new bundles and an "I Want It All Bundle" but everything for the release will be offered as single items for purchase as well.

For my card creation today, I chose the new "Smile Bright" stamp set featured some cool rainbow layers and some fun shapes and greetings.


I chose to feature the Rouge, Ginger, Apricot, Whipped Honey, Wintergreen and Sea Glass inks for a non-traditional rainbow type color scheme.  Most of the inks I used today are in the Apothecary collection and can now be found as an Apothecary Mini Inks pack.

I used a base color of Apricot for the "Bright" word and then blended on some rich Ginger color to get the gradient of color.

Make sure to join us for all of the fun release activities!

Join Us on Facebook at Noon*Monday, February 20thMore Bundle RevealsTuesday, February 21stEarly Ordering at Noon Eastern for StampNation MembersFacebook at Noon - card making with new productsExclusive YouTube at 3pm Eastern for StampNation MembersWednesday, February 22nd9am Eastern General Ordering Opens & Boho Trends InstaHopYouTube* at Noon - card making party with new release!


PLUS... with this release Catherine has a new 3x4 stamp set called "Hang In There" for FREE with a $50 purchase (before taxes & shipping).  You can also purchase the corresponding die for this cute stamp set as well if you wish!

WHOA!!!  Cool right?!?!?

Hope to see you all there!

~ Ally ~


All new products go live in the CP shop at 9am Wednesday February 22nd.

Chibitronic ~ Light Up Fireflies featuring the Reed Switch


Happy Monday!  Today, I'm here to share a fun light up card featuring the new Reed Switch - Magnetic On from Chibitronics.

I began today's card by printing out my little night fairy scene using digital stamps from Sweet November Stamps. I colored one for the front panel of my card and printed another lighter one to build my circuit on. This helps with positioning all our our LED Light Stickers and our circuit elements.


Next I used the Craft Stencil and mapped out my entire circuit including the placement of each LED sticker, the battery housing and the location of my Reed Switch.

Next I laid down the negative side of my circuit's Conductive Fabric Tape. I created the housing for my 2 battery cells and then laid down the tape for the positive side of my circuit. I then added the Reed Switch to my circuit by adhered it to the circuit with Conductive Fabric Tape. I added all 4 Yellow LED Stickers from the Red/Yellow/Blue MegaPack collection over top of the firefly tooshies and the fairy lantern inside the hollow log.


When a magnet-on reed switch is added to your circuit, electricity will not flow unless a magnet is placed nearby. This allows you to add another fun interactive element to your circuits! So I used a little firefly as the magnetic aspect to complete my circuit (seen above).

On my card, my little magnetic firefly is held onto the front with a tiny piece of magnet mounted underneath the firefly located at the top. When you locate the magnetic firefly to the lower right hand corner of the hollow log, the connection made through the card front with the Reed Switch completes the circuit and the LED Light Stickers turn on!

For more step-by-step instructions on how to use a Reed Switch in your next papercrafting project, why not check out my video tutorial HERE for all the details about today's circuit.


 Thanks so much for checking our my project today! Happy creating!

~ Ally ~

Scrap 'N Stamp ~ Sending Love Kit

The Scrap 'n Stamp February kit, "Sending Love" is now available!

Included in the Kit:
  • Photoplay Love Letters stamp 'n die sets
  • 3 sheets of foil - white, red 'n gold
  • 12 sheets of 6x6 Lawn Fawn Gingham Paper
  • 2 sentiment toner sheets
  • 2 Background toner sheets
  • Coordinating sequins 
  • Inspiration and Instruction Sheet

I made a second card creation using this fun kit.

I started by stamping both birds and whole bunch of fun candy jars from the Photoplay "Love Letters" stamp set in Memento Tuxedo Black ink.  I coloured all these items with Copic Markers and then die cut everything out using the coordinating "Love Letter Die" set.

Here's a little close up of the card front...

I had a ball creating this little gingham scene.

The Scrap 'N Stamp's design team is having a inspirational hop. To check out all of the amazing LOVE inspired creations, please head on over to the Scrap 'N Stamp's blog to begin today's hop.  (Comments left here are not entered into the hop's chance to win.)

You could WIN a $50 gift certificate to the shop!

BEGIN HERE!

Best wishes and happy hopping!

~ Ally ~

Sweet November Stamps ~ Meet the Cutest Cattle Dog, Durango!

Happy Saturday all!  Today Sweet November Stamps has a new digi mini release!

Meet the newest digital stamps from the "Dog Park 2"!  Can you say... "Awwww!?!".

Today's card features the adorable "Dog Park 2: Durango the Cattle Dog" digital image along with the "Spring is Back: Background Builder"set for the window and little kitty.


Here's a little close up of my Cattle Dog...


As I was completing my card, I took a few pictures along the way to show my process.


I first started with adding a random yellow floral to my walls.  I used a wash of light Copic yellow and then added the bloom and some leaves.  I even used an old paint brush to add some smudges for some authenticity.


Next I colored in the curtains.  I used some dark and medium tone Copic blues.  I aimed to make my curtains look dimensional.


Then I colored in the wood flooring and window sill underneath my kitty.  I layered a few different shades of brown to achieve some depth and I made sure to put some shadowing underneath my critters.


Then came the coloring of the scene outside of the window.  I started by drawing in my evergreen trees using some dark BG greens.

Then I added in the blue to my sky.  I tried to leave a white glow on tops of my trees for a little moon light kissed effect.

I also completed the piece of wood above the window.


Next was the most challenging part!  Mister Durango!

I started with a base of grey for the black areas and a light beige for the tan areas.

I began adding texture slowly by working my way up through my Copic Cool Grey markers.


I continued to add more depth in the Cattle Dog's coat.  I deepen the shadows and added the tan into his markings.


The final part of the card was the coloring of my kitty.  I decided upon a grey tabby.

For most animals, I try to find a photo of the same animal for reference.  OR use my own pets as reference.  I have a Torti-Tabby myself so I used her markings as a guide!

The last thing was a simple sentiment and another fun scene was born!


Thanks for joining me today!  I hope you have a great weekend!  Happy coloring!

~ Ally ~


09 10