Sweet Sentiment - New Digis are HERE!

Howdy everyone!  Today is DIGI Release day over at Sweet Sentiment!

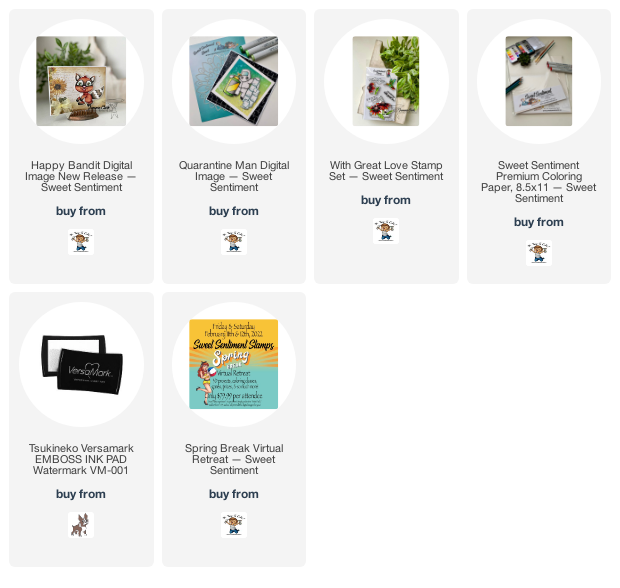
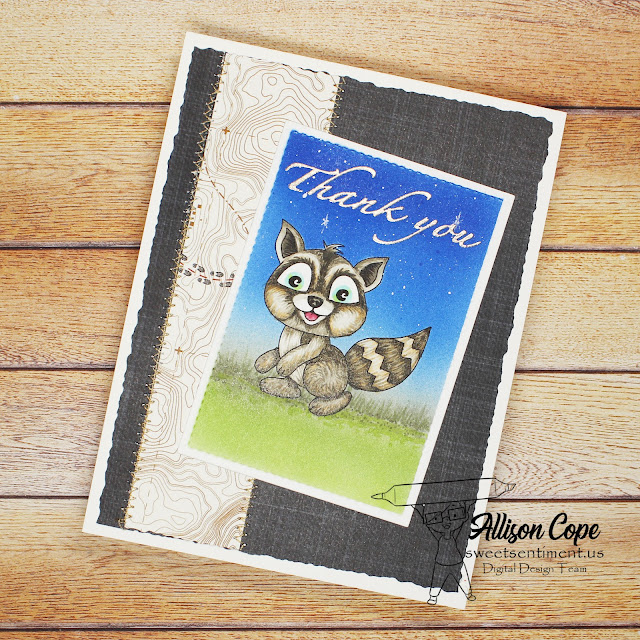
Today we're releasing TWO brand new images and the first one is "Happy Bandit", our cute little raccoon!!

 
I paired up my Copic colored raccoon with a "thank you" sentiment from the "With Great Love" stamp set.

Next for our release is "Quarantine Man"!  This one is inspired by our Covid situation of course.  For my card today, I created my own sentiment before printing out my image.

 
All of my digital images have been printed out on the AH-MAZING Sweet Sentiment Premium Coloring Paper.  This paper is out-standing for coloring your digital images!
 

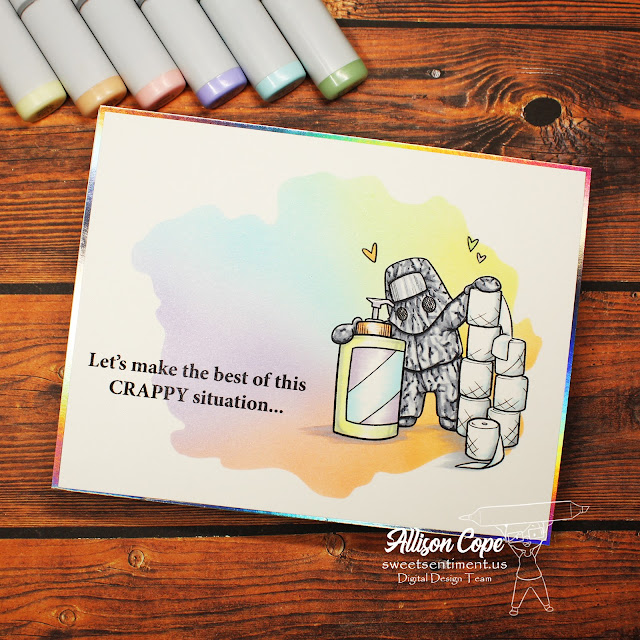
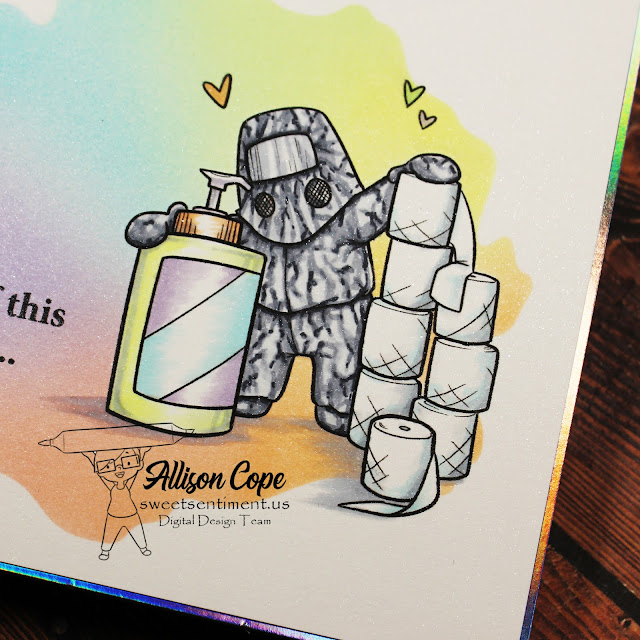
I wanted our little Quarantine Man to look like he was wearing one of those metallic Hazmat suits. The rainbow was applied using my Copic Markers and my Copic Air Brush System to get a nice even blend.

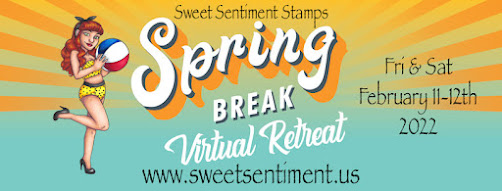
Join the Sweet Sentiment designers next moth for our Spring Break Virtual Retreat!  The Spring Break Virtual Retreat will feature 3D projects, coloring classes, games, prizes, and so much more! Virtual Retreat runs Friday, February 11th and Saturday, February 12, 2022.

Don’t have a printer?  No problem!  Simply order the “Print Pack” add-on for $4.99 and we will print all the digital images for you!  You can find that print pack here.

Digital images for this retreat will be added to the secret Facebook Group which you will be added to as well!

We sure hope you'll join us!

Until next time, go get crafty!

~ Ally ~


Three Room Studio ~ Rich Cocoa Browns

Hello crafty friends!  Welcome to another fun Saturday Challenge with Three Room Studio.

This week our challenge is to create a card using some a MONOCHROMATIC color scheme.  It's that easy!  Choose any color you wish!!

I began by choosing the color brown so I grabbed my Momento Rich Cocoa ink and my darling "Mermaid at Heart" and "Welcome Little One" stamp sets.

I stamped the mermaid and turtles and then used my Copic Markers to color everything in.  I used E21, E13, E23 and E49.

I used my Copic Airbrush and added a little bit of inking and splattering across the background.  Plus I used the "Red Gold" paint from my Gansai Tambi "Starry Night" paint palette and splattered it across the back ground too.

To create a tiny bit of highlights, I did go in with my White Luminance pencil and added some to each turtle, the mermaid and also the sentiment.

Now, check out what my fellow design team member have created to share with you today... 

Kim Skinner - http://stampingimperfection.com OR @stamping_imperfection
Susan Powell - https://creatingwithsusan.blogspot.com/ OR @creatingwithsusan
Sheila Harper - https://lalacrafts.blogspot.com/ or @sheharper 
Pam Tinney - @pocono.pam

Now it's your turn!!  Check out all the details HERE.
 
Good luck and happy creating!
 
~ Ally ~


This post contains affiliate links.

Stamp Anniething

Happy Thursday everyone!  Today is my first official DT post with the Stamp Anniething team!

I am still waiting for a few of my Stamp Anniething products so I kept today's card very, very simple but I absolutely love the end result!

I began by printing the "Kit Crafty Like A" digital stamp out on my favorite kraft cardstock.

I then to add color to my image using Polychromos Pencils.  I also used my favorite white pencil by Luminance.  It's the only white pencil that I find lays down an opaque enough layer of white pigment.

If you'd like to add this adorable little image to your digital stamp collection, it's only $4.00!  Click the image below to purchase.

I hope you're having a crafty day!

~ Ally ~


Sweet Sentiment: Here Kitty, Kitty!

Good morning!  Today I'm sharing a fun and whimsical card I created with some Sweet Sentiment stamps.

I am in love with the "Plans with Cat" stamp set and matching Sweet Cut Die.  So I started by using a stencil and some soft blue ink and then I took the paw print stamp set and stamped the paws inside each of those soft circles.  I made a point of rotating that paw print too.

I then stamped the cat image and colored him up with some violet Copic Markers on Sweet Sentiment Premium Coloring Paper.  If you have never use SS Premium Coloring Paper... you are missing out!!!  This paper has SPARKLE built right in it!  If you look closely at the kitty below, it appears like it has some fine, fine white dots - that's the built in SPARKLESo cool!

Stay tuned... Saturday will be the first official Sweet Sentiment Digital Stamp release! I'll be sharing a few creations with you then.  There will be two fun digital images available for purchase.

Hope you're having a crafty day!

~ Ally ~


This post contains affiliate links at no extra cost to you.

Chibitronics Light Up Lanterns

Today I'm over on the Chibitronics blog sharing a fun tutorial.  You can find it here.

I began by stamping my two lantern images and my sentiment from the "Lantern Festival" stamp set from Catherine Pooler on my card front. I used Oh Boy!, Minted and It's a Girl inks. Then before repositioning my stamps, I stamped the lanterns with Versamark ink and added "Halo" embossing powder and heat set it to make the lanterns sparkle!! To make it easier to design my circuit, I also stamped the 2 lanterns and the sentiment in soft ink for ease of placement of all my circuit elements on my card base.

Next I mapped out my circuit across my card base. I used my stencil tool from the "Craft Effects and Stencil" set. I created 4 spots for our fun LED Light Stickers. I'm going to use pink, blue and green LED stickers from the "Light Sampler MegaPack". This light sticker package has 6 different colored lights plus white LED stickers to use; Red, Yellow, Blue, Pink, Orange, Green and White.

Then I laid down our "Copper Tape" along my negative lines of the circuit on the card base. Then I used two layers of foam tape and created a barrier for my sliding battery holder. The "T" shape of the battery holder allows for the holder to remain in the card without falling out.

Next the "Copper Tape" was added to the positive lines of the circuit. To complete the circuit over top of the battery holder, I used a piece of "Pressure Sensitive Conductive Plastic" to fold over the stacked batteries. Yes, I used two batteries for this card. I also added the pink, green and 2 blue LED stickers to the circuit. To ensure my stickers have great contact with the "Copper Tape", I add a few "Conductive Fabric Tape Patches" to the LED stickers on the right side.

The image below shows the "Pressure Sensitive Conductive Plastic" closed over the battery area and already to place the front on the card base. I added a triple layer of foam tape all around the card edges including another layer of foam tape around the battery area.

Here's the final completed card! Very simple! 


Now... let's light it up!

There we go! One fabulous light up greeting card! And so easy to create!

Thanks so much for stopping by! I hope you get crafty soon!

~ Ally ~ 


This post contains affiliate links at NO extra cost to you!

Let's Get Krafty!


Hello and happy Saturday!  It's time for another fun Saturday Challenge for Three Room Studio.

This week our challenge is to create a card using some KRAFT cardstock.  It's that easy!

So I began my card today using my brand new Sweet Sentiment Kraft Coloring Cardstock and my Black Onyz Versafine ink.  I stamped the frogs, lily pads and reeds from the "It's a Ponderful Life" stamp set first and the sentiment from "Simple Sentiments". 

I just how this kraft coloring cardstock works with my Polychromos Pencils!  Soooo great!

Now, check out my fellow Design Team members...

Pam Tinney - @pocono.pam
 
Now it's your turn!!  Check out all the details HERE.
 
Good luck and happy creating!
 
~ Ally ~
 

Meet Torin, Our Little Viking!

Well Hello!  I have a little announcement today!  I have been asked to join the Stamp Anniething Design Team!  This stamp company has some super cutie-pa-tootie stamps, dies, inks, stencils and amazing resources for card making.

So I began my journey today with a LIVE event over on their Facebook page, here.  I'd love it if you would come and check them out!

This is the card I made on my LIVE today.  You can check it all out RIGHT HERE.  I used the adorable little "Torin, You Are So Brave" stamp set, coordinating die and the beautiful "Norse Stencil" too.

Here's another look...

And here are all the Copic Markers I used on all the elements of the stamp...


I hope you'll go on over and check out this amazing little shop and my live event.

You'll be seeing a lot more Stamp Anniething fun to come!

Happy coloring!

~ Ally ~

Snow Happy ~ StampNation Fun!

Every month over at StampNation, as a member, you can sign up to participate in the PenPal swap.  Each month there is a fun theme that inspires the participants to make a card for their assigned PenPal.

This month, we have this adorable group of photos to inspire the participants... a snowy inspiration for January...


I was inspired by that adorable little snowy fox and the beautiful blue background so I started by stamping this adorable fox from Altenew's "Modern Fox".  I added some Catherine Pooler trees from the "Evergreen Woods" stamp set using the Tranquil and Stone Blue inks.

For the back ground, I used the Cover Blue and Stone Blue ink and blended it with darker corners.  Then I used Dreamweaver Pearlescent Embossing Paste through the Simon Says Stamp "Falling Snow Stencil".  I love how shiny this paste is!

Today Catherine is celebrating StampNation's 11th BirthYAY!  We have some wonder birthday card challenges already posted plus we'll have 2 live card making events today over in the StampNation forums plus some fun video tutorials.

To join SN or find out more about StampNation, click HERE.

I hope to see you there!

Happy creating!

~ Ally ~


This post contains some affiliate links...

Happy Birthday Catherine!


Today is a very special day!  Today is Catherine from Catherine Pooler Designs's birthday!

A whole bunch of Catherine's crafty friends have gotten together a fun birthday surprise Instagram Hop for her today!

Now, if you follow Catherine, you'll know that one of her favorite things are pink snowflakes so that's what our hop today is kind of centred around!

I started by stamping the bunny from the "Spring into Easter", the little champagne glass from the "Bring on January", a speech bubble from "Call Me" and the cheers sentiment from the "Cocktail Party" stamp set.  I created a masked off oval using the "Nested Oval Dies" and then inked it with my blending brushes to add a subtle pink to the oval.

Then I took snowflakes from the "Bring on January" and "Let's Party Like It's" stamp set all over the oval.

A simple sentiment, some plaid paper from the "Be Mine Prints" and a few "Inspiration Point Sequins" were all it needed to finish it up!

Here is the full lineup for our Instagram hop today:

@createncoffee  <-- start here!
@joherbert
@ashbie1412
@bynanettetracy
@kreative_kristie
@laceyanndesigns
@lisaharrolle  
@nancystamps15
@prettylittlebutton
@i_card_so_hard (This is me!)
@emily.leiphart
@delandartie
@craftyandcreativevibes
@jenniferdcarter
@ilinacrouse
@tracimead
@everyday_expressions
@kmskerve
@lisahenke

I hope you enjoy of little inspirational birthday hop today!

~ Ally ~


This post contains affiliate links.

Thank You Friend!

Happy Saturday!  Come and join me and the DT over at Three Room Studio!  Our newest challenge for this week is to create a thank you cardIt's that easy!

For my creation today I started by stamping my girl from the "Hello Friend" stamp set in Memento Tuxedo Black ink.  I then masked her off.

I used some masking tape and created this central pin wheel effect using my Copic Markers and my air brush system.

Then I stamped on the large greeting from the "Aww Thanks" stamp and added my panel to some fun striped black and white patterned paper.

I had so much fun colouring up this image and creating this card!

Now, check out my fellow Design Team members... 

Pam Tinney - @pocono.pam

Now it's your turn!!  Check out all the details HERE.
 
Good luck and happy creating!
 
~ Ally ~


09 10