Chibitronics ~ Light Up Ocean Baby Card

Today I'm sharing a very simple tutorial on how I created this fun light up Oceanic scene card with you over on the Chibitronics blog!


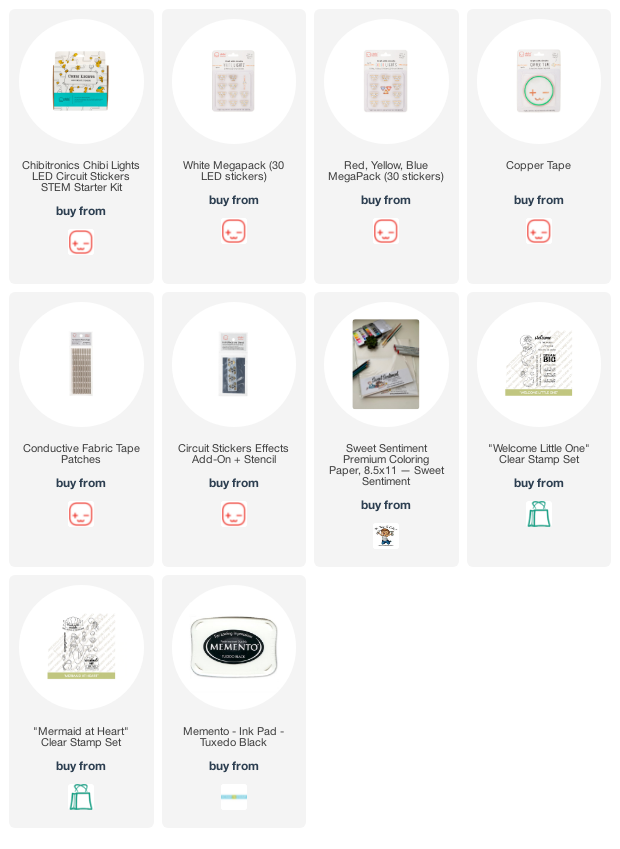
To begin my card, I first stamped out my images from the Three Room Studio stamp sets, "Welcome Little One" and "Mermaid at Heart" onto some cardstock. I stamped one piece to color and one piece to use as my circuit backer. I then colored up my mermaid and her fishy friends with Copic Markers. 

Next I stamped the same mermaid image onto black cardstock and cut her out. I adhered her to the back of the Copic colored front panel of my card. This doesn't allow any light to pass through the mermaid and allows the lights to glow around her instead.


Next I took my stencil tool from the “Craft Effects and Stencil” set and mapped out my entire circuit on my lighted stamped background. Red pen equals negative side of the circuit and the green pen is the positive side of the circuit. The image stamped on the back makes it a lot easier to know exactly where I want to place my LED Light Stickers.


I laid down our “Copper Tape” along my negative lines of the circuit on the card base. I tend to start this side of the circuit first because I can lay all my Copper Tape down under the area where my batteries will go.


I finished placing all of the copper tape along the positive lines of the circuit and built my little battery house. I used some 5mm (1/8") thick foam tape to create the battery housing and added it to the card panel parameter to allow for the thickness of my batteries. Next I adhered down my White LED Light Stickers, my Blue LED Light Stickers and my single Yellow LED Light Sticker. To ensure that some of my lights were secure and some of my joints were connected properly, I secured them our "Conductive Fabric Tape Patches".

Now that circuit is complete and the batteries are installed. Let's light it up...

Voila! By pressing the sentiment, this pressed the copper tape in the battery housing to complete the circuit and light up our amazing little LED Light Stickers! So super fun!

To check out the card in action, you can view this very short video:


Thanks for joining me today! I hope this inspires you to get out your Chibitronics products and go light something up!

~ Ally ~


This post contains affiliate links...

Catherine Pooler - Meet the Apothecary Inks


Happy Hump Day everyone! Today I'm sharing a fun card created using the brand new Apothecary Inks by Catherine Pooler Designs. Yes... we have 4 brand new inks coming to the CP Spa Collection and they are rich and delicious!

Meet the newest Spa colors... Terracotta, Apricot, Ginger and Wintergreen!!!


These four glorious colors will come into the CP Shop next Wednesday, April the 6th at 9am ET.  If you're one of our amazing StampNation members, you will be able to shop a day early... Tuesday April 5th at 12 noon ET.

For my card today I used a lot of fun CP products and built up a fun and festive birthday card!

I started by die cutting my CP Premium White Cardstock with the Mod Stripe Cover Plate Die.  I took the strips and inked them up with our 3 beautiful Earth-toned oranges: Apricot, Ginger & Terracotta. Then I used Ginger ink to stamp right across the whole striped background using the  beautiful Embroidered Background Stamp.

I stamped a variety of florals and greenery from the "Fresh Picked Floral" stamp set in Terracotta and die them all out.  I added touches of the softer Ginger, Apricot and Wintergreen inks to those stamps.

I also added some Wintergreen scalloped strips using the "Scallops & Dots Dies" too.

I laid all the florals around a "Nested Oval Die" cut and sentiment from the "Just Plain Fabulous" stamp set.

I just love the whole look of this fun birthday card!

I hope you'll join us for the crafty fun as we begin to reveal our next release bundles tomorrow!

Our LIVE reveal schedule (LIVES at noon on FaceBook unless otherwise stated)

  • Thursday, March 31st -  2 Themed Bundle Reveals (10am ET)
  • Friday, April 1st -  2 More Themed Bundle Reveals (10 am ET)
  • Monday, April 4th -  LIVE Card Making
  • Tuesday, April 5th - SN Early Ordering at noon ET - Live on FB; SN Only LIVE 3pm ET (private YouTube)
  • Wednesday, April 6th - General Ordering OPENS 9am ET - YouTube Live at noon ET!!

Hope to see you there or catch all these events on replay!  Happy crafting!

~ Ally ~


This post contains affiliate links at no extra cost to you! All the new products listed will become live links on Wed. Apr. 5th at 9am ET. 

Sweet Sentiment ~ New Digi Release!


Today is Sweet Sentiment's Digital Stamp Release Day!

Today we release 3 new digital stamp sets and they are all adorable!

First meet... "I Love You, Friend"!  Sweet Sentiment loves to celebrate all of our friends who are deaf or hard of hearing! This man and woman are making the signs for “Friend” and “I Love You” respectively. Use these for all kinds of cards, not just ASL related. The “I Love You” sign is widely known and would be great on a multitude of projects.

I chose to put my gal in a nice Springy feeling area and dressed her up nice and bright using my Copic Markers!

After I colored her up, I fussy cut her out and popped her up in my scene...

Next is the "Oopsie Daisy" digital stamp set!  These delightful daisies are just perfect! The versatility of these daisies is pretty awesome too! You can use them as just one or in groups, or even make bouquets! Make them any color under the rainbow or traditional white. Your imagination is your only limitation with these amazing daisies!

I chose to make my daisies white so I wanted a beautiful and mystical background for them! 

A touch of chartreuse in their petals adds just the right amount of fun color...

And finally, the last digital stamp release this month is "Plans with Cat".  Where are all the cat lovers out there? THIS adorable cat is JUST for you! So grab that book, a cup of coffee, some fuzzy socks, and curl up with your cat or if they don’t want to cuddle with you color this adorable cat to remind you how adorable they are!

Three amazing new stamp sets to check out!  For more digital stamps from Sweet Sentiment, click HERE

~ Ally ~


Three Room Studio ~ Puppies & Stencils


Happy Saturday everyone!  Today a new Saturday Challenge is up for Three Room Studio!

This week's challenge  is to create a project using some kind of stencil!  Super easy!

For my card I began by stamping the blanket wrapped puppy from the "Doggie Spa Day" stamp set using Copic Markers.  I used some purple inks and my "Star Ray Full Stencil" and created a simple backdrop for my puppy.

For the sentiment I used the "hey" from the "Hello Friend" stamp and die cut it using it's coordinating die.  The "sweetie" is from the "Hello Friend" stamp set too!

Now, check out my fellow Design Team members...


Now it's your turn!! Check out the Three Room Studio Blog for all the details!

Happy stencilling!

~ Ally ~


This post contains affiliate links...

Stamp Anniething ~ Some Bunny Loves You!

Happy Friday all!  Today is my day to share a fun project from the fabulous Stamp Anniething design team!

I started by printing out the adorable "Somebunny Loves You" digital stamp out.  I colored her with Copic Markers and fussy cut her out.  I used the sweet little heart dies from the new "Love Earth Shaker Add On Die" and I used the gorgeous "Spring Suprise" 6x6 patterned papers for all of my paper pieces.

For my design, I used my sketch for Splitcoaststampers this week, SC898:


Now check this out...

The sunflower is the national flower of the Ukraine and has now also become a symbol of solidarity and hope.  Stamp Anniething has 2 products for sale where they are raising money for Ukraine:

Sunflower and Butterfly and Molly Sunflower

All proceeds from the items sold here until April 17th will be directly donated to the Ukraine Red Cross. 20% off will be automatically be applied at check out.
(No other discounts may be applied to these items as 100% of the proceeds are being donated)

I hope you have an amazing weekend!

~ Ally ~

Spring Bingo & a Card!

Hello Spring!  Here in Medicine Hat, Alberta we have seen many signs of Spring this week! I saw my first robin in a tree in our front yard yesterday!  The snow is completely gone from our yard due to the beautiful PLUS TEENS weather the last few days and the river is flowing fast and furiously!

Today I thought I'd share a fun and easy card today featuring the new "Celebrate Spring" goodies from Catherine Pooler Designs.

For my card I began by stamping the fabulous "Coming Up Roses Background" using Twilight ink.  Then I created a front panel with a circle cut out for a shaker element.

Next I stamped my flowers and greenery from the "Fresh Picked Floral" stamp set in Midnight ink and then added some accent colors to each item using Minted, Be Mine and Tiara inks.  I then die cut them out using their coordinating die set.

Next I created a tag from the "Heart-n-Tags Die" set, some Happy Mama patterned papers and a beautiful sentiment from the "Mothers & Daughters Sentiments" stamp set using Be Mine ink.

I assembled the whole thing using foam tape to pop up my front panel and filled it with some new "Helsinki Sequins".

I had blast making up this fun card!

Tomorrow is the day!  Join Catherine, Erika and some of my fellow Brand Ambassadors for a stamping party and take on the Spring BINGO challenge over at StampNation!

Grab your special BINGO Board over at StampNation and all your crafty supplies and create along side us live. If you miss the live, you can create your BINGO cards and share them in the SN Gallery. And as with any good game of BINGO, there will be prizes!!


Hope you'll join us tomorrow!  Happy creating!

~ Ally ~


This post contains affiliate links...

Postage Floral PenPal

Happy Tuesday!  It was a busy weekend with all things Scout for me.  I took my Scout Troop on a 10km Winter hike and an over-night stay at a cabin.  We had a blast!

Every month over at StampNation we have a PenPal sign up and we typically have some kind of theme.  This is the graphic that was to inspire us this month...

I took the Bellini, Aquatini and Party Dress inks and created a blending inky back ground and then some Gansi Tambi "Starry Night" gold paint and splattered it all over along with some water.

I die cut some postage stamp shapes using the fun "Notecard Postage Dies", the "Postage Stamp Dies" and the "Scallops & Dots Dies" and masked them and inked them up.  I stamped a few of the images from the "Fresh Picked Florals" stamp set in Icing on the Cake ink in those color blocks.

For my sentiment I used a retired hello stamp and fussy cut it out!

Want to find out more about StampNation click HERE.   There are 3 different subscription levels that you can sign up for: a monthly subscription, a 3 month subscription, and a yearly subscription. 

Hope you have a great day!

~ Ally ~


This post contains affiliate links.  By clicking the link below, I receive a small commission at no extra cost to you!

Thi

Birthday Pansy Wishes


Happy weekend!  I hope you're having a great Saturday!

Today starts a brand new challenge over at Three Room Studio!

This week's challenge is to use some kind of FLORAL on your project!

I those to use the sweet little "Pansy" digital stamp set today on my card.  I actually layered the digital image twice - I flipped and shrunk it down for a layered look. I printed it out on my printer on some twinkly Sweet Sentiment Coloring Cardstock and then I coloured up my floral cluster using Copic Markers.

To finish the card off, I stamped a birthday sentiment from the "Simple Sentiment" stamp set in CP Drive In ink.

Such a simple but bright and fun birthday card!  

Make sure you check out my fellow designers and what they have created to share today: 

I hope you have an amazing weekend!  Now go get crafting!

~ Ally ~


The products I used today...

Chibitronics ~ Fairy Light Up Twinkle Tag


Happy Friday everyone!  Today I'm sharing a fun non-card project today featuring products from Chibitronics

I made a fun tag display element using the fabulous LED White Light Stickers and lots of fun inks and stamps!

When you press the button at the back, the gold glitter crystals light up in and around the beautiful fairy from the retired "Oak Fairy" stamp set by Sweet Sentiment.

Here's how I created my stand up tag...

I stamped and coloring in my little fairy with Rich Cocoa Memento ink and Copic Markers.  Then I used a LOT of Ranger Distress Oxide inks to create my tag base.  I also used the Stampers Anonymous "Slate Stencil" and some texture paste plus the Catherine Pooler Designs "F as in... Background Stamp" to create a distressed back drop.  I cut another tag from thin chipboard as a backer for my tag to aide in the stability of the whole unit.

Then I mapped out where I was going to place the LED lights and punched holes through my tag.  I placed my tag over my chipboard base and placed marks on the locate of all 8 lights.  I glued different sizes of the Studio Katia clear "Gold Sparkle Crystals" over each of the holes on the tag.  These crystals are clear but have gold glitter embedded in them so they allow the light to shine through them.

Next I used my stencil from the Chibi "Stickers Affects Add-On & Stencil" set and mapped out my circuit.  Red lines for the POSITIVE side of the circuit and green lines for the NEGATIVE side.  I cut 2 little chunks from the chipboard base so my Copper Tape could be wrapped around the edge of the tag without showing along the edge of the finished project.

Next I used my Copper Tape and completed my circuit.  Where my negative and positive circuits crossed, I used a little piece of cardstock to create a bridge and barrier.  I used some "Conductive Fabric Tape Patches" at some of my Copper Tape joints to ensure my circuit would be complete.  I added all 8 of my White LED Light Stickers to the circuit.

I created my little 3D battery housing on the back of my tag using some 3D foam and piece of clear acetate so you could see the battery.


To complete the tag, I added some thin foam to the chipboard base and my CAS-ual Fridays branch die shapes and placed the front panel on top.

Next I attached my tag to the green chipboard base I created for it to stand in and it was complete!

Don't you just love the end result?!?!

I hope you have an amazing Friday and creative weekend!  I'm off to Scout camp with my troop this weekend for along winter hike and camp!  Have a good one!

~ Ally ~


This post contains affiliate links...

Ducklings and Primroses

Today I'm sharing my latest digital stamp creation featuring the "Waddling Ducks" from Sweet Sentiment.

I began by printing out my pair of ducklings onto Sweet Sentiment Premimum Coloring Cardstock.  This cardstock is 89lb weight and goes easily through your printer.  This cardstock is extra special in that is has built in sparkle!  I'm not kidding!!  It's sparkly!!

I colored in my ducklings and then added in a Primrose garden in behind... all using Copic Markers.  I just love how this background turned out!


Make sure to check out the entire new clear stamp release by Sweet Sentiment that just came out last weekend!

Happy coloring everyone!

~ Ally ~

 
09 10