Catherine Pooler Designs ~ S.W.A.K.

A new Catherine Pooler Designs exclusive BOX is being released on Wednesday!  Meet the AIRMAIL BOX!

If you sign up on the WAITLIST, you will get an email TOMORROW to shop TOMORROW!

This box contains an amazing amount of products!

The Airmail Box has everything you need to create heartfelt Valentine’s cards, scrapbook pages, postcards, love notes, and more! Just add inks and cardstock. We already got you started with a NEW INK COLOR mini & refill. This ink is a special delivery exclusive to the Airmail box but will be released in the CP Shop in 2025.

Today's card features the "SWAK Word Die", the "Signed Sealed and Delivered" patterned papers, the "Airmail" stamp & coordinating dies plus our new ink color, Blue Raspberry!

The ink colors that I used on my stamped images include: Cotton Candy, Rockin' Red, Something Borrowed, Minted, Mardi Gras and our new ink color, Blue Raspberry.

Here's a little close up of my stamp & die cluster...

GET ON THE WAITLIST TODAY!

  • This box has a limited supply.  When it's gone, it's gone!
  • Everything in this box is EXCLUSIVE to this box and won't be sold separately... except the new ink color!
  • You can purchase additional packs of the patterned paper if needed!
  • Get on the waitlist to be able to SHOP EARLY!  You can shop TOMORROW!
  • The box goes on sale to everyone on Wednesday December 11th... so get on that waitlist now!

You won't be disappointed!

Have a wonderful week!

~ Ally ~

Catherine Pooler Designs ~ Flyin' By...


A new Catherine Pooler Designs exclusive BOX is being released this week!  Meet the AIRMAIL BOX!

SIGN UP HERE FOR THE WAITLIST!

Some of the fun things that are included in this exclusive box are:

  • signature patterned papers
  • many versatile stand alone dies
  • unique stamps and coordinating die sets
  • a NEW CP mini ink pad color with a refill & side labels... Blue Raspberry ink!
  • a SWAK word die too!

That's LOTS of new goodies that you are sure to love!

Today I'm sharing my first sneak peek with products from the new box.  I've used the adorable (and my favorite part of the box...) the "Prop-erly Yours Dies".  I had a blast making this fun prop plane die come together!

And who doesn't love a blue sky, the new Blue Raspberry ink color with some fun puffy clouds using the new "Fluffy Cloud Dies".

The new Blue Raspberry ink will also be release to purchase separately from the box in early 2025. This new color is included in the box in mini ink pad form and is accompanied with side labels and an ink refill bottle too!

I paired it with the "Ruffles & Dashes Dies" to create the fun, fluffy frame.


For the greeting, I used the "Postcards from the Hearts" stamps and dies.  I even included some cute hearts from the corresponding die set!

GET ON THE WAITLIST TODAY!

  • This box has a limited supply.  When it's gone, it's gone!
  • Everything in this box is EXCLUSIVE to this box and won't be sold separately... except the new ink color!
  • Get on the waitlist to be able to SHOP EARLY!  You can shop TOMORROW!
  • The box goes on sale to everyone on Wednesday December 11th... get it now!

You won't be disappointed!

Have a wonderful week!

~ Ally ~

Sweet November Stamps ~ YouTube Hop & PRIZES!


Happy Sunday!  Some of the Sweet November Stamps crew are sharing inspiration from the Wonderful Winter clear stamps release today over on YouTube!  Come and join in the fun!

The card I'm sharing on my video today features the adorable new "Downhill Dashers" stamp set.  Isn't that sledding pup a cutie??!?!


I also used some of the snowy trees from the "Horizon Lines: Winter Wonderland" stamp set to set the scene.

Here's a quick close up...


Now... make sure you head on over to YouTube and hop along the inspirational journey.

START THE YOUTUBE HOP HERE!

Watch all 7 delightful and entertaining videos from our talented design team then show your support subscribing, commenting, and giving a thumbs up on each channel's hop video. You have a chance to WIN the ENTIRE Wonderful Winter stamp set release!!!

The hop will be running from today until 12/11, and the lucky winner will be announced on the Sweet November Facebook page.

Good luck!

~ Ally ~

Sweet November Stamps ~ December Narcissus Fairy & a Hop with PRIZES!

 
Sweet November Stamps is ready for another fun clear stamp release! 

We're celebrating our "Wonderful Winter" clear stamp collection today! With 6 winter themed sets, and 2 new flower fairies as well as 2 festive sequin mixes this release is packed with Christmas cuteness! 

Once again, we are hosting an Insta-Hop featuring both the Sweet November design team and the team from Crafty Purple Frog, our exclusive UK stockist. 

As always, one lucky crafter will walk away with the entire release! All you have to do is visit each designer’s account provided below, follow them, and leave a comment on their SNS post. 

For my card today, I used the adorable "December Narcissus Fairy" and I paired her with a digital image, the daffodil from the "Scene Builder: Daffodil Background" stamp set.


For my card, I started by creating my layered daffodil background in Photoshop and printing it out on my Catherine Pooler Designs Premimum White Cardstock.

I created a mask for my large daffodils and then inked up the sky with Distress Oxides: Villainous Potion and Blueprint Sketch inks.  For the grass, I used Oxide inks as well: Twisted Citron, Mowed Lawn and Rustic Wilderness.

I removed the masks and colored in my daffodils with Copic Markers.

Next I stamped my little "December Narcissus Fairy" out and colored her again, with Copic Markers.

To add a bit of twinkle, I used a white gel pen to add some stars and dots!

I adhered her to the card front with some foam adhesive and then stamped on the sentiment from the "Rainy Day Fairwees" stamp set. 

And a card was born!

Now take off to Instagram for the hop...

HEAD HERE TO START THE HOP

Good luck!  Make sure to comment, like and follow along the way!

When you spend $75 or more in the shop, add the "Flutterbee Lyra" in your cart  and you'll get it for FREE!!

For all you digi enthusiasts, our Wonderful Winter digital bundle can be found in-store thru Monday December 9th! Get your hands on all 8 stamp sets, 38 digital images for just $58. Offered for a LIMITED TIME!!!  Get it NOW.... Click here!


Have a wonderful and crafty weekend!

~ Ally ~

Scrap 'n Stamp ~ Bags, Tags & Gift Wrap Blog Hop

Welcome to the Scrap 'N Stamp Bags, Tags & Gift Wrap Blog Hop!

Today's hop is all about sharing some festive ideas for some bags, tags and gift wrap!

My card features the adorable "Christmas Minis" Thinlits from Sizzix!  This sweet little set contains 5 die cut shapes, snowman, Santa, gingerbread man, candy cane and holly berry plus it also includes a striped mini embossing folder (or a texture fade).

I started my little bag by stamping on some snowflakes from the Sweet November Stamps "Winter Reindeer Wishes" stamp set and the sentiments from the Jillibean Soup "Christmas Tags" stamp set in Catherine Pooler Sand Castle ink.

Next I cut a series of tags from the Hampton Arts "Birthday Banners" stamp & die set from a variety of fun patterned papers from the Echo Park "Winnie the Pooh Christmas" mega 6x6 pack of paper.

I grabbed all 5 die shapes from the Sizzix Thinlit & Texture Fade set called "Christmas Minis", and die cut them all out on white cardstock.

I used my Copic Markers to color in all of the cute layers of each die cut.  I matched the colors as well as I could to match the patterned papers.

After coloring all of the pieces, I adhered my little characters together and added them to a set of layered tags.  I used some of the candy canes and holly to decorate other tags.

Once the tags were complete, I adhered them to my kraft bag using some 3D foam to make them pop off the bag.

To finish off my bag, I added some White Gel Pen details to the characters eyes and icing details to the gingerbread men. I also took some white acrylic paint and splattered it across all the tags and the bag to mimic some snow.  The perfect touch!

Another cute bag to send something fun for Christmas!

NOW... check out all the other projects that our design team has to share!!

Here's our hop list...

Now for the GIVEAWAY...

 GIVEAWAY DETAILS!!


  1.  Hop along and LEAVE A COMMENT on each designers blog post.
  2.  One lucky WINNER will be chosen to receive a $50 gift certificate to the store.
  3.  Winners will posted on the Scrap 'N Stamp blog sometime in mid to late December.  Good luck!

Thanks for stopping by!  Happy hopping and GOOD LUCK!

~ Ally ~

Craft Roulette ~ Santa's Cutest Elf

Happy Friday all!  Today I'm sharing a holiday card featuring Colorado Craft Company! 

Today's card I made for last week's episode for Craft Roulette.... and submitted it in the final hour!  I'm a Member so I get the perk of submitting my card up until midnight on Thursday nights.

For episode #243, the four parameters that the wheel gave us were:

  • Project: Card with a Belly Band (my elf kitty has a belt... aka a belly band)
  • Colors: Cottage Colors (Around the cottage: greenery, red berries, golden grass)
  • Element: Coat(s) (my elf is wearing a coat)
  • Random: Upcycled (I used a plastic fern as a mask for my background)

 Here's my card...


I used the adorable "Cutest Elf" stamp set from Colorado Crafts for my card.

I created a mask, added it to my scene along with a stamped sentiment from the same stamp set.  Then I took my Copic airbrush system and layered up lots of green Copic colors. As a final touch, I used a piece of plastic fern to create a greenery background.  I used some white acrylic paint and sponge to add some snow.

Next I peeled off the mask and colored in my little kitty elf with Copic markers.

As a final touch, I cut the edges of the panel using my Deckle Edge Trimmer from Tonic to add a little whimsical edge to the finished panel.

Don't forget to join us every Friday at 6:10pm CST for another fun episode of Craft Roulette.  We have generous Spin Sponsors so you will have a chance to WIN some prizes just by playing along!

Good luck and have a great weekend!

~ Ally ~

Catherine Pooler ~ Something Lovely is Arriving!

 Exciting things are coming to Catherine Pooler Designs!

A new exclusive BOX is being released next week!

SIGN UP HERE FOR THE WAITLIST!

Catherine and Erika have already shared some simple projects plus a few of the products contained in this box!

Some of the fun things that are included are:

  • signature patterned papers
  • many versatile stand alone dies
  • unique stamps and coordinating die sets
  • a NEW CP mini ink pad color with a refill & side labels, and...
  • a cute new word die too!

LOTS of new goodies that you are sure to love!

Check out Catherine and Erika's sneak peeks here...

  1. Today's Facebook Live
  2. Catherine's YouTube Live

The Airmail Box will be open for purchase on Wednesday December 11th.... but if you are on the WAITLIST then you will get an email for EARLY ordering on December 10th.  All boxes will begin shipping December 12th, in the order of purchase.  So the earlier you order, the better!

Make sure to sign up for that WAITLIST people because you don't want to miss out on this amazing collection of goodies!  These goodies WILL NOT be sold at a later date!!  They are exclusive to this box EXCEPT the new ink... which will be released in early 2025.

Good luck and don't forget to sign up NOW!

~ Ally ~

Sweet November Stamps ~ Wonderful Winter Sneak Peek!

Happy Saturday! Today the design team from Sweet November Stamps are sharing all kinds of sneak peeks of the new clear stamp release, "Wonderful Winter".

This new release will be in the shop next Saturday December 7th!

I'm sharing a sweet image from the up and coming "Downhill Dashers" stamp set...


This stamp set is jammed packed full of snowy fun!  It contains 6 cute snowy scenes and a great sentiment.

Make sure to head on over to the Sweet November Stamps Instagram page to check out all the amazing sneaks from our design team.

Today I'm also sharing a card I made for our holiday clear stamps release from October.  This little lady is one of the SN Gals, her name is Candie.

To set her scene, I stamped her image first.  Then I stamped the window from the "Simple Room Christmas Add-On" stamp set.  I wanted her to have some furry friends so I stamped the kitty and mousey images from the "You Look Familiar" stamp set.

To create the carpet texture, I used the nubby stamp from the "Simple Room Christmas Add-On" stamp set. 


For my final touch, I cut the edge of my front panel with my Tonic Deckle Edge Trimmer and added a sweet sentiment from the "Cold Hands, Warm Heart" stamp set.

This card was fun to create!

Have a great rest of your weekend!

~ Ally ~

Sweet November Stamps ~ Eat all the Cake

Happy Friday all!  Today I'm sharing a birthday card featuring Sweet November Stamps

I'm always in need of birthday cards so I decided to gear this one to a winter themed birthday so I found myself some pretty, but retired, patterned papers by Catherine Pooler Designs to use.

For episode #242, the four parameters that the wheel gave us were:

  • Project: Gate Fold Card (I made a tucked gate fold card)
  • Colors: Produce Aisle Colors (purple eggplants, peach peaches, white eggs)
  • Element: Fence (I added a fence behind my elf)
  • Random: Crumpled Paper (I crumpled a piece of paper, added blue ink and added it to the sky of my circular scene)

 Here's my card...

I used one of the elves from the "Sugar and Spice" stamp sets from Sweet November Stamps. 

I used Memento Rich Cocoa ink to stamp her and then I colored her in using Copic Markers with some of the details added back in with some Polychromos Pencils.

Don't forget to join us on Friday at 6:10pm CST for another fun episode of Craft Roulette.  PLUS, Sweet November Stamps is one of this month's Spin Sponsors so you have a chance to WIN a gift certificate to the SNS shop!

Good luck and have a great weekend!

~ Ally ~

Black Friday Sales

 Hello friends!  I just wanted to share a few Black Friday sales that you might want to take advantage of...

Catherine Pooler Designs:

Shop the sale now through Sunday, December 1st, and grab your favorite crafty goodies:
🎉 15% off orders under $200 with code BF15
🎉 30% off orders $200 and over with code BF30
💌 Early Bird Special: Order by Friday, November 29th, and get a FREE mystery gift! Use code BF30 to claim your treat. Valid on orders $200 and over.
Don’t wait—shop now and treat yourself to a little extra holiday magic! 🎁

And a free mystery gift...

Plus I have the low-down on some Crafty Meraki Black Friday sales too...

TODAY ONLY

For ONE DAY ONLY, get 25% OFF all dies and bring your crafting visions to life.

From intricate florals to interactive card designs, now’s your chance to snag those must-have dies at a killer discount.
 
 Use Code: DIES2DIE4 at checkout.
 
But don’t wait—this deal is valid for 11/27 ONLY and disappears at midnight!
Stay tuned… tomorrow’s deal will keep the crafty fun going!
 

Happy shopping!

~ Ally ~

Chibitronics ~ Light Up Winter Scene & Video Tutorial

Happy Wednesday!   Today I'm sharing my latest Chibitronics creation that I've made this week.

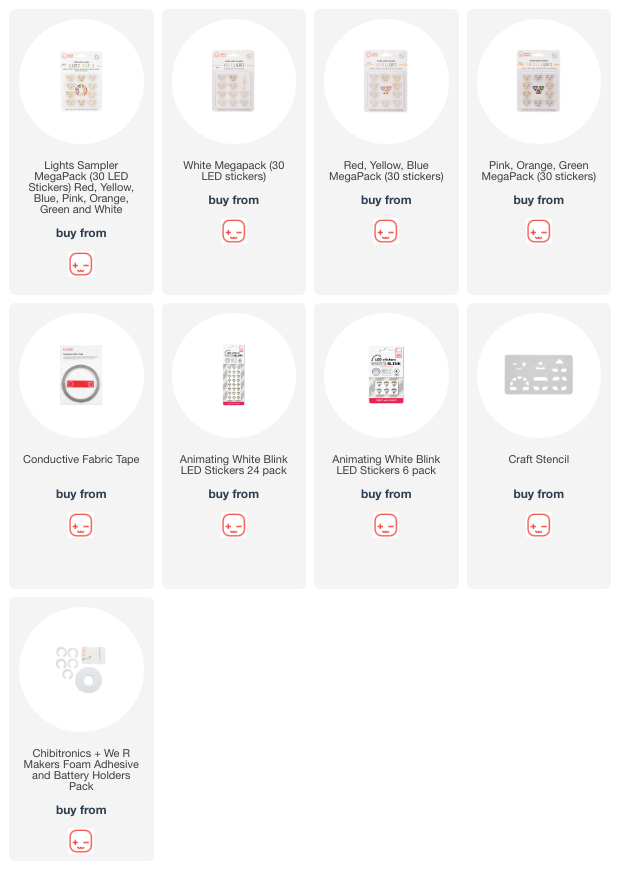
Today's card features the cool Animating White Blink LED Light Stickers and the adorable "Fa la la" stamp set from Magengo Designs. 

I began by stamping out my little critters and coloring them in.  I fussy cut them all out.  I wanted to make it easier to create my background.

Next I stamped the 3 lamp posts on my card front panel. I created masks for each one and applied them to the image.  Next I drew on some lines for the wall.  I then masked off the wall and inked up my sky with Distress Oxide Pine Needles and Chipped Sapphire inks.  Then I masked off everything but the bottom of the wall and applied a brick stencil and used my Copic Air Brush to color it in.  I finished off the rest of the wall and the ground with my air brush.  I applied some snowflakes and snowy areas to the background image.

With every stamp of the lamp post, I also stamped the same image, in the same place on my inner card panel to create my circuit panel.

Next it was on the circuit.

First I applied my Battery Holder to the lower right hand corner of my circuit building surface.  This will used as a switch to activate the lights.

Next I mapped out the location of all my light stickers and the pathways of the negative (blue lines) and positive (red lines) of my circuit using pen.

Next I laid down the Conductive Fabric Tape for the negative side of my circuit.  I began on the bottom side of the self adhesive Battery Holder and the location of the Battery.


Then I laid down the positive side of the circuit tape.  I began on the inside of the lid of the Battery Holder of the top circuit and I adhered the Battery to the Slide Switch circuit.  This allows the lid of the Battery Holder to be pressed to close the circuit and allow the lights to come on - otherwise known as the switch. 

Lastly, to complete the circuit, I added my LED Light Stickers.  I used 3 Animating White Blink LED Light Stickers to the circuit.

I adhered the double sided self-adhering "C" shaped foam inside the Battery Holder and popped in a 3V Coin Battery.

I also added some 3D foam strips all around the edge of the circuit panel so the card feels flat.

Let's give it test... and REMEMBER... the switch, when pressed and held, allows the 3 lamp posts to light up and blink.

So much fun to make!

So if you want to see how this card was made, please visit the Chibitronic's YouTube channel for the full tutorial...

Thanks for stopping by!  I hope you have a wonderful week!

~ Ally ~
 
09 10