Chibitronics ~ Flickering Campfire Foxes

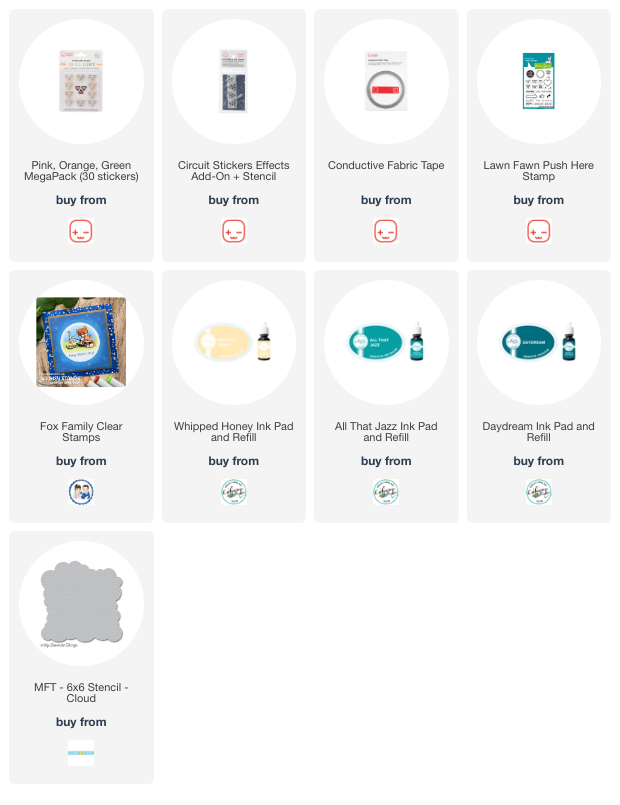
Hello everyone! Happy Friday! Today I’m sharing how I made this fun light up glowing campfire card. Today I’m featuring the Chibitronic Orange LED Light Stickers, and the Craft Effects Sticker "Twinkle". Our sweet little firelight kissed foxes are from the “Fox Family” stamp set by Whimsy Stamps.

I first began my card by stamping out my images on the front and inside of my cardstock. I colored up my images using Copic Markers and masked them off to ink up my cloudy night sky with Catherine Pooler inks. I also stamped a "Push Here" in the top right corner using the helpful Lawn Fawn "Push Here" stamp set, also found in the Chibitronics shop.

As you can see, I stamped the same scene on the circuit surface (as seen below). This allows for ease of placement of all of my circuit elements.

I used my Craft Stencil to trace out the placement of my LED Light Stickers & Craft Effects Sticker and then I used the edge of the stencil to draw out each side of the circuit. I used a small circle shape to trace a place for my battery. The blue lines indicate the negative side of the circuit and the red lines are the positive side of the circuit.

Next I applied the Conductive Fabric Tape to each side of the circuit. I began on the negative side of the circuit to allow for the tape to be laid down under the battery area. 


 Then I laid the Conductive Fabric Tape down on the positive side of the circuit.


To create the battery housing, I used 3D foam tape to create a 4 sided barrier. This just keeps the battery in place so it won’t move once the card front is attached. A used a small piece of acetate to create the flap over the battery housing. The conductive tape has been wrapped around the piece of acetate and it continues on to complete the rest of the positive side of the circuit.


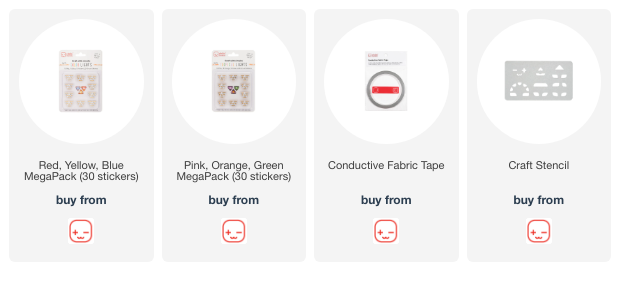
The final step is add our LED Light Sticker. I used one Orange (O) sticker. These lights can be purchased in the Lights Sampler (contains all 6 colors of lights) or in the Pink/Orange/Green Megapack.


 Now that everything is built, let’s check out the finished lit of card...

The "Twinkle" Craft Effects Sticker makes it look like the fire is flickering (obviously hard to capture in one photo!)!

Check out how the card looks like lit up...


Thanks for stopping by! Making your own light up creations is a LOT easier than you think! Happy creating!

~ Ally ~ 

Catherine Pooler ~ Ahoy Matey Shaker

Happy Thursday!  Today I'm sharing the fun card I created for my StampNation PenPal for June.

So every month over at StampNation we host a monthly themed PenPal.  This month's inspiration is a mood board with all kinds of inspiration: beaches, sunsets, bicycles, sailing and all things summer...

So I decided to use my "Ahoy Matey" stamp set and go the sailing or water direction for my card.

I started by making a shaker element.  I stamped and die cut out the circular rope image from the "Lots of Knots" stamp set and coordinating die.  I stamped the rope in Samba ink. I stamped a few fish images from the "Ahoy Matey" stamp set in Something Borrowed and Fiesta Blue inks and die cut them out and added them to the inside of my shaker element with some new "Nova Scotia Sequins".


Next I created my card front panel cutting some fun patterned papers from the "Bar Harbor" paper pack.  I even stitched on my blue & white stripped paper!


Finally I stamped the sweet little nautically dressed Otter and lobster from the "Ahoy Matey" stamp set and colored them up using Copic Markers.  I die cut each of them out with their coordinating dies and added them on to my card front.

The last element I added was a sentiment!  And voila... a card fro PenPal was complete!

I hope you like my card!  Have a great rest of the week!  Now go and create something to share!

~ Ally ~


Splicoaststampers - Best Wishes Lighthouse

Happy Hump Day everyone! Today's card was created for my Splitcoaststampers newest sketch.

It's my turn for a sketch this week and here's what I've created for you... SC964:

I chose to create a card today featuring the brand new release goodies from Catherine Pooler Designs.

I first die cut the 3 circles from my die cut stitched rectangle using the CP "Circle Dies".  Then I stamped the cute little lighthouse from the CP "Scenic Lighthouses".  I used some Do-si-do ink and the coordinating solid stamp to color in the base of the lighthouse image.  I also used some Catching Rays ink to ink in the shell light.


 I added some Copic coloring over top of the shell images inside the lighthouse image.

Then I stamped a series of starfish and shell images and inked them in using the same Do-si-do, Samba and Catching Rays inks.

I mounted the die cut panel up on a pink and white wavy piece of patterned paper from the Bar Harbor patterned paper pack.

To finish off the card, I used some of the yellow and orange sequins from the Park Avenue Sequins.

Thanks for checking out my sketch today!

Happy creating!

~ Ally ~

Scrap'N Stamp ~ Shaker Card Kitties


Join me at 8pm ET over on the Scrap'N Stamp Facebook page for a fun Crafty Live on Sunday!

This weekend we're going to create a very simple shaker card featuring the adorable kitties from the MFT "Smitten Kitten" stamp set!

Hope you'll join me!

~ Ally ~

Sweet November Stamps ~ More Summer Fun!

Happy Saturday!  We're still celebrating the big Sizzlin' Summer release over at Sweet November Stamps

Last weekend we release 8 new Summer themed stamp sets including the adorable little "Paisley" stamp set.  Paisley is accompanied by a cute balloon image.

I began my card, by first stamping our sweet little Paisley.  Then I stamped a single balloon, created a mask for the balloon, added the mask to the first balloon and then stamped 2 more balloons on either side of the original balloon.

I stamped and fussy cut a mask for all 3 balloons and little Paisley and applied them to my card.  Then I stamped the island image from the "Dock on the Bay" stamp set a few times to build an island behind her.

Then I took my Sharpie Fine pen and drew in some dock details.

I created more masks for the island pieces and the dock area.  I used my Copic Airbrush to color in the water.  Then I fussy cut a bumpy cloud stencil from copy paper and air brushed in some clouds in the distance.

I removed all the masks and colored everything in using Copic Markers.

I had a blast creating this scene!  I sure hope you like it!

Have a great weekend!

~ Ally ~

CP & Craft Roulette ~ Happy Birthday Sailor!


It's Friday night and time for the latest episode of Craft Roulette!

What is Craft Roulette you ask... it's a weekly live show featuring improvised crafting, special guests, community contributions, tons of prizes and much, much more!  It's live every Friday over on YouTube.  You can check out this week's episode here.

So the four parameters that the wheel spit out this week were:

  • Project:  See Through
  • Colors: Rustic Garden
  • Element: Fashion
  • Random: Hexagon

So for contribution this week I started with a hexagon shaped card base to cross off the "Random" parameter.  I used some Honey Bee Stamps "Hexagon Dies".  I also created a black cardstock frame for the card front.

Then I stamped the cute little otter, "Captain Gully" and the post from the new Catherine Pooler Designs "Ahoy Matey" stamp set in Memento Tuxedo Black.  I stepped the gull and the post on a separate piece of cardstock.  I colored them all using Copic Markers.

Then I masked off my otter and stamp a variety of wave images from the new CP "Scenic Lighthouses" stamp set using some blue inks; Oh Boy, Fiesta Blue and Something Borrowed.

Next I glued the post, then the 2 layers of vellum waves (cut with the CP "Melon Edge" dies") to the black frame and added them over top of the whole scene.

To finish off the scene, I added some glasses to my little otter from the CP "Pet Specs Dies" and colored them to match the reds in the scene. I love how it ended up!

Make sure to check out the LATEST episode of Craft Roulette.  You can play along until 11:59pm CT.

Click HERE to submit your card!  

We also have 3 amazing prizes being offered to WIN from our Spin Sponsors.  Make sure to check them out. All you have to do, is play along!  Good luck!

~ Ally ~

Summer at the Shore is HERE! ~ Catherine Pooler Designs

The new Catherine Pooler Designs release is now here and in the shop!  It's called "Summer at the Shore"!

I just received my purchase from the new release and I'm in love with all the new products but as soon I saw the otter and the seagull from the "Ahoy Matey" stamp set, I knew I had to have that stamp!

I started off my card y cutting out a piece of the "Bar Harbor" 6x6 patterned paper with the cute buoys for my card front.

Then I stamped the rope from the "Lots of Knots" stamp set in Tutti Frutti ink and die cut it with the outside die from it's coordinating die set.

I stamped the otter and the anchor images from the "Ahoy Matey" stamp set and colored them in with Copic Markers and the die cut each of them out with their coordinating dies.

Last of all I stamped a sentiment from the "Lots of Knots" stamp set in Something Borrowed ink and adhered everything to the card front.

Here's a close up our cute little otter...

I hope you check out all of the new release.  You can find in the Catheirne Pooler shop right HERE or click any of the links below!

Have a great rest of the week!

~ Ally ~


Sweet November Stamps ~ Our SN Gal Sunny

Happy Saturday!  It's a big Sizzlin' Summer release over at Sweet November Stamps!

First of all we're having TWO hops this week.

Our first one is over on Instagram and my project features the sweet new "SN Gal Sunny".  She's all decked out in her beach bikini and ready to work on her tan.

I had a blast coloring up our bathing beauty.  I used a light brown ink and then colored everything in Copic Markers.  To deepen her finer features I used some Polychromos Pencils.

I used the "Background Builder: Seaside Cliffs" to add to the beach scene.

To achieve the transparent beach water over the sand, I used my Copic Airbrush system to add that light touch to the card.

This release is full of all kinds of cool summer images and even a few mythical ones too!

PLUS... you can WIN the entire Summer Release clear stamps for your very own - that's 8 stamp sets!  That's OVER A $100 VALUE!! You have TWO ways to WIN!

The FIRST way to WIN is check out our Instagram Hop going on!  You can START HERE on my Instagram account and hop thorough all of our AH-mazing designers and guest designers for this release. 


For the SECOND chance to WIN, we're also having a VIDEO HOP!

Each one of the designers below will be sharing a video on their individual YouTube channels with one of our newly released Summer Release stamp set beginning at 5pm ET (3pm MT).  Just comment on each video AND subscribe to WIN the entire release.

👉 You can begin on my YouTube channel RIGHT HERE!!!


I'm sharing a video where I color up an entire card featuring the new "Royal Treatment" stamp set!

Good luck!

~ Ally ~

Sweet November Stamps ~ Summer Release is Here!

Welcome to the Summer Release from Sweet November Stamps!

This release is full of all kinds of cool summer images and even a few mythical ones too!

PLUS... you can WIN the entire Summer Release clear stamps for your very own - that's 8 stamp sets!  That's OVER A $100 VALUE!! You have TWO ways to WIN!

The FIRST way to WIN is check out our Instagram Hop going on!  You can START HERE on my Instagram account and hop thorough all of our AH-mazing designers and guest designers for this release.

Wowsers!!!  All you have to do is follow each designer and leave a comment on each post for your chance to win!!!

For the SECOND chance to WIN, we're also having a VIDEO HOP!

Each one of the designers below will be sharing a video on their individual YouTube channels with one of our newly released Summer Release stamp set beginning at 5pm ET (3pm MT).  Just comment on each video AND subscribe to WIN the entire release.

👉 You can begin on my YouTube channel RIGHT HERE!!!

Good luck and happy hopping today!!!

~ Ally ~

Sweet November Stamps ~ Royal Treatment


Yesterday we began our Sizzling Summer YouTube Hop for Sweet November Stamps.

You can WIN the ENTIRE Summer release (8 stamp sets valued at over $100!) just by viewing the videos and leaving a comment below each video.

Start the hop HERE.


Today's video features the adorable new stamp set, "Royal Treatment".  This regal stamp set features three princesses, one prince. lots of cute frogs and mini fairies and some great sentiments.

I chose to create a wedding card for my video.

I used my Copic Marker Airbrush system to create the circle scape and Copic Markers to color in our prince and princess. 

Make sure to check out my coloring video and COMMENT to WIN!  Click the image below.

Good luck!

~ Ally ~

Scrap 'n Stamp ~ Cracked Glass Technique


Make sure to check out my latest Technique Tuesday live video over on the Scrap 'N Stamp Facebook page.

On today's live we made a card featuring the cool "Cracked Glass" technique using UTEE (Ultra Thick Embossing Enamel).

To check out today's video CLICK HERE

Here is what the final card looked like...

Don't forget to join me too on Sundays at 8pm ET (6pm MT)!

Have a great week everyone!

~ Ally ~

Chibitronics ~ Fire Breathing Dragons

Today I'm sharing how I made this fun light up fire breathing dragons card. Today I'm featuring the Chibitronic Red and Orange LED Light Stickers. Our fiery friends are from the "Dragon Trio" stamp set by Sweet November Stamps.

I first began my card by stamping out my images on the front and inside of my cardstock. I colored up my image using Copic Markers.

As you can see, I stamped the same scene on the circuit surface. This allows for ease of placement of all of my circuit elements.

I used my Craft Stencil to trace out the placement of all 3 of my LED light stickers and then I used the edge of the stencil to draw out each side of the circuit. I used a small circle shape to trace a place for my battery. The blue lines indicate the negative side of the circuit and the red lines are the positive side of the circuit.

Next I applied the Conductive Fabric Tape to each side of the circuit. I began on the negative side of the circuit to allow for the tape to be laid down under the battery area. To create the battery housing, I used 3D foam tape to create a 4 sided barrier. This just keeps the battery in place so it won't move once the card front is attached. A used a small piece of copy paper to create the flap over the battery housing. The tape has been wrapped around the piece of paper and it continues on to complete the rest of the positive side of the circuit.


The final step is add our LED Light Stickers. I used one Orange (O) sticker and 2 Red (R) stickers. These lights can be purchased in the Lights Sampler (contains all 6 colors of lights) or in the Red/Blue/Yellow Megapack or the Pink/Orange/Green Megapack.


Now that everything is built, let's check out the finished lit of card...

Three little cute fiery dragons!

Don't forget to check out the step by step video tutorial on how I built this circuit... HERE!

Thanks for stopping by! Making your own circuits is a LOT easier than you think! Happy creating!

~ Ally ~

 
09 10