It’s Day 4 of our Power Poppy reveal for October and today we’re featuring another wonderful holiday stamp set called “Poinsettia”!
This stunning collection has two extremely detailed images for your Christmas cards plus four beautiful sentiments. This will be be a “must have” for all your holiday purchases this year indeed!
For my card, I chose to have some fun with kraft cardstock and white embossing powder. I first stamped the ornate poinsettia and boughs in the top left hand corner of a kraft card base. Then I stamped the same image twice more on to vellum and fussy cut only the poinsettia out.
I added a bit of color using Copic markers on the BACK side of the vellum as to ensure I didn’t wreck the tips of my markers. I used some 3D OLBA glue to stack and adhere my vellum layers.
Some cool white pen lines and dots, some score-line details and a gold embossed greeting finished off my card.
Thanks for joining us the past 4 days for our reveals. Check back tomorrow when the Bloom Brigade showcases all kinds of holiday beauties! But for now, check out what my fellow design team has done with the “Poinsettia” stamps for today…
Allison Cope – you are here!
Christine Okken
Dawn Burnworth
Julie Koerber
Katie Sims
Leslie Miller
Stacy Morgan
Tosha Leyendekker
Marcy on the Power Poppy Blog
Happy blog hopping everyone! Enjoy all the new holiday inspiration!
~ Ally ~
Sponsored by: Power Poppy
Supplies:
stamps: Power Poppy (Poinsettia)
cardstock: Bazzill, vellum
tools: Scor-Pal
paint: Ranger Distress Stain (Tarnished Brass)
ink: Versamark, Copic Markers, Signo White Gel Pen
embossing powder: Hero Arts (White), PKGlitz (Gold).
Showing posts with label Scor-Pal. Show all posts
Let Freedom Ring!
It’s Friday and another fabulous day to not only share with you, but for you to share with us! Come and join the Bloom Brigade over on the Popper Poppy Blog for another Peep of the Week! Come and play along with us and get a chance to WIN!
This week I chose to work with the stunningly delicate “Countryside Bouquet” digital stamp set. I took the image, duplicated it four times and took square snippets of the image from different areas and then printed out all four squares along with the cute (and offered free… click here!) sentiment.
To play along the freedom theme, I chose to work with reds, blues and whites!
Take a gander at what the rest of the Bloom Brigaders have done with our fabulous digital images…
Allison Cope -- you are here!
Christine Okken
Cindy Lawrence
Danielle Kennedy
Dawn Burnworth
Julie Koerber
Kathy Jones
Katie Sims
Leslie Miller
Tosha Leyendekker
Thanks for stopping by today! I hope you enjoy all our inspiration.
~ Ally ~
Sponsored by: Power Poppy
Supplies:
stamps: Power Poppy (Countryside Bouquet)
cardstock: Recollections, Woodgrain – AveryElle
tool: Scor-Pal, Scor-Bug
gems: Doodlebug
ink: Copic Markers.
Introducing… Sassy Succulents!
I’d have to say… this is my favourite set of our June sneak peeks and it’s called “Sassy Succulents” and it’s super cute! Not only does it have this stunning grouping of hens & chicks but it contains 6 MORE images of succulent plants and 7 fabulous sentiments! It will surely be a stamp set you’ll grab time and time again!
For today, it was all about experimentation for me! Not only did I experiment once… but I experimented TWICE! So I have 2 fun cards to share today.
For my first one, I started by stamping my hens & chicks image onto a script paper I had. Then I took some Ranger Distress Inks and dabbed them on my craft mat and used my water brush to paint my succulent plants.
For my second creation, I started by scoring out a panel on my light kraft cardstock and then stamped those pretty little hens & chicks once again inside the panel. Then I used my pencil crayons to add colour. My photo really doesn’t do this card justice… it’s very soft and subtle and actually quite layered with colours!
I played around with just a simple cross hatching of the back ground using my pencils and then added some glittery dots all around…
I truly had some fun with my inks and pencils with my cards today! Thanks for stopping by!
Don't forget that TODAY is the last day to come and PLAY ALONG with us. Here are a few ways to do so...
Come and check out what the Bloom Brigade did with this lush set of beauties…
Allison Cope -- you are here!
Christine Okken
Cindy Lawrence
Danielle Kennedy
Julie Koerber
Katie Sims
Tosha Leyendekker
Marcy on the Power Poppy Blog
~ Ally ~
Sponsored by: Power Poppy
Supplies:
So Glad We’re Friends:
stamps: Power Poppy (Sassy Succulents)
cardstock: Bazzill
patterned paper: My Mind’s Eye (Stella Rose)
edge punch: Fiskars
ribbon: Offray
ink: Memento, Ranger Distress Inks
tools: We R Memory Keepers Envelope Punch Board
other: thread, Glossy Accents.
We're All in this Together:
stamps: Power Poppy (Sassy Succulents)
cardstock: Bazzill
ink: Memento
pencil crayons: eeBoo
tools: Scor-Pal
other: Stickles.
For today, it was all about experimentation for me! Not only did I experiment once… but I experimented TWICE! So I have 2 fun cards to share today.
For my first one, I started by stamping my hens & chicks image onto a script paper I had. Then I took some Ranger Distress Inks and dabbed them on my craft mat and used my water brush to paint my succulent plants.
For my second creation, I started by scoring out a panel on my light kraft cardstock and then stamped those pretty little hens & chicks once again inside the panel. Then I used my pencil crayons to add colour. My photo really doesn’t do this card justice… it’s very soft and subtle and actually quite layered with colours!
I played around with just a simple cross hatching of the back ground using my pencils and then added some glittery dots all around…
I truly had some fun with my inks and pencils with my cards today! Thanks for stopping by!
Don't forget that TODAY is the last day to come and PLAY ALONG with us. Here are a few ways to do so...
Enter to win by 3pm EST today!
Come and check out what the Bloom Brigade did with this lush set of beauties…
Allison Cope -- you are here!
Christine Okken
Cindy Lawrence
Danielle Kennedy
Julie Koerber
Katie Sims
Tosha Leyendekker
Marcy on the Power Poppy Blog
~ Ally ~
Sponsored by: Power Poppy
Supplies:
So Glad We’re Friends:
stamps: Power Poppy (Sassy Succulents)
cardstock: Bazzill
patterned paper: My Mind’s Eye (Stella Rose)
edge punch: Fiskars
ribbon: Offray
ink: Memento, Ranger Distress Inks
tools: We R Memory Keepers Envelope Punch Board
other: thread, Glossy Accents.
We're All in this Together:
stamps: Power Poppy (Sassy Succulents)
cardstock: Bazzill
ink: Memento
pencil crayons: eeBoo
tools: Scor-Pal
other: Stickles.
Let There be Flowers!
For the card challenge this week over on the LCOM blog, Cindy gave us a great challenge to create a flower embellishment of our own and use it on a card.
For my card, I cut out a pretty die cut back ground and then used some of the die cut shapes to create my flowers. I used my Copic airbrush to colour them.
supplies: die cut paper, Kustom Die Kuts; cardstock, Bazzill Smoothies; ink, Copic; embossing powder, Hero Arts; die cut circles, Spellbinder's; stamp, Papertrey Ink; embossing folder, Cuttlebug; pearls, Kaiser; tool, Scor-Pal.
Here's a close up for my die cut details....
I even decorated the inside of my card to match the outside.
Here's a close up...

I hope you will check out what the rest of the Card Team did on the LCOM blog today!
Don't forget that the LCOM Sketch Team will be having a Blog Hop this Friday! Join us on the Let's Capture these Sketches blog at 7pm EST.
I also have a VERY BIG ANNOUNCEMENT coming up!!!! Stay tuned. I will be doing my BIG reveal in the next few days! Pssst... I've already left a clue somewhere in this post! LOL!
For my card, I cut out a pretty die cut back ground and then used some of the die cut shapes to create my flowers. I used my Copic airbrush to colour them.
supplies: die cut paper, Kustom Die Kuts; cardstock, Bazzill Smoothies; ink, Copic; embossing powder, Hero Arts; die cut circles, Spellbinder's; stamp, Papertrey Ink; embossing folder, Cuttlebug; pearls, Kaiser; tool, Scor-Pal.Here's a close up for my die cut details....
I even decorated the inside of my card to match the outside.
Here's a close up...
I hope you will check out what the rest of the Card Team did on the LCOM blog today!
Don't forget that the LCOM Sketch Team will be having a Blog Hop this Friday! Join us on the Let's Capture these Sketches blog at 7pm EST.
Having Some More Sketch Fun Today!
For the designers at myStamp BOX this month, I designed two fun card sketches for the mSB designers to use as inspiration.
Check out the mSB blog today for the two sketches and eight wonderful and very creative cards by the mSB designers.
Here's the card I designed using my second sketch. I used three fun mSB stamp sets to achieve my finished card and I also used some of our extremely generous products from Helmar and Clear Scraps that we received to create with through mSB.

Have a Very Merry Christmas
Helmar is also having a fun giveaway. Check out "Three Cheers for Red, White and Glue!"
supplies: stamps: myStamp BOX (Let it Snow, Winter Flakes, Lines of Life), transparent holiday ornament, Clear Scraps (Christmas Ornaments); adhesive, Helmar (Premium Craft Glue US version), Scotch; cardstock, Bazzill; patterned paper, BasicGrey; pearls, BasicGrey, KAISERscrapbook; ink, StazOn, Stampin' Up!, Versamark pen; embossing powder, Walmart; tools, Copic airbrush, Spellbinder's Nestablities, Scor-Pal; other: ribbon, wire.
Make sure you check out the rest of the designer's creations on the mSB blog.
Check out the mSB blog today for the two sketches and eight wonderful and very creative cards by the mSB designers.
Here's the card I designed using my second sketch. I used three fun mSB stamp sets to achieve my finished card and I also used some of our extremely generous products from Helmar and Clear Scraps that we received to create with through mSB.

Have a Very Merry Christmas
Helmar is also having a fun giveaway. Check out "Three Cheers for Red, White and Glue!"
supplies: stamps: myStamp BOX (Let it Snow, Winter Flakes, Lines of Life), transparent holiday ornament, Clear Scraps (Christmas Ornaments); adhesive, Helmar (Premium Craft Glue US version), Scotch; cardstock, Bazzill; patterned paper, BasicGrey; pearls, BasicGrey, KAISERscrapbook; ink, StazOn, Stampin' Up!, Versamark pen; embossing powder, Walmart; tools, Copic airbrush, Spellbinder's Nestablities, Scor-Pal; other: ribbon, wire.
Make sure you check out the rest of the designer's creations on the mSB blog.
Daisy Days

Over at StampTV, Melanie M., one of my So Sketchy Sistas, issued a fun challenge. It was to create a card where you took you focal image and cut it into equal pieces.
I had fun creating with the pretty double daisies stamp from the Gina K. Designs "Flowers for Daisy" stamp set. I masked the original stamped image and made a long line of them for my focal point of my card.
I coloured the daisies using my Copic markers and softened the centers and the edges using some chalk.
I distressed and embossed (using my Cuttlebug embossing folders & my Scor-Pal) the white cardstock and added it to the card base and then added my daisy focal strip over top.

Supplies: cardstock: Bazzill, Prism; stamps: Gina K. Designs; ribbon tag: Spellbinder's Nestabilities; ribbon: misc.; ink: Copics; chalk: Craf-T; tools: Cuttlebug embossing folder, Scor-Pal, Tim Holtz paper distressor.
Pumpkin-ey Goodness
A few months back I was approached by the lovely Diana Crick, the designer of the Scor-Pal tool, to create a pumpkin themed card using the Scor-Pal tool to showcase in their company newsletter.
I was extremely honoured and accepted her invitation immediately!!
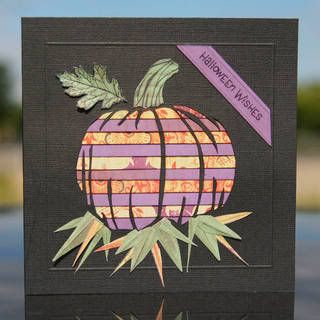
The newest Scor-Pal Hallowe'en magazine is out! Come and check out my pumpkin iris folding card using the Scor-Pal tool and all the other fabulous Hallowe'en themed products by her other talented designers.

Thank you Diana for allowing me to create this card for the Scor-Pal website! I thoroughly enjoy your Scor-Pal tool and products!
I was extremely honoured and accepted her invitation immediately!!
The newest Scor-Pal Hallowe'en magazine is out! Come and check out my pumpkin iris folding card using the Scor-Pal tool and all the other fabulous Hallowe'en themed products by her other talented designers.
Thank you Diana for allowing me to create this card for the Scor-Pal website! I thoroughly enjoy your Scor-Pal tool and products!
Ooopsy Daisy!
Here are few new cards that I created using one of the newest Gina K. Designs newest releases, Flowers for Daisy.This fabulous set of 9 stamps was created by artist Asela Hopkins for Gina K. Designs. For a limited time, a portion of the sales of this stamp set will be donated to the American Cancer Society in honor of Asela Hopkins' friend Daisy who is fighting a courageous battle with cancer.
Here a couple of cards using the 2 daisy images included in this set...
Daisy Trails....

To create this card I stamped and masked 5 daisy images on to the bottom of a piece of vellum.
Then I embossed the top of the vellum with a Cuttlebug embossing folder and then I embossed a double line just above the daisy images using my Scor-Pal tool.
I attached the vellum to the back of the card and folded it up and over the card front.
I measured the distance from the top of the card to the top of the double embossed line and adhered a piece of yellow cardstock underneath the vellum.
I added the strip and bow made of ribbon and the clear dollar store gems.
Lastly, I added some yellow flocking for soft daisy centers.
Diamond Daisy.....

To create this card, I stamped the large single daisy stamp randomly over the surface of the card cardstock card base. I was careful not to ink the stem of the flower so it was just the flower image that was stamped.
I cut a piece of vellum to place on the front and stamped one daisy in Ranger Distress ink on the front.
I carefully embossed the vellum using my Scor-Pal tool, avoiding embossing the daisy it's self.
I painted the back side of the daisy image on the vellum using my Ranger crackle paints. The paint colour is soft and subtle due to the translucency of the vellum.
I added a strip of punched green cardstock to the front of the card. I used a Martha Stewart punch for this design.
I punched two centered holes through the vellum and cardstock card base and tied a ribbon bow to attach my vellum to the card.
I added a simple sentiment on a piece of chalked white cardstock. I used my oval Spellbinder's Nestabilites die for the greeting shape. A few dots and a daisy card was born!
Supplies:
Top Card: Stamps: Gina K. Designs. Cardstock: Prism, Bazzill. Flock: Doodlebug Designs. Gems: Crafts. Tools: Cuttlebug embossing folder, Scor-Pal. Ink: Ranger. Ribbon: misc.
Bottom Card: Stamps: Gina K. Designs. Cardstock: Prism, Bazzill. Tools: Scor-Pal, punch by Martha Stewart, Spellbinder's Nestabilities (oval). Ink: Ranger. Paint: Ranger. Ribbon: misc. Chalk: Craf-T Products. Pen: Micron.
Gina K Designs: Cherry Candle & Card Tutorial
Here's another short tutorial for you using the amazing rubber stamps from Gina K. Designs.I was browsing through one of our local dollar stores and come across these cute little fragrant candle tins. I thought that it might make a simple "thank you" type gift for a friend.
So I thought I'd alter the tin and make a matching card for her.
Here's the step by step instructions on how I made it.
Step One: Measure the height of your container paying careful notice about any lips or embossed sections that the outside may have. In my case the height was 1 1/8 inch high. I then cut a strip 12 inches long of plain white cardstock. It's better to have more than enough to cover than not enough. You may want to measure your container because may need more than 1 strip to cover the surface.

Step Two: Stamp your image all the way down the length of the cardstock strip. I used the cute little cherry stamp from the Gina K Design's set, "Summer Harvest".

Step Three: Using my Copic markers, I coloured in all my images along the entire length of the stamped strip.

Step Four: I added a little hightlight to all the cherries using my Signo white pen. This makes them appear shiny.

Step Five: Add glossy accents to all the images you whish to be shiney. I added it to all my cherries. Once completely dry, I ran a generous amount of adhesive along the back of the entire strip of stamped cardstock and wrapped it around the candle base.
Step Six: I removed the lid and added a single stamped cherry image to the top of the candle lid. I used black Staz-On ink on this surface so it would remain there and not rub off.

Step Seven: I then added some Glossy Accents by Ranger to the stamped image on the candle lid as well. When it was completely dry, I added some colour to the image using my Copic markers. The image remains clear but you can easily see the colour.
And here are the completed candle and matching card.Card Supplies: Stamps: Gina K. Designs. Ink: Ranger, Copic. Paper: BasicGrey. Cardstock: Bazzill, The Paper Company, Prism. Tools: Spellbinder's Nestabilities (circle, scalloed circle), Scor-Pal. Punch: Martha Stewart Crafts. Pen: Signo. Metallic rub: Craf-T Products. Other: Glossy Accents by Ranger, ribbn.
Candle Supplies: Stamps: Gina K. Designs. Ink: Ranger, Copic. Cardstock: Prism. Pen: Signo. Other: Glossy Accents by Ranger.