MarMonday,31,

Crafty Meraki ~ A Thank You

Hello, crafty friends!  

I’m so excited to share a floral thank you card that highlights some of my favorite Crafty Meraki products. If you’re a fan of delicate florals and elegant texture, you’re going to love this one!

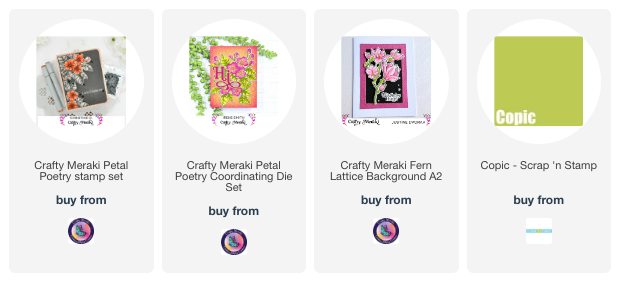
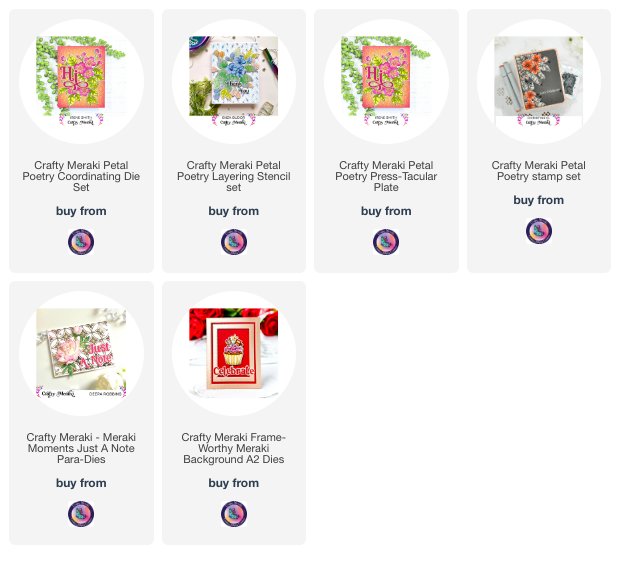
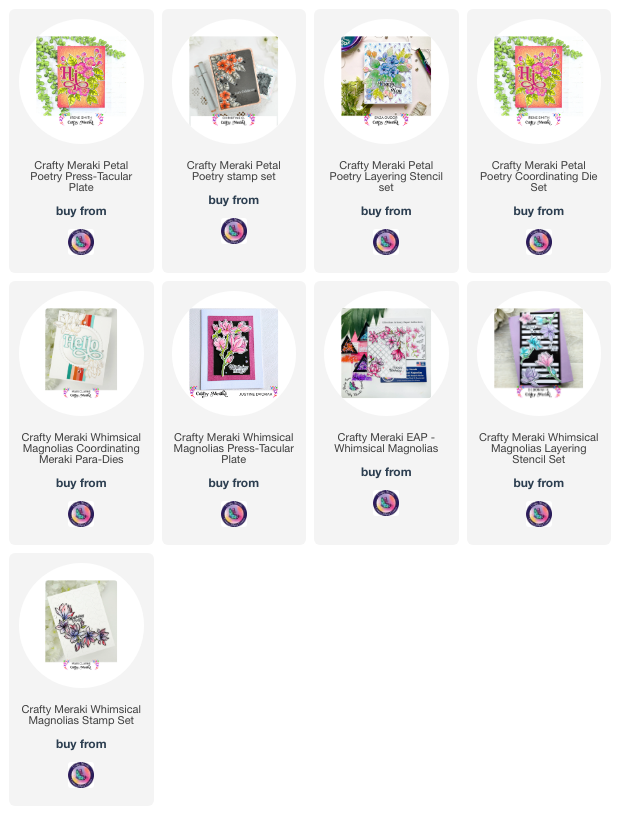
For today’s card, I pulled out the stunning Crafty Meraki "Petal Poetry" stamp and die set. These beautiful bold florals are a dream to color – I chose soft purples and fresh greens to keep things springy and serene. The detail in these blooms makes them perfect for center stage on any project.

To add some subtle texture and dimension, I used the "Fern Lattice" background die. I absolutely love how it adds interest without overwhelming the delicate lines of the flowers. I die-cut it from the same lavender cardstock as the card base to keep the design cohesive and elegant.

The bold gold foiled “Thank You” greeting comes from the "Gilded Greetings EAP". I love the mix of greetings in this set – the scripty font adds a touch of glamour and style to any sentiment. I popped up the sentiment with foam tape to give it a little extra dimension.

Supplies Used:

  • Stamps & Dies: Crafty Meraki Petal Poetry Stamp & Die Set

  • Background Die: Crafty Meraki Fern Lattice Die

  • Sentiment: Crafty Meraki Gilded Greetings EAP

  • Cardstock: Lavender, white

  • Coloring: Copic Markers, Polychromos Pencils

I hope this card inspires you to mix texture with florals and to let your sentiments shine! Thank you for stopping by today – and as always, happy crafting!

~ Ally ~

MarSunday,30,

Sweet November Stamps ~ A Little BOOP to Brighten Your Day!

Hello crafty friends!

Today I’m excited to share a sweet and sunny card I created using the brand new "Bunny Boop" digital image from Sweet November Stamps

This adorable image is available FREE exclusively to our newsletter subscribers — it’s our little way of sending a smile and a boop your way. 🥰

The moment I saw this image, I knew it needed a peaceful and playful background. I imagined a warm Spring day with our little girl relaxing in the grass, enjoying a gentle moment with her bunny friend. I added a  background scene featuring a cozy wooden fence, a welcoming gate, and leafy green trees to set the scene.  The trees are from the "Don't Feed the Trolls: Troll Bridge Background Builder Set" and the fence is from the "Scene Builder: Pumpkin Patch" digital set.

The sentiment, “A little BOOP to brighten your day!”, felt like the perfect finishing touch.

🎨 Copic Marker Colors Used:

Here’s a peek at some of the Copic colors I used to bring this sweet scene to life:

  • Skin: E04, E13, E11, E21

  • Hair: E35, E27, E29

  • Dress: Y13, Y15

  • Bunny: C1, C3, C4, C5, R21

  • Grass & Trees: YG11, YG13, YG17, E31, E33

  • Sky: B000, B21, B00

I also used a combination of soft blending techniques and light flick strokes for the grass and foliage to give it a soft and storybook-style charm.

🌼 Want "Bunny Boop" for Free?

If you haven't already, be sure to subscribe to the Sweet November Stamps newsletter to receive this delightful digital stamp as a FREE download. It’s perfect for spring cards, encouragement notes, or just a little something to brighten someone’s day!  Sign up on the Sweet November Stamps website - just scroll to the bottom!

Thanks for stopping by today! I hope this little card brought a smile to your face. Let me know in the comments how you'd use "Bunny Boop" in your own projects — I’d love to hear your ideas!

Crafty hugs,

~ Ally ~

MarFriday,28,

Sweet November Stamps ~ Some Stories Stay with Us Forever

Hello, crafty friends! 🌿 Today, I’m sharing a card that holds a very special place in my heart, created using the absolutely adorable Fairwees Readers clear stamp set from Sweet November Stamps

If you’re a book lover—or just love the magic of storytelling—these little fairy friends will surely bring a smile to your face!

I wanted to capture that peaceful moment of being lost in a good book on a sunny day, so I created a soft grassy background using ink blending and subtle flicks for grass detail. The two sweet Fairwees are cozied up with their favorite stories, surrounded by some curious ladybug friends. 🐞

I colored these cuties with alcohol markers, focusing on warm and bright tones to make their joyful expressions pop. And can we talk about those hairstyles?! Absolute fairy perfection! Their tiny wings and whimsical books just made the whole scene feel like something out of a storybook.

To tie it all together, I added a floral frame and stamped the sentiment: "Some stories stay with us forever."
It’s the perfect reminder of how stories—just like handmade cards—can leave a lasting impression. 💕

Here’s a closer look at those sweet details:

I had such a wonderful time bringing this scene to life, and I hope it inspires you to dive into your own crafty adventures—or a good book!

Thanks so much for stopping by, and as always—happy stamping! 

~ Ally ~

MarWednesday,26,

Sweet November Stamps ~ You're My Cup of Tea

Howdy crafty friends!  Ally here, and today I’m sharing a sweet and cozy card that’s steeped in charm — literally! 

I had so much fun creating this playful tea-time scene using the Spill the Tea stamp set from Sweet November Stamps. It’s full of adorable little mice and all the tea-time essentials your heart could want!

I started with a soft pastel background using my Copic markers to create a warm, inviting table and a gentle purple wall that adds just the right touch of whimsy.

Copic Color Combos I Used:

  • Mice: C1, C3, C5, R20, R21 for the cheeks and ears

  • Teapot and Teacups: YR21, YR24, YR27 with touches of E99 for depth

  • Lemon Slices: Y11, Y15, and Y17 for that zesty pop

  • Table & Background: E50, E53 for the table; V000, V01, V12 for the soft lilac backdrop

To add even more charm to the teapot, I borrowed a lovely floral stamp from the Bountiful Blessings: Thanks a Bunch set. I lightly stamped the grape vines onto the body of the teapot before coloring to give it that beautiful vintage porcelain look. I love how this detail makes the teapot feel extra special!

The sentiment “You’re My Cup of Tea” from the Spill the Tea set was stamped in a vibrant violet to tie everything together and give the card that final loving touch.

💡 Tip: When creating scenes like this with multiple elements, use light hand-drawn shadows under each object (I used E series Copics) to help ground them and bring the whole composition to life.

This card is perfect for a friend, tea lover, or anyone who could use a warm hug in an envelope. I hope it inspires you to cozy up with your stamps and markers!

Until next time—craft with heart and don’t forget to spill the tea (creatively, of course)!

Warm hugs and happy coloring,

~ Ally ~

MarMonday,24,

Crafty Meraki ~ Just a Note

Hello, crafty friends!

Today I’m thrilled to share a sweet and simple card that’s close to my heart, created with the brand new Petal Poetry stamp and stencil combo from the Meraki Harmony release by Crafty Meraki.

I absolutely adore how soft and elegant this set is — those florals are timeless and just perfect for building a heartfelt card like this one. Whether you’re sending a little love or a thoughtful “thinking of you” message, this set has you covered.


For this card, I started with the Petal Poetry coordinating stencil, blending the layers with my favorite Catherine Pooler inks to bring the blooms to life. The ink shades layer beautifully, adding depth and dimension with hardly any effort. I went for a delicate pink-and-green combo to keep things fresh and floral.

Once the flowers and leaves were stencilled, I used the coordinating Petal Poetry stamp set to add that perfect crisp detail, then I die cut all the elements to arrange around my card front. A soft watercolor-inspired background in pink tones adds a dreamy touch and lets the floral cluster shine.

To finish it off, I added a bold, foiled sentiment: Just A Note, framed with a sleek gold foiled border to ground the design. A few inky splatters around the card add a bit of dramtic elegance, without overpowering the soft floral vibe.

I hope this card inspires you to give the Petal Poetry collection a try — it's such a versatile set for so many occasions! Whether you’re new to layering stencils or a seasoned stamper, this combo will quickly become a favorite in your crafty stash.

Stay creative and keep sharing those beautiful handmade moments!

With inky fingers,

~ Ally ~

MarSaturday,22,

Sweet November Stamps ~ Prepping for Easter!


Spring has officially sprung, and I’m hopping into the Easter spirit with a sweet new card featuring the "Prepping for Easter: Bunny with Carrot" digital stamp from Sweet November Stamps. This adorable bunny was an absolute joy to color and makes the perfect center piece for a cheerful holiday card.


I printed the digital stamp on smooth, alcohol marker-friendly cardstock and reached for my trusty Copic markers to bring this scene to life. The bunny’s soft gray and white fur was blended with warm and cool neutrals to add dimension, and of course, those bright orange carrots had to pop! 

The crocuses in the background were the perfect touch of Spring color – I love how the purples, whites, and yellows play off the fresh green leaves.

Copic Color Combos Used:

  • Bunny Fur: E70, E71, E74, E77, R20 (for cheeks and ears)

  • Carrots: YR07, YR04, YR02, YG03, YG17 (tops)

  • Flowers: BV00, BV01, BV02, Y13, Y15, BV000, BV02

  • Sky: B91, B93, B01, blender

  • Grass & Leaves: YG21, YG01, YG03, YG17

  • Dirt: E30, E31

Once everything was colored, I added some subtle highlights with a white gel pen to really make certain details pop. I finished the card with a cheerful sentiment: “Hoppy Easter”, which felt like the perfect pun to match our carrot-loving friend.

This stamp is such a versatile and fun image for Easter cards, spring greetings, or even baby cards with a little creative tweaking. If you're looking for a sweet, smile-inducing image for your next project, definitely hop on over to Sweet November Stamps and check out their Easter collection!  Make sure to check out the rest of the "Prepping for Easter" collection - you can see them down below!

Wishing you a colorful, creative, and hoppy Easter season!

Happy coloring! 🐰🥕🌷

~ Ally ~

MarFriday,21,

Chibitronics ~ Lil Lit Cottage

Hello gang!  It's Friday!  Today I'm sharing my latest Chibitronics project!

I began by stamping and coloring my card front.  I used the Sweet November Stamps "Background Builder: Autumn Cottages" stamp set. I colored up everything using Copic Markers.

For my cards, I also stamp the same image in the same place on the inside panel for building my circuits.


For the 2 large cottage windows I used our "Animating White Blink LED Light Stickers" and I used a solid "White LED Light Sticker" for the the little window in the door.

I used "Conductive Fabric Tape" to build my circuit too!


To activate my circuit, you press the sentiment and then the 2 large windows blink with white light and the window in the door lights up with white light.

You can see this card in action over on my Instagram account, @i_card_so_hard today!

I hope you have a wonderful weekend!  Now go get creative!

~ Ally ~

MarThursday,20,

Sweet November Stamps ~ Boy Birthday!

Happy Thursday!  Today I'm sharing one of my cards from the newest Sweet November Stamps release, "Fab Favorites".

I chose to pull out lots of boy images for today's card!

All of these boys (and critters!) are from the Postage Pals (Landscape & Portrait) stamp sets. I stamped them all on the Waffle Flower Slimline Postage Die cut.


To accompany the postage theme I used the "Year Round Post Marks" stamps to create a subtle stamped card base.  I also stamped them across my Copic Marker colored boys and critters too!

To finish off this slimline birthday card, I added a simple sentiment from the "Birthdays are the Best" stamp set.


I just love how this turned out!

Hope you have an amazing rest of the week!  Got get creative!

~ Ally ~

MarMonday,17,

Crafty Meraki ~ Magnolia Hugs

Crafty Meraki is celebrating a new Spring release.  Introducing the Meraki Harmony collection!

For today's card I used the new "Whimsical Magnolias" stamp set.  

I started by stamping the magnolia images with Distress Vintage Photo ink. and coloring them in using ZIG Clean Color Markers.


Once they were all colored, I die them all out using the coordinating "Whimsical Magnolias Dies".

I added them to my natural cardstock panel that I had splattered with gold metallic paint.

I paired them with a strip of kraft cardstock featuring the "Sahara Symphony Die" - which I love!


The final piece was to add a sentiment.  I chose the gold foiled "Hugs" greeting from the "Gilded Greetings ESP" paper.

I just love the final look of this card!  Have a great week everyone!

~ Ally ~

MarSunday,16,

Scrap'N Stamp ~ Easter Bird Card Tutorial


Join me today at 8pm EST for a LIVE tutorial on how to create this super cute Easter card.

The card above features the Birch Press Designs "Block Print Tufted Bird Die" & "Foliage Bunch Dies" and some cute Lawn Fawn "Bitsy Blooms" patterned papers and the "Scripty Easter Die".

I'll be over on the Scrap 'N Stamp Facebook group! 

Hope to see you there!

~ Ally ~

MarSaturday,15,

Sweet November Stamps ~ Postal Pals

Happy Saturday everyone!  Today I'm sharing a card that features a few of the new Fab Favorites collection released a few weeks ago from Sweet November Stamp

Today's card stars some of the adorable kiddos from "Postage Pals: Portrait" and "Postage Pals: Landscape" clear stamp sets. These particular stamp sets were designed to fit within the confines of the Waffle Flower Postage Dies.


To accompany the postage theme, we also added the "Year Round Post Marks" stamp set.  I  a few of the birthday themed post marks and the parallel marks across my stamps and also to create the front panel of my card.

I used Copics to color all of my images for this card - no big surprise!

To finish off the card, I used one stamp space to add in the sentiment using the new "Birthdays Are the Best".  I actually included the word "March" and this card is already been mailed off to someone special!

I hope you have a wonderful and crafty weekend! 

~ Ally ~

MarWednesday,12,

Sweet November Stamps ~ Bring on the Birthday Cookies!

Happy Wednesday everyone!  Today I'm sharing a card that I shared over the weekend on Instagram using another fun digital image from Sweet November Stamp. These images are part of the new digital release, "Birthday Cookies".

There are 4 new digital collections to purchase.  We have 3 sets of shaped cookies including birthday boy & girl cookies, a balloon doggy cookie... all the way to birthday presents and cake cookies!  The last and final set is a set of number cookies and that includes a question mark cookie too! See the images and links listed at the bottom of the post.

My card today shares the adorable "Birthday Cookies Set #1".  This set includes a party hat, a lit candle, a balloon dog and finally a cupcake cookie.  I decided to use them all!


I started my digital scene by bringing the sweet little "Midnight's Gift" image and adapting it to fit my 4 cookie images.


To finish off the card, I added one of our new birthday greetings from the "Birthdays Are the Best" clear stamp sets.

So super cute!   Hope you check out all the new cookie designs!  Have a great week!

~ Ally ~

MarTuesday,11,

Spellbinder's ~ Justine's Farm Instagram Hop *PRIZE*

I’m beyond excited to celebrate the launch of the Justine’s Farm collection from Spellbinders, designed by Justine Dvorak! 

Justine has created 5 Press Plates for her collection.  She's included a little pig, a cow, a little lamb, a rooster and chicken set and a sweet little farm scene.  All of these products are listed at the bottom if you wish to view them up close.

To make this even sweeter, Justine is giving away a $25 store credit to Spellbinders to one lucky winner! To enter, just drop a comment on each post in the Instagram hop. Easy peasy! 

To begin hopping, please begin on Justine's Instagram page, HERE.

Today I'm sharing the adorable piglet, "Daisy", on my card.


I used my Spellbinders Betterpress Letterpress system to letterpress my little oinker and the sentiment.

I used my sewing machine to tack on the sentiment pieces and also the focal panel.

Once dry, I colored it with Copic Markers.


Isn't sweet little Daisy adorable???

Make sure you join the Instagram hop for a chance to WIN! 

~ Ally ~

MarMonday,10,

Crafty Meraki ~ Meraki Harmony Release

Crafty Meraki is celebrating a new Spring release.  Introducing Meraki Harmony!

Today we're celebrating with a Instagram Hop.

BEGIN HERECrafty Meraki Insta

The card I'm sharing on today's hop stars the beautiful new stamp, die and stencil set, "Petal Poetry".


I used the stamp set and then used stencil to add some of the leaf details on.  I also used some Copic Markers and Polychromos Pencils to add more depth and detail to the flowers and the leaves along with the stencil.

I combined it with the gorgeous and ornate "Fern Lattice Die" in purple to match the blooms. 


To finish the card off, I stamped the simple greeting from the "Petal Poetry" stamp set.

Such a fun and simple purple creation!

Don't forget to check out the Instagram Hop for your chance to WIN!

~ Ally ~

MarFriday,07,

Scrap'N Stamp ~ 3D Birthday Inspirational Hop **PRIZE**


Welcome to the Scrap 'N Stamp the 3D Birthday Inspiration Blog Hop!  Today's hop is all about sharing fun 3 dimensional birthday projects!

For my card today I'm using the very inventive die set from Lawn Fawn called the "Pivot Pop Up Die". 

I began by stamping all of the critters from the My Favorite Things stamp set, "Pawty Time".  I colored all of the cats and puppies using Copic Markers and then fussy cut them out.

I die cut a scalloped rectangle of yellow polka dotted paper from the Catherine Pooler Designs "Poppin'" paper pack and then a few other pieces for the front of the card.

For the sentiment, I stamped it from the Lawn Fawn "Offset Sayings Everyday" stamp set and colored it in using the same rainbow of colored Copic Markers.

For the inside and the mechanism, I used the same patterned paper pack from Catherine Pooler plus a sentiment from the "Best Birthday Yet" stamp set in Party Dress pink ink.  I also used the same "Pawty Time" stamp set from My Favorite Tings to add the inside sentiment. 


I love the "Pivot Pop Up" die's action!

 Here's the card in action...

NOW... check out all the other projects that our design team has to share today!! 

But first...we're also having a SALE...

Here's our hop list...

Now for the GIVEAWAY...

 GIVEAWAY DETAILS!!

  1.  Hop along and LEAVE A COMMENT on each designers blog post.
  2.  One lucky WINNER will be chosen to receive a $50 gift certificate to the store.
  3.  Winners will posted on the Scrap 'N Stamp blog sometime in mid to late March.  Good luck!

Thanks for stopping by!  Happy hopping and GOOD LUCK!

~ Ally ~ 


09 10