Now, let’s create!
Today I’m creating with a few Power Poppy clear stamps; Sweet Memories (Sweet Peas), Vibrant Thanks (Zinnias), Countryside Bouquet Deluxe (Cosmos) and Party Time (sentiment).

L (above left): I die cut some letters to spell “HAPPY” using some stamping masking paper.
R (above right): I placed them on my die cut piece using a ruler to ensure they were straight. I pressed down the masks using a bone folder for good contact.

R: I traced the masks using a Copic Multiliner 0.25 before removing them.

R: I applied a layer of BV20. I also used a Copic Blender to help soften the edges of the BV20.

R: I added some darker purple BV25 and blended it out with BV23.
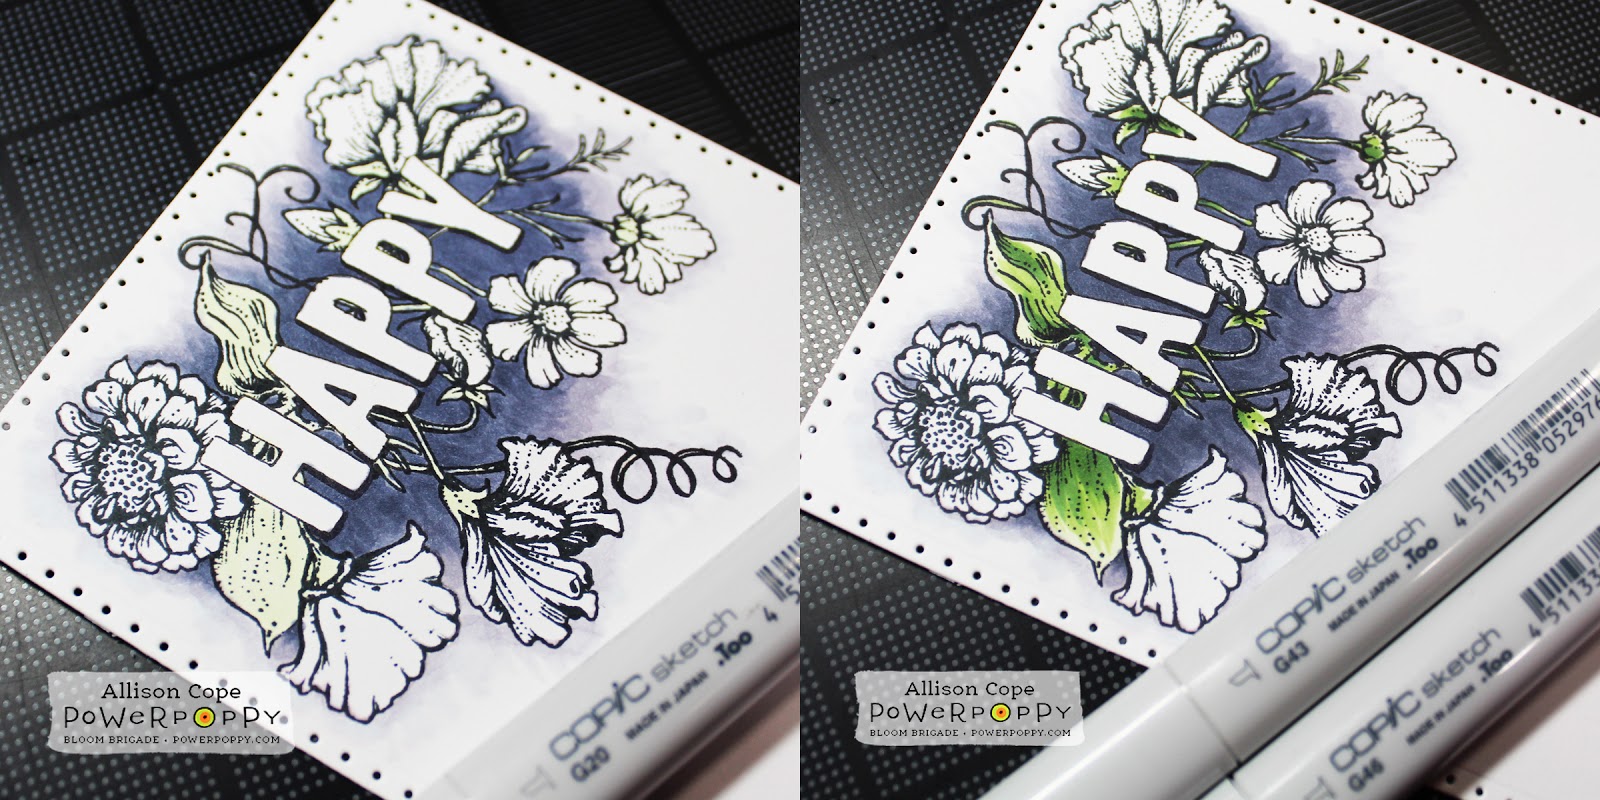
R: I added some G40 and G46 to some of the leaves and bases of the blooms. I blended them with the G40.

R: I colored the Sweet Peas with R11 then R12 and then blended them with the R11 again.

R: I stamped just the “BIRTHDAY!” part of the stamp from the “Party Time” stamp set on a piece of white cardstock. Then I trimmed it into a thin strip.

R: I cut a piece of stripped white and black diagonally striped patterned paper to put on my card front and then colored in a few of the strips to match the colors in my card.
And here are all the Copic Markers I used again for my card…

I just love the end result! What about you?

Don't forget to check out my fellow Bloom Brigade creations shared today...
Cindy Lawrence-- go here next!
Thanks for stopping by and checking out my tutorial today. I hope I inspire you to try some letter masking today.
~ Ally ~
Supplies:
stamps: Power Poppy (Sweet Memories (Sweet Peas), Vibrant Thanks (Zinnias), Countryside Bouquet Deluxe (Cosmos) and Party Time)
cardstock: Recollections (110# White Cardstock)
inks: Memento (Tuxedo Black), Copic Markers (see list above)
dies: MFT (Little Letters), Sizzix (Rectangles; Dotted)
other: Inkadinkado (Stamping Mask Paper)


3 comments:
WOW! Ally, you are amazing, and thank you SO much for this great tutorial! I love your card and love how you've used the block letter dies...totally in awe of your creativity (for the umpteenth time...hehe!). But I truly love how you've created what some stamp companies have stamps for...why when you can do this?!?! Love your beautiful colors, and thanks again for the tip about the Notes and Colors you use. I have my messy way of doing it, but I need to print out some of these and use them! Thanks so much, and I'm praying for your upcoming surgery. Yes, who needs a uterus when it's a problem? I loved not having mine when I had mine out early. You won't miss "you know what!" Warm and loving hugs, sweet friend! Easy does it! xoxo
Ooooh, such a pretty card!
Ally every bit of this is gorgeous, the masking and combination of blooms - right down to the subtle colors of stripes you coloured in. A beauty!
Post a Comment