Lottie Love ~ Sweet November Stamps

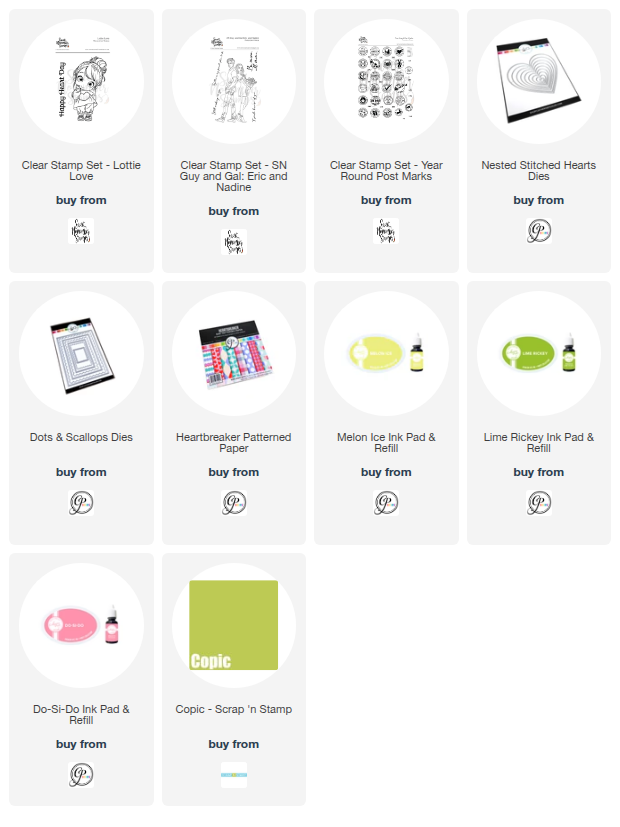
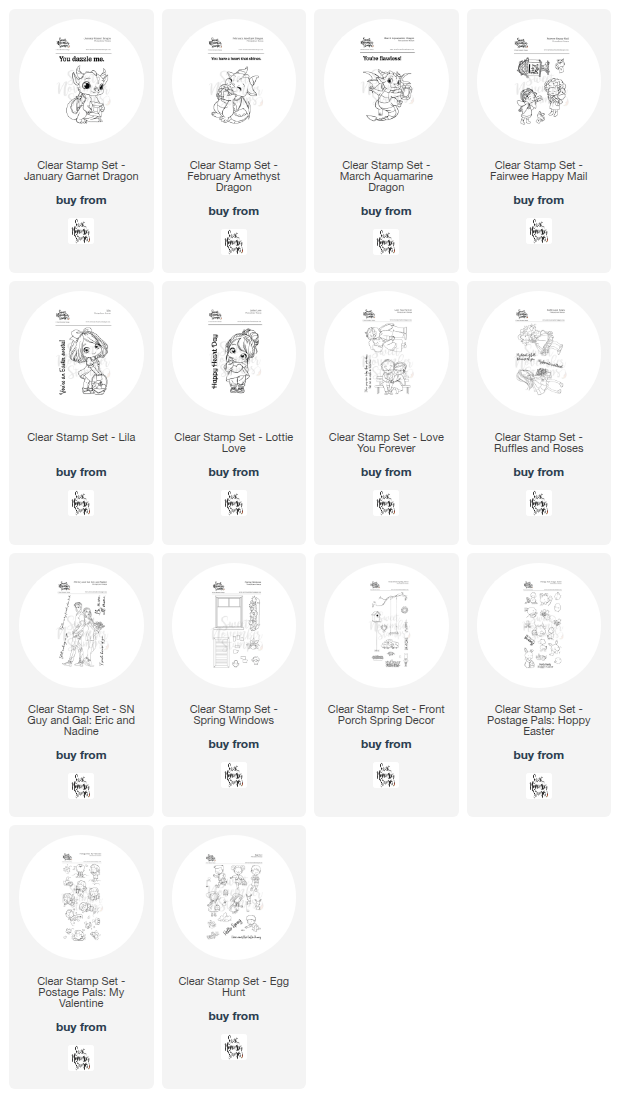
Today I’m sharing a sweet and simple card featuring the absolutely adorable “Lottie Love” clear stamp from Sweet November Stamps. Isn’t she just the cutest with her big bright eyes and that oversized heart sweater? She completely steals the show!


I colored Lottie with my Copic markers, keeping the palette fun and cheerful with bold reds and bright greens. I love how her vibrant outfit pops against the softer pink heart background. Her rosy cheeks and shiny auburn hair really bring her to life — she just looks like she’s ready to deliver a little love and happiness.

For the background, I decided to create my own patterned paper directly on the card base using the “Year Round Post Marks” stamp set. I stamped the postmarks in a mix of fun, colorful inks to coordinate with Lottie’s outfit. I love how the layered hearts and postal details add movement and interest without overwhelming the focal image. It’s such an easy way to customize your background and make it perfectly match your card design!


Behind Lottie, I layered a heart-patterned panel to anchor the design and keep the Valentine vibe going strong. To finish things off, I chose a sentiment from the “SN Guy and Gal: Eric & Nadine” stamp set. The simple “I smile because of you” fits Lottie perfectly and pairs beautifully with the large stitched heart die cut.

This card would be perfect for Valentine’s Day, an anniversary, or just a sweet “thinking of you” surprise. Sometimes a handmade card is the best way to tell someone they make you smile.

Thanks so much for stopping by today! I hope this card inspires you to mix and match your Sweet November Stamps sets and create your own custom backgrounds.

Happy stamping! 💕

~ Ally ~ 

Happy Birthday, You Spring Chicken! 🐔🌿

Today I’m sharing a cheerful birthday card featuring the adorable hen from the Chicken In stamp and die set from the From the Farm release from Catherine Pooler Designs. I just can’t get enough of these sweet little chickens!

Farm-Fresh Layers

To start, I chose one of the bright green patterned papers from the Farm Fresh 6x6 Paper Pack for the card front. I love how the subtle botanical tone-on-tone print adds interest while still keeping the design fresh and clean.


Next, I die cut a white cardstock panel using the Scallops & Dots Dies for that soft pierced detail around the edges. I also die cut a circle opening in the panel to create a focal point window.

Behind the opening, I layered in a smaller circle cut from the new Samba Cardstock. That bold pop of red frames the chicken perfectly and adds just the right amount of contrast against the green background.

Sweet & Simple Stamping

For the chicken, I kept the stamp colors soft and classic. I stamped her in Buttercream ink and added a touch of Cashmere ink for gentle shading. To finish her off, I used Samba ink for the comb and wattle and a bit of Over Coffee ink for the feet and wing detail.


The result is a warm, neutral hen that really pops against that bright circle frame.

Finishing Touches

I stamped the sentiment, “Happy Birthday, You Spring Chicken,” to tie in with the playful farm theme. Keeping the layout simple lets the color combination and sweet image shine.

This design is a perfect example of how patterned paper, bold cardstock, and soft ink blending can come together for a clean yet eye-catching card.

Thanks so much for stopping by today! 🐔❤️ Let me know — are you loving this farm-fresh color combo as much as I am?

~ Ally ~ 

Fairy and a Fur-iend ~ Sweet November Stamps

Today I’m sharing a magical little scene featuring one of the brand new Sweet November Stamps digital fairies — Magpie Cloverwood! She’s part of a trio of enchanting new fairies being released alongside Gracie Greenglade and Whimsy Heathersong. Each of these beauties comes with and without wings, giving you so much flexibility to create fairy-filled scenes… or simply sweet woodland girls without the fantasy twist!

For my card, I kept Magpie’s wings and created a glowing green forest setting for her to explore. I colored her up with Copic markers in rich purples and warm oranges, then added soft leafy details and light bokeh effects to bring that magical forest glow to life.

To make the scene even more whimsical, I perched Magpie right on top of another adorable Sweet November digi — Durango the Cattledog. His big, soulful eyes peeking up from below add such personality and charm to the card. I love how the mix of fairy magic and furry friend creates a story without needing any words at all.

I decided to leave off a sentiment this time so this card can be used for anything — birthday, encouragement, thinking of you, or just a little happy mail surprise. Sometimes the artwork tells the whole story!

Be sure to check out all three of the new fairies in this release — I can’t wait to see whether you use them with wings, without wings, or maybe even mix and match for your own magical adventures!

Happy crafting! ✨

~ Ally ~ 

You Are My Happy Place 🌾☀️

Today I’m sharing a card featuring the brand new On the Farm Dies from the From the Farm release by Catherine Pooler Designs — and I had so much fun playing with an unconventional color palette for this one!

Instead of traditional reds and browns, I chose a fresh combo of mint green and orange… and I absolutely love how it turned out!

Building the Sunny Background

I started by die cutting my front panel from the new Catching Rays Cardstock using the Dots & Scallops Die to add that sweet stitched detail around the edges.

To create the warm, glowing sky, I pulled out an oldie-but-goodie — the Twisted Starburst Stencil — and softly blended Orange Twist ink to form subtle sun rays across the panel.

For a little extra sparkle and movement, I splattered the sky with the new Orange Twist Shimmer. The shimmer adds the perfect sun-kissed finish!

Minty Fresh Farm Details

Next came the stars of the show — the adorable barn and windmill from the On the Farm Dies.


I die cut both elements from the fun mint patterned paper in the Farm Fresh pack to keep the look light and playful. Then, for contrast, I also cut each element from an orange and white polka-dotted patterned paper. I hand-cut the barn roof and door details to layer over the mint base — such a fun way to customize the look!

For the windmill, I doubled up the blades using the mint patterned paper to give it a bit more dimension and visual weight.

Finishing Touches

The sentiment, stamped in Orange Twist ink from the retired One Liner Sentiments stamp set, is layered on a die cut from the Sentiment Banner Dies for a clean and polished finish.

The combination of the soft mint, warm orange, and sun-splattered sky creates such a happy, uplifting farm scene — perfectly fitting for the greeting:

“You Are My Happy Place.”

This card proves farm designs don’t have to stick to traditional colors — sometimes a fresh twist makes everything shine!

Thanks so much for stopping by today! 💛 Let me know — would you try a mint and orange farm palette?

~ Ally ~

Egg-cellent News from the Farm! 🐔🍓

I’m back today with another card featuring the adorable products from the From the Farm release by Catherine Pooler Designs! This one is clean, bright and full of playful farm charm.

Meet the Chickens


The star of the show is the sweet hen & chick and that tiny egg from the Chicken In stamp set with coordinating dies. I inked the images in bold, happy color combos to make them really pop against the white background:

  • Party Dress & Samba for the vibrant pink hen

  • Melon Ice & Lime Rickey for the little chick and egg and a little Cotton Candy ink for the ground 

I love how these ink pairings create instant dimension while keeping everything fresh and graphic.


Patterned Paper Details

To bring in even more farm-fresh personality, I added some of the adorable patterned papers from the Farm Fresh paper pack. The strawberry print paired with the soft green floral is just too cute!

I die cut the patterned panels using the Skyscape Mini Cover Plate Dies, which gives them that fun scalloped edge detail. It’s the perfect way to add texture and shape without overpowering the clean layout.

Finishing Touches

The sentiment — “Congrats on your egg-cellent news!” — is stamped in Samba ink to coordinate with the hen and tie everything together. I kept the rest of the card clean and simple so the bright inks and cheerful patterns could shine.

This release is packed with farm charm, sweet patterns and the cutest little flock — I’m having so much fun mixing bold inks with playful prints!

Thanks so much for stopping by today! 🐔💗 Let me know which color combo you’d try first!

~ Ally ~ 

Best of Cluck – Triple Oval Shaker Fun! 🐔✨

Today I’m sharing a bright and sparkly shaker card featuring the adorable flock from the Chicken In stamp set from Catherine Pooler Designs — and this one has ALL the farm-fresh fun!

I decided to create a triple-window shaker design using the Around the Loop Nesting Dies. I die cut three oval openings from a white cardstock panel to create my shaker windows — I love how these rounded shapes frame each chicken perfectly.

Chicken Scratch Background

Behind the windows, I stamped the brand new Chicken Scratch Background Stamp in Party Dress ink. How fun are those little chicken footprints?! They add the perfect playful texture without overwhelming the design.

To give the background some sparkle, I splattered all three of the new CP Shimmers across the footprint pattern:

✨ Party Dress Shimmer
✨ Orange Twist Shimmer
✨ Lime Rickey Shimmer

The shimmer adds beautiful movement and catches the light perfectly inside the shaker windows.

Let’s Shake It Up!

After adding clear acetate behind each oval, I filled the compartments with a mix of sequins from:

💛 Valencia
💗 Inspiration Point
💚 Portland

The mix of pinks, oranges and greens ties in beautifully with the chickens and shimmer splatter.

Meet the Rainbow Flock


The sweet hens are from the Chicken In stamp and coordinating die set. I created a rainbow trio using these ink pairings:

  • Cotton Candy & Party Dress

  • Creamsicle & Orange Twist

  • Melon Ice & Lime Rickey

I love how each chicken pops against the shaker background while still coordinating perfectly with the sequins and shimmer.

To finish the card, I added a couple of strips of Party Dress cardstock across the top and bottom for a bold pop of pink that matches the sentiment, stamped in Party Dress ink. And of course…

Best of Cluck! 🐔💕

This card is such a fun mix of pattern, sparkle and interactive detail. I can’t stop shaking it!

Thanks so much for stopping by — let me know if you’re team shimmer, team shaker… or both! ✨

~ Ally ~ 

Postage Pals: My Valentine 💌💕 ~ Sweet November Stamps

Today I’m sharing the sweetest little Valentine card featuring the brand new “Postage Pals: My Valentine” stamp set from Sweet November Stamps — and oh my goodness, these tiny cherubs completely stole my heart!

This set is full of adorable little cupids along with the cutest love-bugs, making it perfect for Valentine’s Day cards for anyone you love.

Postage-Style Layout

I decided to use my postage stamp die from Waffle Flower to create that fun multi-window layout. I love how it divides the card into little “mini scenes,” almost like a sheet of stamps ready to be mailed. It’s such a great way to showcase multiple images from one stamp set!

I mixed and matched several of the sweet cherubs along with the adorable love-bugs to create a playful Valentine collage.

Quick & Easy Backgrounds

To add soft color behind each image, I used my Copic Airbrush system. Once everything was masked off, it was so quick and easy to spray in that beautiful blue sky for each little window. I love how the airbrushed backgrounds make the images pop while keeping the overall design clean and cohesive.

Each image was colored with Copics, keeping the palette soft and classic for Valentine’s Day — pinks, reds and warm neutrals with touches of minty green for the wings.

Sent with Love

This card was extra special because I sent it to my sister and her family for Valentine’s Day this year. I love creating handmade cards for family — especially when they feature sweet little characters like these cherubs spreading love everywhere they go. 💕


The Postage Pals: My Valentine set is such a darling addition to the Postage Pals collection, and it’s perfect for Valentine’s Day, anniversaries, or just sending a little love anytime.

Thanks so much for stopping by today! 💌 Let me know — which cherub is your favorite?

~ Ally ~ 

Just Cluckin’ Around with NEW CP Shimmers & a Sunset Barnyard! ✨🐔

Today’s card is all about shimmer, color and the cutest little flock from the From the Farm release over at Catherine Pooler Designs! I had so much fun creating this bright and cheerful design featuring the brand new CP Shimmers — and let me tell you… they are GORGEOUS in person!  Add dazzling shimmer while keeping the true color of your favorite CP Inks. Shake well — a little goes a long way!

We now have three Shimmer colors:

Lime Rickey
Party Dress
Orange Twist

And of course… I had to use all three!

Shimmery Ovals


I started by creating the three oval platforms as the focal point of the card. Once die cut, I splattered each oval with the new Shimmers — mixing Lime Rickey, Party Dress and Orange Twist across the panels for that playful, sparkly finish. The shimmer catches the light beautifully and adds so much movement and texture without overwhelming the design.

Meet the Flock


The adorable chickens are from the Chicken In stamp set with coordinating dies. I colored them in a rainbow of CP inks to keep everything fresh and farm-fun:

  • Melon Ice with Lime Rickey

  • Cotton Candy with Party Dress

  • Creamsicle with Orange Twist

I love how these soft, happy colors pair with the sparkle from the Shimmers!

Pattern & Sentiment Details

To tie everything together, I added patterned papers from the Farm Fresh paper pack — the florals bring in just the right amount of country charm behind the clean oval shapes.

For the sentiment, I stamped “Just Chicken In” in Party Dress ink and layered it using the Sentiment Banner Dies. That little pop of bold pink pulls the whole card together perfectly.


For this second card, I had so much fun creating a peaceful farm scene using the new “On the Farm Dies.” I colored the sky, barn, and windmill with Copic Markers to get that soft sunset glow and added dimension with simple shading. The grassy hillside was blended & cloth textured with Martini ink, giving it a bright, fresh pop of green that really makes the red barn stand out. 

It’s such a sweet and classic farm scene—perfect for adding a little country charm to your cardmaking! 🌾 


This release is packed with farm-fresh sweetness and now a whole new level of sparkle thanks to the Shimmers! I can already tell these are going to be a staple on my craft desk.

Thanks so much for stopping by today — let me know which Shimmer color is calling your name! 💚🧡💗

~ Ally ~ 

Happy Birthday, You Spring Chicken! ~ Catherine Pooler

Today I’m sharing another card from the absolutely adorable From the Farm release by Catherine Pooler Designs — and this one is bringing all the sweet country birthday vibes!

This card features the brand new On the Farm Dies, the playful Country Plaid Cover Plate Die, and the cutest little images from the Chicken In stamp set with coordinating dies.

Let’s Build a Barnyard Scene


I started by creating the bold red barn using the On the Farm Dies. I die cut the barn from Samba cardstock and layered in Midnight cardstock for the roof and details. I just love that classic red-and-black farmhouse look — it really anchors the design beautifully.

For the lower portion of the card, I used the Country Plaid Cover Plate Die to create that fun, textured plaid pattern. I cut it from Martini cardstock and layered Samba cardstock behind for a bright, cheerful contrast. The plaid adds such great dimension and interest while still keeping everything clean and graphic.

Meet the Chickens


The sweet mama hen and her two baby chicks are from the Chicken In stamp set and coordinating dies. I kept the image colors soft and warm to complement the bold cardstock elements. I used Buttercream & Cashmere ink to stamp the main body of the chicken and added a Samba ink comb and black details. For the chicks, I used Limencello ink.  And of course I had to use that punny sentiment —

“Happy Birthday, You Spring Chicken!”

The sentiment is stamped on a die cut from the Tickets & Tape Dies, which adds the perfect little label element to finish off the design.


Release Details 🐓

StampNation Members can purchase TODAY at 12 noon EST
✨ The full release will be available to everyone soon in the CP shop

This release is packed with charm — barns, plaid, chickens and all the farm-fresh goodness. I’m having so much fun mixing the bold cardstocks with these sweet country images!

Thanks so much for stopping by today! 💛

~ Ally ~ 

Best of Cluck ~ From the Farm Release ~ Catherine Pooler

Today I’m sharing a card featuring the adorable new “Chicken In” stamp set from the From the Farm release by Catherine Pooler Designs — and I am completely smitten with this sweet little hen! 🐔✨

This release is full of fresh, country charm and my card today captures all those fun farmers market vibes!


Building the Background

I started with the bright and cheerful patterned papers from the new “Farm Fresh” pack. The veggies, crates and market signs instantly set the scene and make the perfect backdrop for our feathered friend.

To frame everything up, I used the Dots & Scallops Dies for the main panel and layered it over a scalloped frame. That bold red scalloped layer was die cut from the brand new Samba cardstock — and let me tell you, this color is STUNNING in person! It adds the perfect pop of farm-fresh energy to the design.


Stamping the Chicken

For my chicken, I kept things soft and warm. I stamped her in Buttercream ink and did a little blending with a soft blending brush with Cashmere ink to add dimension.

To finish her off, I added touches of Samba ink for her comb and wattle, and a bit of Over Coffee ink for grounding and detail. The result is a clean, cohesive look that ties beautifully into the bold red scalloped frame.

The “Best of Cluck” sentiment just makes me smile — such a fun and punny greeting!


Release Details 🚜🌽

StampNation Members can shop EARLY on Tuesday at noon EST
✨ The full From the Farm release goes live Wednesday at 9am EST in the Catherine Pooler shop

This release is packed with country cuteness, fresh colors and the sweetest farm-inspired designs. I can’t wait for you to see it all!

Thanks so much for stopping by today! Let me know in the comments — are you team chicken, veggies, or farmers market crates? 😉🐔🥕

~ Ally ~ 

SN Guy & Gal: Eric and Nadine – Joyfold Style Card ~ Sweet November Stamps

Happy Valentine's Day everyone!! Today I’m sharing a card featuring the brand new SN Guy & Gal: Eric and Nadine stamp set from Sweet November Stamps — and I absolutely love these two together! 💕

Eric and Nadine have such a sweet, storybook feel to them. I decided to create a fun Joyfold card design — a mini card tucked inside a larger one — to add a little interactive surprise. Nadine flips open to the right, revealing a hidden message on the inside. I always love adding that unexpected element to my cards… it makes them feel extra special!

Coloring Details

Both images were colored with Copic Markers. I kept Eric in classic casual tones with soft greens and denim blues, while Nadine’s dress has a gentle lavender hue to complement the florals she’s holding. I added subtle shading and warm skin tones to give them depth and dimension while keeping the overall look soft and romantic.

Patterned Paper Love

For the background, I used the beautiful “Gardner’s Notebook” patterned paper from Catherine Pooler Designs. The leafy print pairs perfectly with the bouquet Nadine is holding, and I love how the soft mint tones make the characters pop. The striped paper on the inner panel adds a playful contrast and frames the mini card perfectly.

Joyfold Design

The Joyfold style is such a fun format to work with! The smaller front panel opens first, and then the larger card opens to reveal the full inside sentiment. It’s like a card within a card — perfect for highlighting a sweet couple like Eric and Nadine.

Nadine’s panel flips out to the right, making her the star of the interactive feature. It’s a simple mechanism, but it adds so much charm and interest to the design.

This stamp set is perfect for anniversary cards, Valentine’s Day, weddings, or just celebrating love in everyday moments. I can’t wait to create more scenes with these two!

Thanks so much for stopping by today — I hope this inspires you to try a Joyfold card with your next Sweet November Stamps project!

Happy crafting!
~ Ally ~💛

Sweet November ~ Love You Forever!

There is just something so heart-melting about this sweet couple from the “Love You Forever” stamp set from Sweet November Stamps. Their gentle smiles and hand-holding moment instantly tell a story of a lifetime of love — and I couldn’t resist creating a cozy little scene around them.

To set the stage, I paired them with the “Spring Windows” stamp set to create that charming brick wall and window backdrop. I love how this set makes it so easy to build an environment that feels warm and lived-in. I added a flower box full of blooms and even a curious little kitty peeking out the window for an extra touch of personality!

For the background, I reached for my Copic Airbrush System to quickly blend in smooth color. It’s such a fast and effective way to build depth and atmosphere without overworking the paper. The soft sky tones in the window and the warm brick wall really help the sweet couple stand out as the focal point.


Everything was colored with Copic Markers, and I had so much fun adding little details like rosy cheeks, subtle shading in their clothing, and a bit of grass texture beneath the bench to ground the scene. That tiny blue bird perched nearby just finishes the card perfectly — a sweet symbol of happiness and companionship.

The sentiment says it all:

“I love you more today than yesterday, but not as much as tomorrow.”

Isn’t that just the most beautiful way to describe a lifelong love?

This card would be perfect for an anniversary, Valentine’s Day, or even just a special reminder to someone you love. Sweet November Stamps always has a way of capturing heartfelt moments so perfectly.

Thanks so much for stopping by today! 💕

~ Ally ~ 

Hoppy Hearts Release Day – Postage Pals: Hoppy Easter

It’s release day over at Sweet November Stamps, and the Hoppy Hearts release is officially live! 🎉 Today I’m sharing a sweet and cheerful card featuring the absolutely adorable Postage Pals: Hoppy Easter stamp set.

I fell in love with this little bunny the moment I saw him — that basket of Easter eggs is just too cute to resist! I colored the image with Copic Markers, keeping the palette soft and springy to really lean into those fresh Easter vibes.

To build my card, I paired the stamped image with a mix of Catherine Pooler patterned papers and dies. I love how the postage-style frame highlights the image perfectly, while the bold gingham and floral patterns add texture and interest without overwhelming the focal point. The layered papers give the card a cozy, handmade feel and really help the bunny shine.

For the finishing touch, I added a simple sentiment that ties everything together and keeps the card playful and light — perfect for Easter, springtime, or even just sending a happy hello.

This card came together so easily, and it’s a great example of how fun patterned papers and a strong focal image can do all the heavy lifting for you. If you love cute characters, postage-style designs, and all things spring, this release is definitely one to check out!

Thanks so much for stopping by today — I hope this card brings a little hop to your step! 💕🐇

~ Ally ~ 

 
09 10