Catherine Pooler Designs ~ Lots of Kitties

The Catherine Pooler Designs newest collection, "Birthday on the Go" is now in the shop! 

Today's card features both the "Pedaling By" stamp and die set plus the very cool "Serena Cover Plate Die".


I thought all those rainbow kitties from the "Pedaling By" stamp set would fit purr-fectly in the openings of the "Serena Cover Plate Die".

I decided to add the whimsical greeting from the "Look Who's Talking Sentiments" stamp set and it's coordinating dies.


I think it turned out pretty cute!

Hope you have a great week!

~ Ally ~

Sweet November Stamps ~ Hey Ocean Friends


 Happy Sunday everyone!  Today I'm sharing another new digital image from this weekend's little release called "Unbelievable Friend" from Sweet November Stamps.

This digital release celebrates the friendship of our beloved mermaid friends and humans.

The card I'm sharing today features the "Unbelievable Friends: Hello There" digital image. These two sea bound pals are hand in hand.

I printed off the image and then immediately printed out the exact same image on my masking paper from Eclipse.  I fussy cut out the image and applied to my card front panel.

Next I took some Distress Oxide inks and blended them for a smooth blue fade.  I flicked some fine water droplets on to the panel and dabbed them up to make some faux bubbles in the water.  I had also masked off a sea floor and used some brown Distress Oxides inks to blend in that element too.

Next I peeled off the mask and colored in my ocean pals with Copic Markers.  I stamped a few fish from the "Something's Fishy" clear stamp set and fussy cut them out.

I took 2 grassy edges die cuts and used my Copic Air Brush system and inked them up in a variety of greens and applied them over the base of the scene.  I also added a vellum layer of the grassy lines too.  I took the 3 little fish I had fussy cut and glued them in to the grassy layers.

For the final element, I used some vellum and black cardstock and die cut the sentiment "Hey" from the Catherine Pooler Designs "Hey Word Dies" and added it to the card front.

Simple but cute!

Have a great rest of the weekend!  I hope you're able to get crafty!

~ Ally ~

Sweet November Stamps ~ Unbelievable Friends Release

 Happy Saturday all!  Today I'm sharing a new digital image from this weekend's little release of the "Unbelievable Friends" from Sweet November Stamps.

This digital release celebrates the friendship of our beloved mermaid friends and humans.

The card I'm sharing today features the "Unbelievable Friends: Helping Hands" digital image.


I decided today's mermaid needed some colorful hair so I used blues, teals and purples to adore her hair plus her tail too!

I also used the shoreline background from the "Horizon Lines: Seaside Cliffs" stamp set to set the scene for my friends.

I had fun playing with color on this one and I think it turned out quite fun!

Make sure to check out more of my mermaid and human friendship coming this week!

Have a great weekend!

~ Ally ~

Sweet November Stamps ~ Fairwee Happy Birthday

Happy Friday all!  Today we're sharing some more of the Sweet November Stamps latest release.

This card features the adorable little fairies from the "Fairwee Happy Birthday" clear stamp set.

I began by actually creating my shaker card background.  I used the banner image and created a draped banner background.  I proceeded to color the banners in rainbow Copic Markers.

I used some vellum and some Island Splender Mix Sequins and added them to my shaker.

I used some black cardstock to create the large shaker border.

Next I stamped 2 of the celebrating Wees and there gorgeous birthday cake on the adorable table in Memento Tuxedo Black ink and colored them up with Copic Markers as well. I stamped a greeting from the set and fussy cut out all of the images.


I used my White Gel Pen to also add some sparkle details to the images including their rosy cheeks!

Check out more deets on my Instagram, @i_card_so_hard .

Have a great weekend!

~ Ally ~

Catherine Pooler ~ Pedaling by...

The Catherine Pooler Designs newest collection, "Birthday on the Go" is almost in the shop!  The collection goes live at 9am EST today but I wanted to share another sweet birthday card before it hits the shop.

Today's card features both the "Pedaling By" stamp and die set plus the very cool "Serena Cover Plate Die".

In this case, I only used a sliver of the "Serena Cover Plate Die" just for added tone-on-tone texture.

I used all kinds of Spa colored inks for my card elements today.  I used a two color blend for each item with the exception of the balloons and the kitty.

I used the following ink colors: Lemongrass & Green Tea, Clay Mask & Polished, Lilac & Verbena, Shea Butter & Goldenrod plus Hot Tub and Pebble & Slate. 

Today's the day to SHOP!  Everything will be loaded into the shop at 9am EST.

Happy shopping all!

~ Ally ~

Catherine Pooler Designs ~ Cycle Around the Sun


Happy Tuesday!  The Catherine Pooler Designs newest release, "Birthday on the Go" is almost here!

If you are a StampNation member, then you get to shop TODAY at 12 noon EST.  The entire release will be in the shop for you.  All you have to do as a member is login to your CP shop account with the same email you use for your StampNation membership and the products should be listed under the drop menu as "NEW".  Happy shopping SN members!

Today's card card features the adorable "Pedaling By" stamp set and die. This cute stamp set has a cute little bicycle and all kinds of festive add-on images like a bouquet of flowers and some fluttering banners.


I began my card by cutting out the brand new "Serena Cover Plate Die" and adding it to the lower aspect of the card - about 2/3rds down.

Then I die cut two "Around the Loop Nested Dies" shapes from white cardstock and I direct-to-paper inked it up with our new Verbena ink on the larger of the two ovals.

Then I stamped my sentiment in Polished ink.  It's from the "Pedaling By" stamp set.

I stamped and die cut the following elements; present (Lemongrass, Green Tea inks), Bow & Flowers (Polished, Lemongrass, Green Tea inks), Bicycle (Shea Butter, Goldenrod inks), Banner (Clay Mask, Polished inks), and finally the Bike Wheels, Basket, Handles, Bike Seat (Lilac, Verbena inks).

Once stamping out all the bike and the corresponding decoration elements, I die them out using the "Pedaling By Dies".

Don't forget to add the FREEBIE WITH PURCHASE, the adorable 2x3 stamp set "Serving Love" stamp set to your cart.  You can earn this little stamp set for FREE when you have $50 (before shipping & taxes) into your cart, you add the stamp set in your cart and add the code "ONTHEGO" to your coupon code on checkout.

Wednesday everything from the release will be live in the Catherine Pooler shop at 9am EST.

Happy shopping!

~ Ally ~

Catherine Pooler Designs ~ Birthday on the Go!

Happy Monday all!  Today I'm sharing a few new products from the Catherine Pooler Designs new release set to hit the store on Wednesday!  This release is call "Birthday on the Go" and it's jam packed full of cute birthday items PLUS two new Spa ink colors.

Let's start off by introducing you to the brand new Spa inks... meet Verbena and Goldenrod.

The new Goldenrod color fits on top of Shea Butter in the Yellow Spa inks and Verbena fits between the Royal Treatment and Lilac inks. A new CP Color Wheel can be downloaded for FREE over in the CP shop!

So today's card features the brand new "Pedaling By" stamp set and it's coordinating die, "Pedaling By Die".

I began by die cutting all of my required elements; the bike frame, two of the full tire images, a couple sets of balloons, a set of banners, the bike's basket and of course, a kitty!

I used Shea Butter, Goldenrod, Lilac, Verbena inks to ink up of my bike and balloon parts.  For the balloon strings, sentiment and the sweet kitty's facial details I used Slate ink. To color in between the spokes of the wheels, I just used some pieces of low-tack tape and inked up the triangles with my CP Blending Brushes.

This is an INTERACTIVE card so I made the bike's wheel rotate! To do this, I cut two small circles on the card front panel directly under the tire centres were located on the bike frame.  Then I added some circular foam pieces through the cut holes, attaching them to the back of the tires and then placing a paper stopper on the back side of the panel so they would stay in place.

Then I used 3D foam to attach the bike frame over top of the tires but not actually attaching it to the tires themselves. This allows the tires to move independently from the frame.

To finish off the card, I attached the basket with the kitty inside, the banner piece and the 4 pairs of balloons to the card front.  I stamped a sweet sentiment from the same stamp set, "Pedaling By" using Slate ink to complete the card.

Make sure to head on over to my Instagram account to check out a short video on my card in action!

Everything you see goes on sale on WEDNESDAY at 9am EST.  If you are a StampNation member, you can shop TOMORROW at 12 noon EST.

Happy shopping!

~ Ally ~

Sweet November Stamps ~ More Summertime Fun

Happy weekend all!  Today we're sharing some more of the Sweet November Stamps latest release.

This is the little dragon from the stamp set called "Extraordinarily Happy".

I began by coloring up this little guy and I fussy cut him out.

I decided he needed a little waterfall oasis to chill in!  So I created a fun and mossy background.

A very colorful card for sure!

Hope you have a great weekend!

~ Ally ~

Sweet November Stamps ~ Flight of the Fairies

Happy Thursday all!  Today I'm sharing the card I created for my Sweet November Stamps PenPal for June.

This month's penpal theme was FAIRIES, so I pulled out adorable "Coffwees" stamp set.

I stamped my little wees at the mushroom table first, then I masked them off.  Then I stamped the two trees from the "Horizon Lines: Spring in Bloom" stamp set in the background and the sentiment.  I masked off the trees, the ground and Wees at the table and then used my Copic Marker air brush system to color in the sky.

I peeled off all the masks and colored up the whole image using my Copic Markers.


I also stamped the little Wee with the mug in her hands on a separate piece of paper, colored her up and cut her out.  I decided to attach her on a wobbler to the card front to make it look like she's flying.

The card arrived this past week so I know my PenPal has received it.

I hope you have a great rest of the week.

~ Ally ~

Chibitronics ~ Light Up Birthday Frog Card

Happy Wednesday!   Today I'm sharing my latest Chibitronics creation that I made this week.

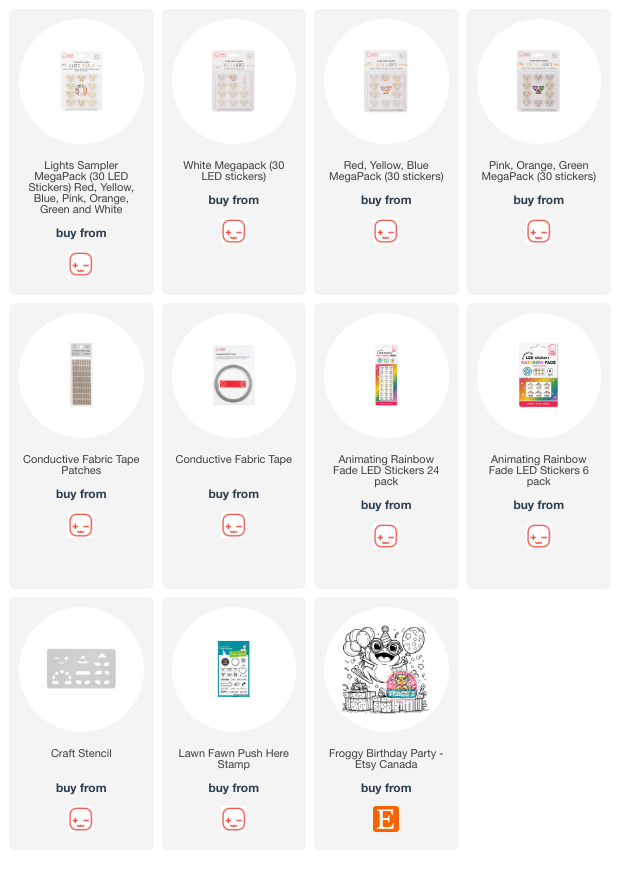
This card features cool paper circuit products including the Animating Rainbow Fade LED Light Stickers!  This particular light sticker rotates through the rainbow of colors!

I began today's card by printing off a front card panel using the adorable "Froggy Birthday Party" digital stamp from "Teaco's Custom Stamps".  I also printed off a lighter version for the inside of my circuit building surface.  I colored up my froggy image using Copic Markers and add the "push me" sentiment from the Lawn Fawn "Push Here" stamp set in the yellow balloon.

Next I began to plan out my light locations.

I used the lighter version of my front panel image to locate the spots for all of my lights; the frog's eyes, the large blue balloon, the frog's tongue, the 4 stars and finally the froggy's belly.  The belly will be the location of the Animating Rainbow Fade LED Light Sticker!  

The blue lines indicate the NEGATIVE side of the circuit and he red lines indicate the POSITIVE side of the circuit. 

I used my Craft Stencil to trace out the location of all my stickers. I also added my Battery Holder to my circuit.  They have a peel and stick backing so they're easy to add to your projects.

Next I began to lay down the Conductive Fabric Tape to connect up my circuit.

I started with adding Conductive Fabric Tape to the negative side of the circuit.  I started in the bottom of the Battery Holder and extended it out to cross over all of the blue pen lines.  Where I had branches of the circuit that I couldn't get with one continuous piece of tape, I just cut a piece of tape to fit and made sure to cross over the 2 pieces of tape for good circuit contact.

Once the negative side of the circuit was complete, I started on the positive side.  I began laying down my Conductive Fabric Tape on the inside lid of the Battery Holder.  I started on the inside, wrapped the tape around to the top of the Battery Holder and then laid the tape over all of the red lines.

I had TWO places where my tape was going to cross over the blue lines/negative lines of the circuit so create 2 paper BRIDGES over top of the tape.  This little paper barrier would allow me to pop these lines right over top as to not short circuit my circuit. 

The above dots are indicating the placement of my LED Light Stickers; yellow = yellow lights, orange = orange lights, blue = blue lights, red = red lights, black circles with the white centres = white lights and the circle with R in the middle = animating rainbow fade LED light sticker.

Next I added all of my light stickers.  I used the Animating Rainbow Fade LED Light Sticker for the frog's belly, two White LED Light Stickers for his eyes, 2 Blue LED Light Stickers for the large blue balloon, one Red LED Light Sticker for his tongue and 2 Orange and 2 Yellow LED Light Stickers for the stars surrounding the frog. Each sticker is as easy as a peel & stick motion.

To finish off the card, I placed a C-shaped 3D foam sticker inside the Battery Holder by peeling off the sticker backers.  I laid 2 3V batteries, one on top of the other into the foam void and closed the lid of the Battery Holder.

I also used 3D foam to wrap around the 4 sides of the circuit on the edges of the circuit building surface.  This allows for the depth of the foam around the battery to dealt with.

For the card to light up, just press the yellow balloon indicted with the "press here" sentiment and this closest the circuit and the card lights up.

Holding the button/switch allows for the  Animating Rainbow Fade LED Light Sticker to cycle through it's 6 different colors of light.  I just let my recipient know to press and hold the button to activate their card with a little note inside. 

Here's a little bit darker image of the card front in action... the Chibitronic light stickers are BRIGHT!!

Now, if you'd like to see build this card and it's circuit, please check out my YouTube video over on the Chibitronics YouTube channel.  Click HERE or click the image below to view the video.

Thanks for joining me today!  I hope this tutorial inspires your to make your very own light up card too!

Have a great week!

~ Ally ~


Pink & Main ~ Stay Sparkly!

Happy Tuesday!  Today I'm sharing another fun card featuring the May release from Pink & Main.

In honor of MerMay last month, I thought I'd share a whimsical card using the "Stay Sparkly" mermaids.

I first stamped my mermaids and their finned friend using Memento Tuxedo Black ink.  I colored them up using some Copic Markers.

 
Next I took my tri blend of blue Copic Markers and I created a flowing backdrop of water among the mermaid and her friends.  I added a sandy bottom and some waving seaweed too! 
 

To finish off the card, I added some White Gel Pen details to her hair piece and outfit, some Stickles "Stardust" bubbles to the water and a pink colored sentiment included in the "Stay Sparkly" stamp set.

A card fit for a mermaid lover for sure!
 
Have a great week everyone!

~ Ally ~

Sweet November Stamps ~ YouTube Hop with a PRIZE!

Happy Sunday all!  Today over at Sweet November Stamps we are celebrating our new "Summertime Fun" clear stamp release! 

To celebrate this new collection, we invite you on over to YouTube to hop along with a few of our designers to get inspired!

The card I'm sharing on our little adventure is this card.  It features the adorable "Tide Pool Pals" and the cool "Coastal Getaway" stamp sets.

For my video today, I share step-by-step the process of making this cool stormy sky using Copic Markers and our trusty Copic Blender Pen.

Who can resist some cute seals and an otter!?!?


Come on over and check out hop.  You could WIN the entire "Summertime Fun" clear stamp release for you very own!  Check out the description on the video on how you can play along for your chance to win.

START your YouTube Hop adventure HERE!  Have fun!

~ Ally ~

Sweet November Stamps ~ Summer Fun Release Instagram Hop


The long, hot days of summer are upon is and that means it is the perfect time to crank up the AC and enjoy crafting with the new Summertime Fun clear release at Sweet November Stamps. There are 11 fun stamp sets, as well as 2 new sequin mixes that are ready to heat up your crafting.

My first card share of this clear stamp release features the beautiful "Coastal Getaway" stamp set.  This stamp set feature 3 sentiments, s a cliff side lighthouse, a row of changing huts, a seaside cottage, some seaside dunes and grasses plus a sweet couple arm in arm with one another.

I started by stamping my 3 images using Memento "Rich Cocoa" ink.  I like this ink as it is a little lighter than a black ink so it makes the stamped lines a little softer.

I started by coloring in all my sky and sea using my Copic Markers.  I try to make my sky colors just a little bit different from my water just so I can visually tell the difference between the two.

To finish off my card, I used some CP Rockin' Red ink to stamp on a simple sentiment from the same "Coastal Getaway" stamp set.

Make sure to head on over to Instagram to check out our hop today.  Follow and comment o each designer's post for a chance to win the ENTIRE Summer Fun clear stamp release!  Good luck!

START HERE!

Hope you have a great weekend.  See you tomorrow with more Sweet November Stamps fun!

~ Ally ~

 
09 10