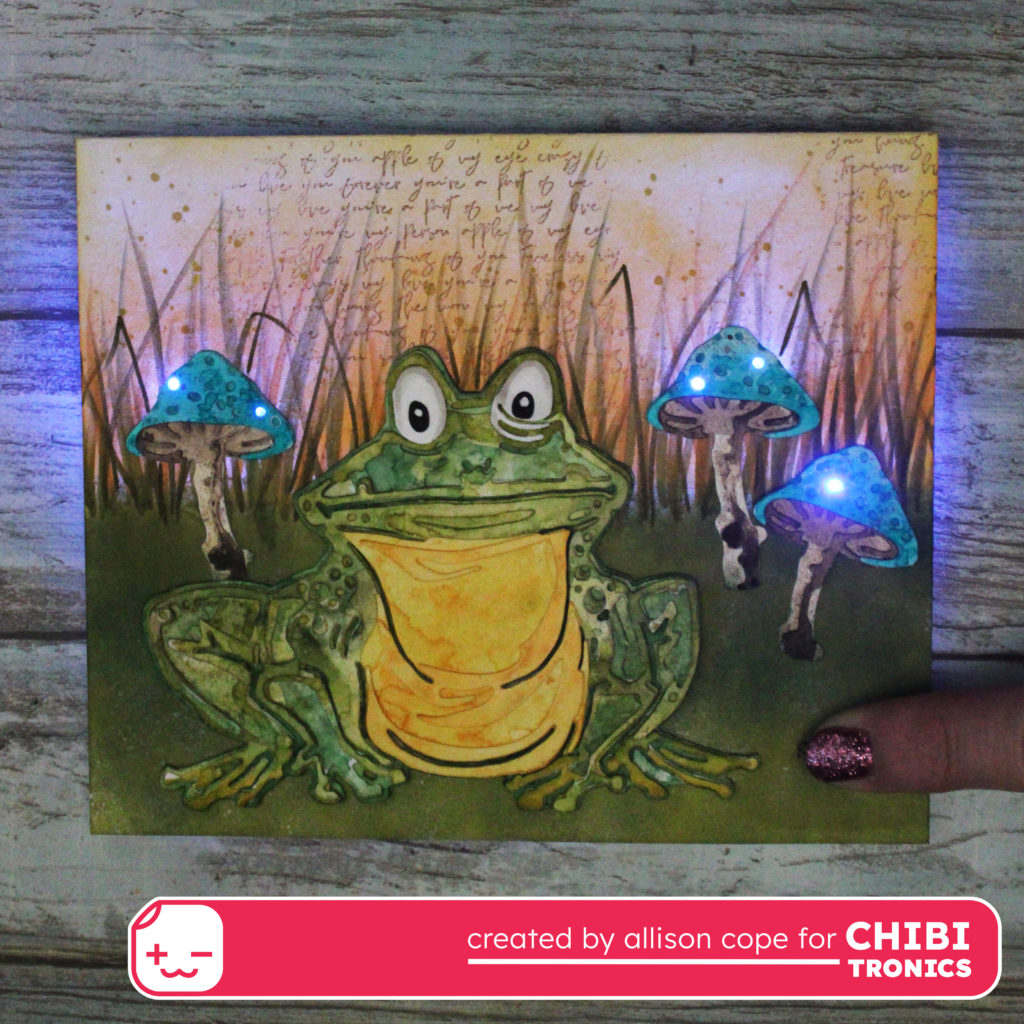
Happy Monday all! Today we’re going to create a light up swampy scene with this adorable toad and his toadstools!
To begin my card I first created a simple card base with a 3 dimensional fold in the center. This allows for the depth of my foam tape. This card is not a traditional size because I wanted to make sure that our little Sizzix “Myron” toad had enough room on the card front for the scene. I used a variety of Catherine Pooler inks to color up my entire scene.

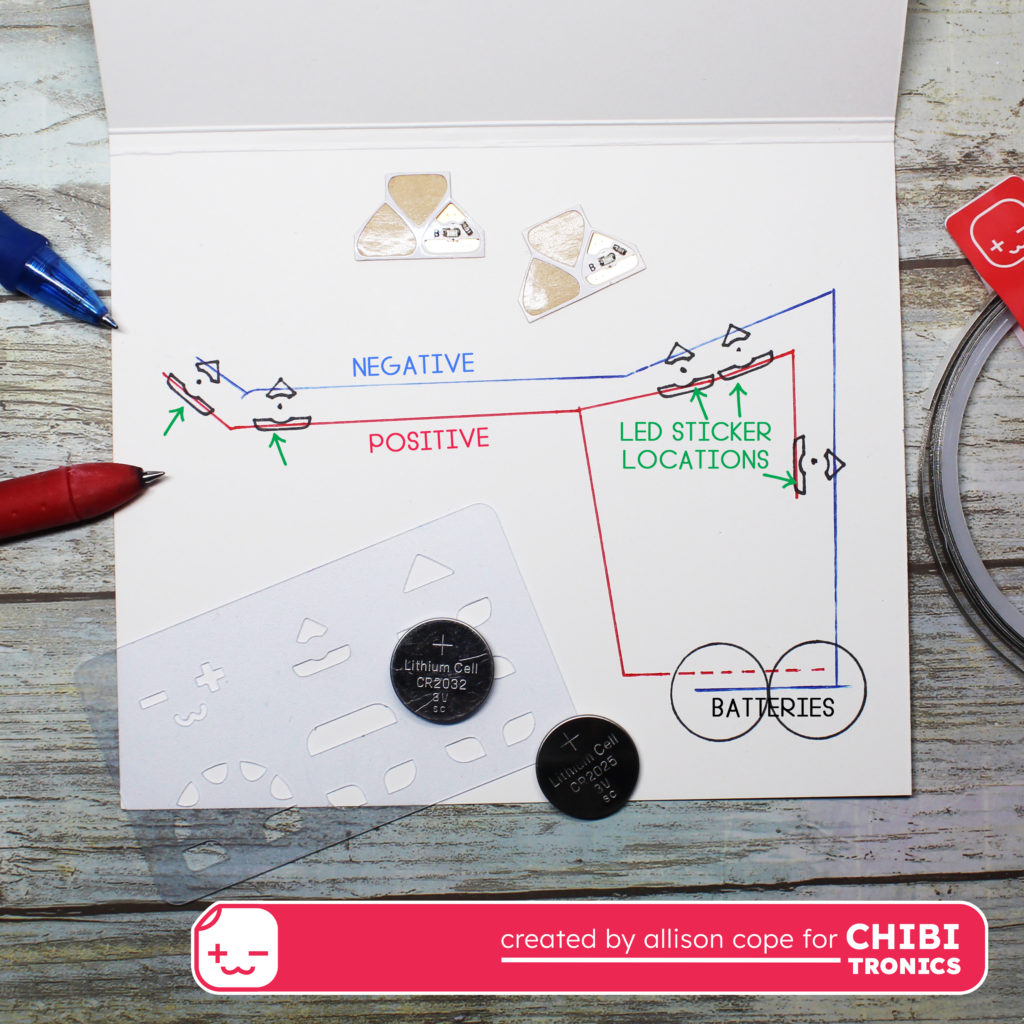
To begin my circuit under my card front, I poked holes through the toadstool die cuts in 5 places. Then I poked a pencil through the holes to place marks on the circuit surface. This way I would know exactly where to place my LED Light Stickers.
Once those light positions were located, I used my Craft Stencil and traced where each of my 5 stickers would go. Then I created a spot for my battery housing and connected the batteries and LED Light Stickers to complete the circuit.
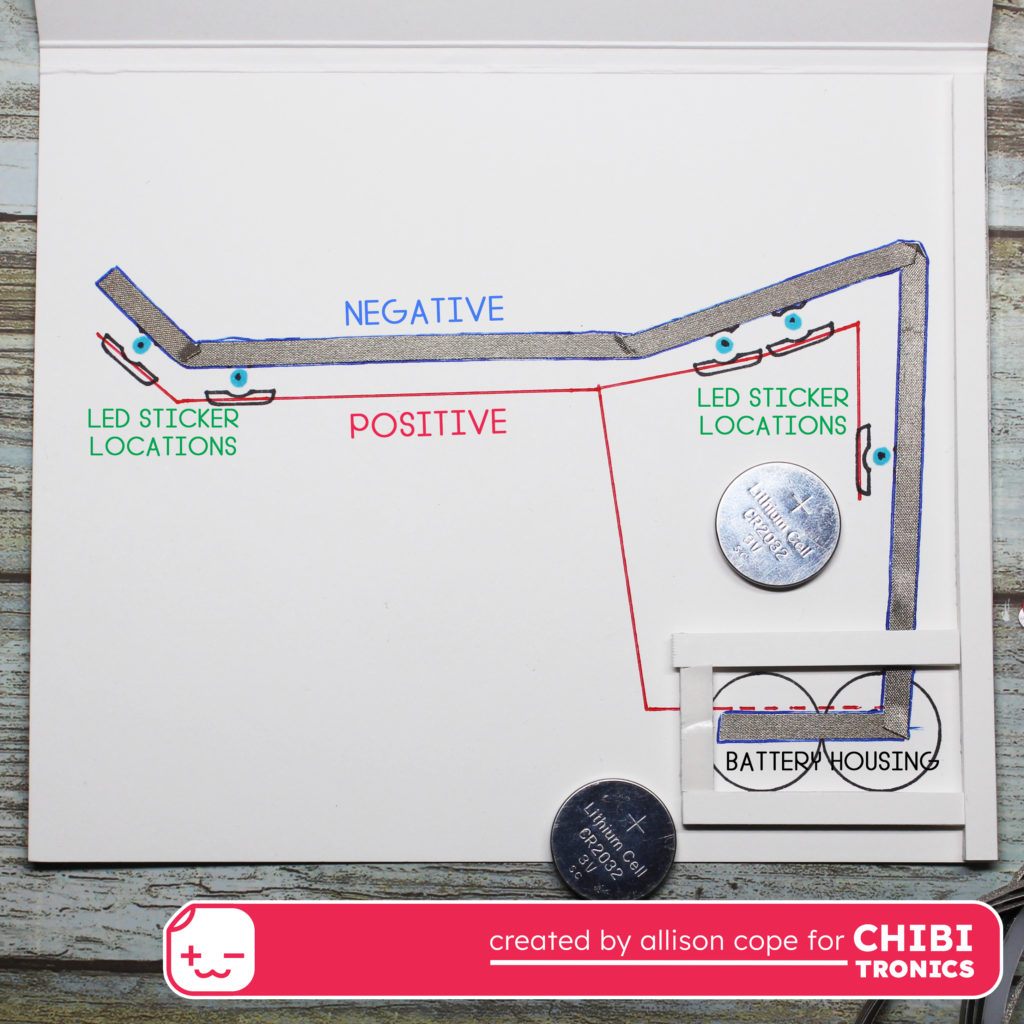
Now I can lay down the Conductive Fabric Tape on the negative side of the circuit. This tape is very flexible and self adhesive.
Next I created a little house for my 2 batteries. You do not have to use 2 batteries but I like my lights to be nice and bright.
To create the battery housing, I used some 3D foam to build 4 walls to hold the batteries tightly.
Next I used a slender piece of vellum to create a flap to go over the batteries. I wrapped this vellum piece with the Fabric Conductive Tape to ensure that the tape makes contact with the top of the batteries. Then I proceeded to follow the red pen line and finish off the remainder of the positive side of the circuit.
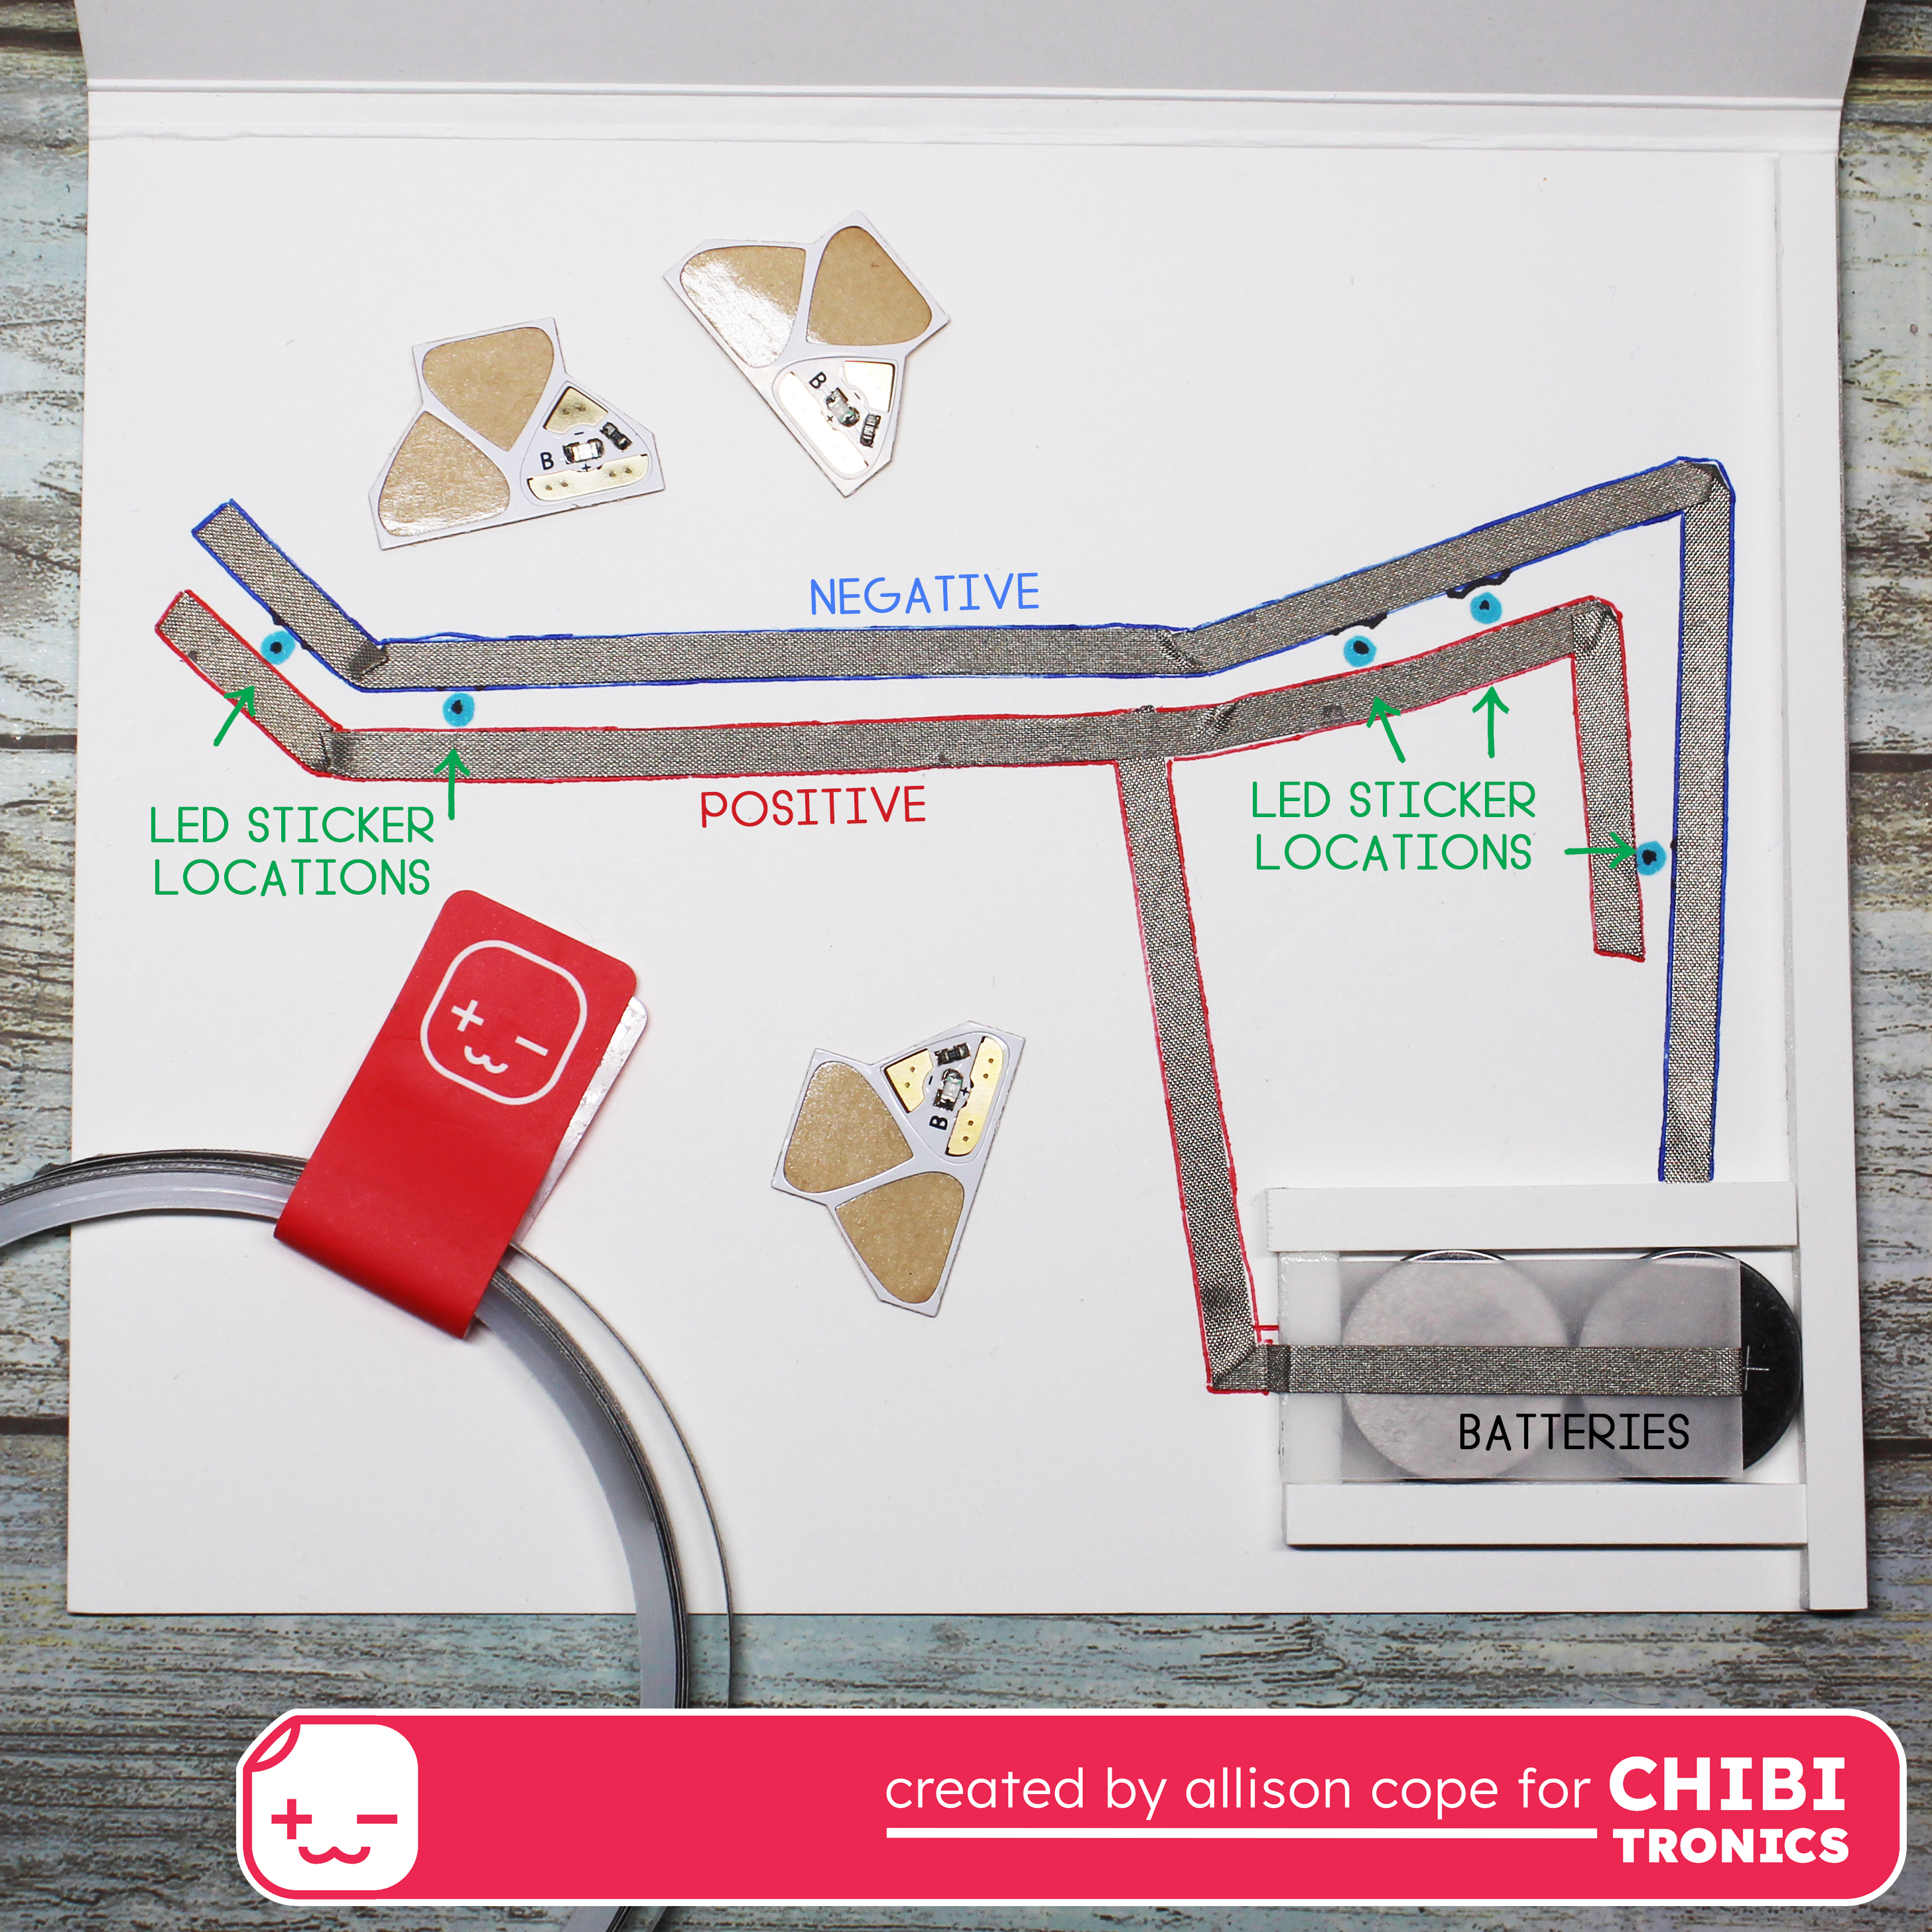
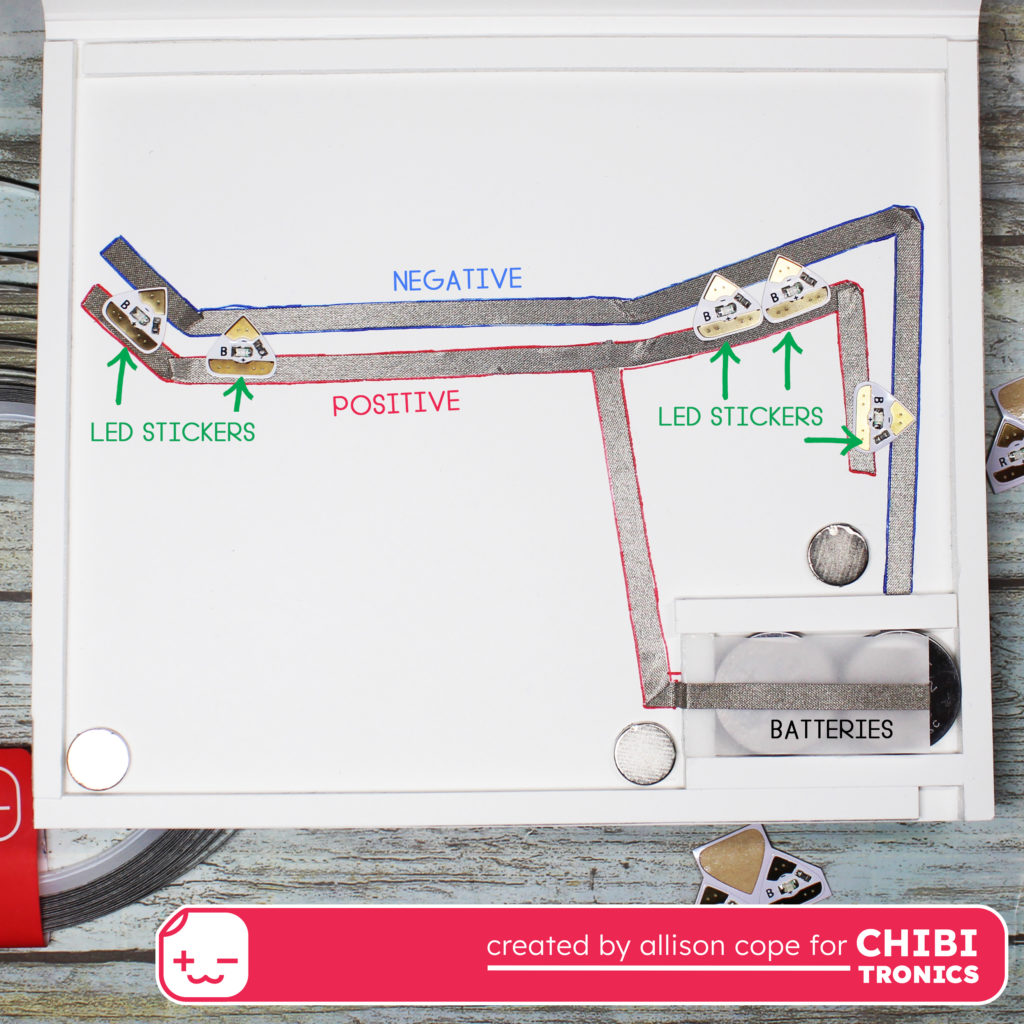
The final step is to place the Blue LED Light Stickers in their spots. Each sticker is clearly labelled which side of the sticker is the negative side (-) versus the positive side (=).
To finish off the interior of the card, I added 3D foam around the parameter of the card. When I give an interactive card I always leave the circuit available to be accessed so for this card I added some small magnets for the closure.
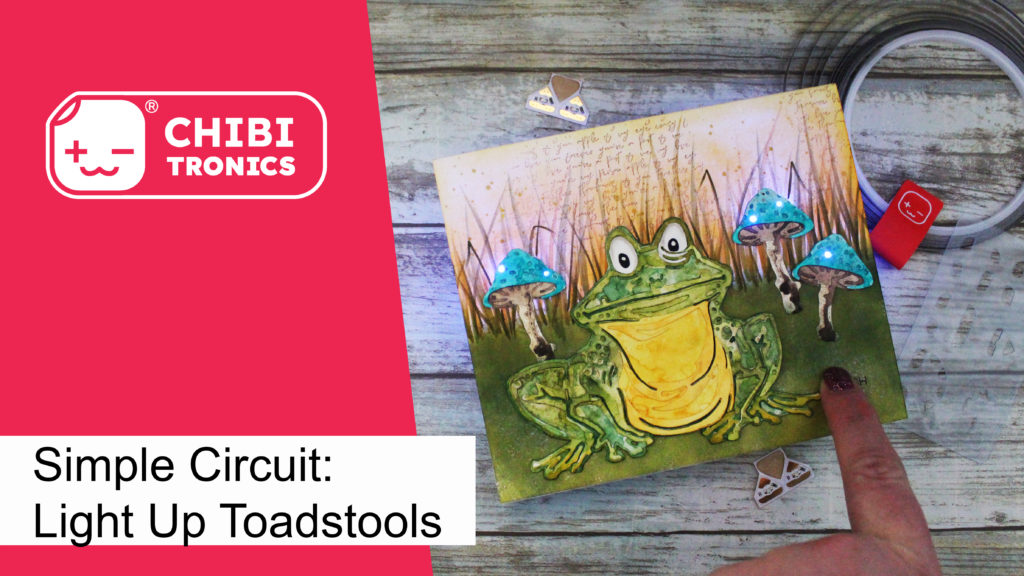
And volia! You press the word “press” on the front of the card and those cute little toadstools light up!
If you’d like to see exactly how I created the circuit , please check out my VIDEO tutorial:
Thanks for joining me today! I hope I’ve inspired you to light up your next card!


No comments:
Post a Comment