Sweet November Stamps ~ A Great Adventure!

Happy Tuesday everyone!  Over at Sweet November Stamps we released a new digital image this past weekend!  This digital release is called "Camper Life" and it has some super cute camp themed mini packages.

I decided to use the adorable "Camper Life: The Teens" package on today's card...

The sign post is part of this little package so I decided to have them out in the woods together getting ready to figure out which trail they would head down.

A very simple scene and all colored in using Copic Markers.

We have the Sweet November Stamps Halloween release coming soon!  Stay tuned!!

~ Ally ~


Sweet November Stamps ~ Newsletter Freebie 'Libby'

Happy Saturday!  Today I'm sharing my card featuring the brand new "Libby" digital image from Sweet November Stamps today.

If you are a Sweet November Stamps newsletter subscriber, you could have gotten Miss Libby for FREE!  Every month, we send out a newsletter which contains all kinds of inspiration and a new digital image is released that same Sunday.  We offer a code to get this new digi for FREE within the newsletter.

I was in the mood to start some Halloween inspired art so Miss Libby is wearing an x-ray dress and socks for this birthday card...

I decided that she should be the spotlight of the card so I made a very simple Copic Marker background.  I used three of the Copic fluorescent markers for this one which makes that back drop so bright and vibrant!

Thanks for stopping by!  I hope you head over to the Sweet November Stamps website and sign up for the FREE monthly newsletter.  You can find that at the bottom of the website right at the bottom.

Have a great rest of the weekend!

~ Ally ~

Sweet November Stamps ~ A Camper Life

Happy Saturday everyone!  Over at Sweet November Stamps we have a brand new digital release hitting the shop today!  This digital release is called "Camper Life" and it has some super cute camp themed mini packages.

I decided to make a huge digital scene with lots of different images on a slimline card.


The left side of the card features the Camper Life Grandma, Grandpa, BBQ and Dad.

The right side features the Camper Life Mom, Teen Girl and the Parent Camper.   I also had to include a puppy so I chose to include "Booker the Scottie" from the Dog Park digital collection.


Make sure you check out all the new digis today over at the shop.

Don't forget... that the "Christmas in July" sale is still on for a few more days.

Sales are on Christmas clear stamps, Christmas digital images and Christmas sequins.

The July newsletter goes out tomorrow.  May sure you are signed up as each newsletter contains a code for a FREE digital image.  This month's freebie is a cutie!

Happy shopping all!

Have a great weekend!

~ Ally ~

Scrap 'N Stamp ~ Pop Out Swing Card

Join me Sunday at 8pm EST for a LIVE tutorial on how to create an interactive simple Pop Out Swing Card.

Today's card also features an adorable stamp set from Marianne Designs called "Peek-a-Boo Winter Animals".

I'll be over on the Scrap 'N Stamp Facebook group! 

Hope to see you there!

~ Ally ~

Catherine Pooler ~ Jungle Birthdays

Happy Thursday!  Today's card features a few Catherine Pooler Designs /Sizzix products. 

I began by stencilling three card bases using the brand new "It's a Jungle Out There Stencil".  I used 4 different green and a pink ink: Melon Ice, Garden Party, Lime Rickey, Grass Skirt and Coral Cabana.

I splattered the panels with a little bit of bright gold paint for a touch of sparkle.

Next I stamped 3 monkeys from the "Going Bananas" stamp set using Memento Rich Cocoa ink.  I used a variety of brown Copic Markers to color all three of them in.

For the final touch, I added greetings from the "Best Birthday Yet" stamp set.

A few more birthday cards for my stash!

Have a great rest of the week!

~ Ally ~

Sweet November Stamps ~ Swinging By...

Happy Saturday!  Today I'm sharing my final card featuring the brand new "Lazy Days of Summer" digital release from Sweet November Stamps. this week.

Today's card features another one of the "Lazy Days of Summer" digi stamps.  Meet "Joni". She's just enjoying her tire swing out on this sunny day.

She even has a little peeper on the tree branch above...

I hope you have a wonderful weekend!

~ Ally ~

Chibitronics - Happy Birthday Spencer!

Happy Wednesday!   Today I'm sharing my latest Chibitronics creation that I've made this week.

This is a special week as today is my son's 19th birthday and he LOVES all things plane related!


I started today's card by printing 3 copies of the plane blue print image.  I used one to fussy cut out the plane to pop it up on my card front.  Before I added the plane I punched holes in the lower plane panel to allow the light to transmit through the image more brightly.  I also cut holes in the 3 locations of the lights in the actual cardstock front to allow as much light as possible to pass through the card front panel from the circuit.

The third copy of the image I used on the inside guts of my card to map out my circuit.

First I located my battery location underneath one of the engine fan images on my card front.  Then I used my Craft Stencil and added the 3 locations of the light stickers I wanted to use; one on each wind tip and one on the tail.  Next I mapped out the pathways of the negative (blue lines) and positive (red lines) of my circuit using pen.

Next I laid down the Conductive Fabric Tape for the negative side of my circuit.  I began on the bottom side of the self adhesive Battery Holder.

Next I added a piece of paper for a bridge over top of the piece of negative side of the circuit where my tape was going to cross over it.  Then I laid down the positive side of the circuit tape.  I began on the inside of the lid of the Battery Holder.  This allows the lid of the Battery Holder to be pressed to close the circuit and allow the lights to come on - otherwise known as the switch.

Lastly, to complete the circuit, I added my three LED Light Stickers, I used one Green LED, one Red LED and an Animating White Blink LED Light Sticker.

I used the green sticker from the Pink/Green/Orange MegaPack, the red sticker from the Red/Yellow/Blue MegaPack and the White Blink sticker from the Animating White Blink LED Lights Pack (comes in 24 or 6 pack).

I adhered the double sided self-adhering "C" shaped foam inside the Battery Holder and popped in a 3V Coin Battery.

To allow for the bulkiness of the Battery Holder, I applied 3D foam around the perimeter of the circuit panel so the card front closes on the same level as the whole card.

Let's give it test... and REMEMBER... the white light BLINKS on and off!


I sure hope he likes it!  Happy birthday buddy!

~ Ally ~

Sweet November & Craft Roulette ~ A Joyful Noise & a SALE!

Happy Tuesday all!  Today I'm combining two ideas for one project!

Today's card was initially created for this week's Craft Roulette episode.  This is my 76th submission.

The four parameters that the wheel gave us this week were:

  • Project: Smaller/Larger (I have one large star and multiple smaller stars.)
  • Colors: Planet Colors (Blue for the sky.  Browns, reds, etc. for the actual planets.)
  • Element: House(es) (Top of the stable - a house for animals)
  • Random: White Border (obvious!)

So this week's card features the adorable "A Joyful Noise" stamp set from Sweet November Stamps.

I first created my background.  I masked off the white borders around the edges and then I masked off the top of the stable.  I applied my Catherine Pooler "Twisted Sunburst Stencil" to the masked off panel and air brushed a dark blue Copic color through the stencil.  I then removed the stencil and sprayed more blue across the panel to soften the white of the page to look more like a nighttime sky.

I drew in the peak of the stable roof and colored everything in with Copic Markers, making sure I added some wood grain to the beams.

I stamped all three angels from the "A Joyful Noise" stamp set with Memento "Rich Cocoa" ink.  I also colored them all all in using Copic Markers.  I used some Polychromos Pencils to add a little more depth and shaded to each one too.

To finish off the card, I used a white gel pen to draw in the large and smaller stars and I also add an embossed sentiment from the same stamp set.

PLUS a SALE...  Sweet November Stamps is have a Christmas in July SALE all month long!  Save BIG...

I hope you join us for the next Crsft Roulette and take a peek at all the fun Christmas stuff on SALE over in the SNS shop!

Ta ta for now!

~ Ally ~

Sweet November Stamps - Oopsie Daisy!

Happy Monday!  Today I'm sharing some cards featuring the brand new "Lazy Days of Summer" digital release from Sweet November Stamps. this week.

Today's card features another one of the "Lazy Days of Summer" digi stamps.  Meet "Skylar".  She's out having fun in the daisy field with her furry companion.

I started my card with the sunset sky this time.  I colored it using long strokes of all kinds of warm colors; pinks, oranges and some purples too.

Next I laid in the grassy foreground.  I made the shadows a little longer to indicate that sun was setting and casting long shadows.

I used some dusty greenish-blues to add in some lanky pines in the background and then colored in Miss Skylar and her puppy in the daisy field.

To finish off my card, I stamped a cute daisy themed greeting from the "Spring Garden Critters" clear stamp set.

So much fun!  Hope you'll check out all the mun new digi stamps from the "Lazy Days of Summer" digital release.

Have a great week!

~ Ally ~

Sweet November Stamps ~ Lazy Days of Summer Release


Happy Saturday!  Today I'm sharing some cards featuring the brand new "Lazy Days of Summer" digital release from Sweet November Stamps.

Today's card features the "Lazy Days of Summer Emsley" digi stamp.

I started by printing her out and coloring in the sky.  It's hard to see but I first colored in the sky with a series of teal green and yellow green Copic Marker swirls of color.  Then I masked it all off and added a layer of Black Soot Distress Oxide ink over top to make it appear like the aurora borealis. 

I colored in the rest of the scene in true, bright color and then I toned down the darker spots with a series of C3-5 markers. 

To add the lantern, I used the "Camping Wees" stamp set and I masked off the lantern from one of the fairies to appear like it was tucked in the hammock.

To finish off the card I added a simple sentiment, also from the "Camping Wees" clear stamp set.

I hope you check out Sweet November Stamps for all the new girlies ready for summer.

~ Ally ~

Catherine Pooler ~ Christmas in July

Over at StampNation every two weeks we provide a challenge for our members. This week's challenge is to create a card or project for Christmas in July

Today's card features a few Catherine Pooler Designs products. 

I began by stamping a variety of pieces from the "Winter Vibes" stamp set.  I used Oh Boy, Melon Ice, Pucker Up and Party Dress inks. I cut each piece out with it's corresponding die.


Next I stamped a whole bunch of the 3 sizes of snowflakes all over a a piece of white cardstock using the exact 4 same ink colors.

I die cut this panel with the largest die from the "Dots & Scallops Dies".


Then I cut a circle towards the top left hand corner of the panel.  I used the whole to position a greeting on my card base.  I stamped the sentiment from the "Seasonal Mix Sentiments" stamp set in Party Dress ink and popped the panel onto the card front using 3D foam.

And voila... a Christmas card to add to my stash!

Check out all the fun StampNation has to offer!

~ Ally ~

Chibitronics ~ Slide Switch Sunset Sunnies *Video*

Happy Wednesday!   Today I'm sharing my latest Chibitronics creation that I've made this week.

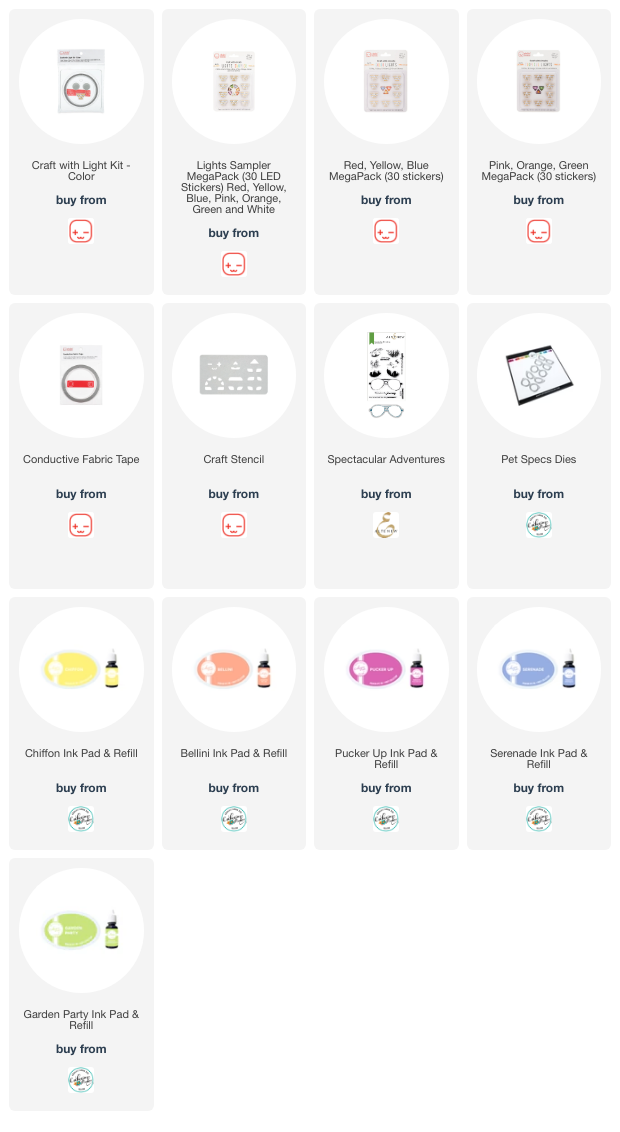
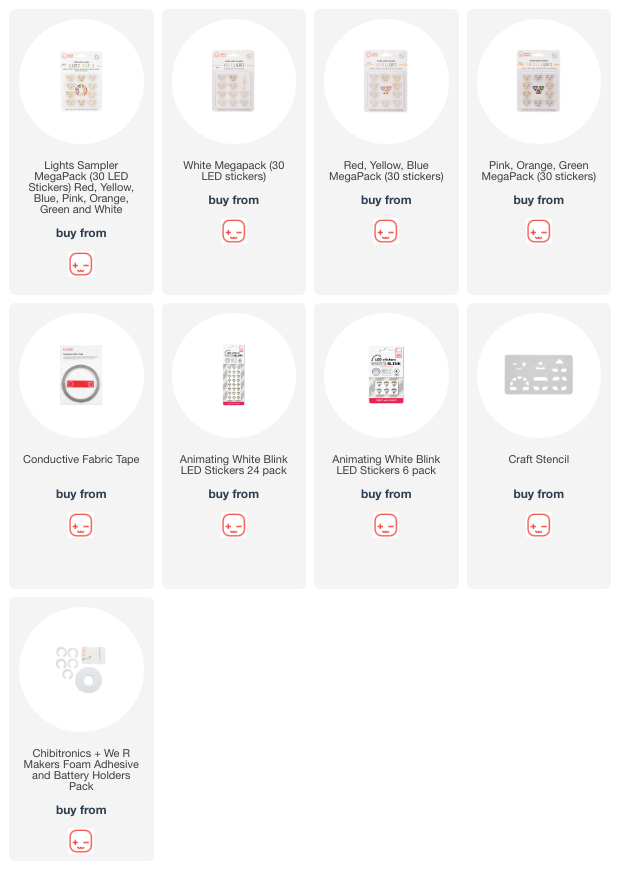
This card features cool paper circuit products including the Craft With Lights Kit - Color!  We're going to use all the light sticker rotates through the rainbow of colors from little kit today!

I started today's card by stamping the sunglasses image and sentiment from the Altenew "Spectacular Adventures" stamp set on a card base.  I used 5 Catherine Pooler Designs inks, Chiffon, Bellini, Pucker Up, Serenade and Garden Party, swiped in rows on some white cardstock and then I cut a whole bunch of the glasses shapes using the "Pet Specs" Dies" and adhered to a frame.  I also added some retired MFT striped patterned paper to the frame on the inside.

I also stamped the sentiment and the sunglasses outsides on the inside of the card base to build my circuit upon.

Next I laid out the position of my LED Lights.  I decided to use all 6 colors of lights from the Craft with Lights Kit - Color. I used my Craft Stencil to trace out the 6 shapes onto the inside of the sunglasses lenses.

Next I drew in all the aspects of my circuit.  I used a circle to indicate the location of my battery and then I drew in the location of the negative side of my circuit (in blue).  Please ignore the blue lines below the 6 strips of Conductive Fabric Tape at the bottom of the circuit... I mistakenly added these in but didn't apply any tape to them to create the Slide Switch.

Next I applied a light blocking panel behind my sunglasses image.  I hand cut out the lens shapes so the light only passes through the sun glass's lenses.

Let's finish the circuit!

Next I added the battery, holding it down with the starting end of the Conductive Fabric Tape for the positive side of the circuit.  I made sure to take it down to the location of the LED Light Stickers.

Next I added my six colored LED Light Stickers: yellow, orange, pink, red, blue and green LED Light Stickers.

I folded down the switch panel and closed the top of the card and then tested out my switch...

The way the switch works, is as you slide your fingers down the sentiment, pressing down, you complete the circuit underneath each light sticker so the lights light up!  Fun right?!?!

Make sure to check out the actual video tutorial by clicking the image below...

Thanks for stopping by!  I hope you have a wonderful week!

~ Ally ~

Sweet November Stamps ~ Life is Sweeter

Happy Tuesday!  Today I'm sharing another images from the Summertime release from Sweet November Stamps.

Today's card features the "Bountiful Blessings: Berry Sweet Day" clear stamp set. 

I just add the sweet little quails all over this sweet scene.

Everything is colored in Copic Markers.


I hope you check out all the new clear stamp release today.

Have a great day!

~ Ally ~

Scrap 'N Stamp ~ Christmas in July Hop

Welcome to the Scrap 'N Stamp Christmas in July Blog Hop!

Today's card features an interactive card today!  I used the adorable Echo Park "It's a Wonderful Christmas" stamp and die set.  I stamped my snowmen with Memento Tuxedo Black ink and colored them in using Copic Markers.

For the sentiment I used CP Be Mine ink and Something Borrowed ink for the snowflakes.  I die cut everything using the corresponding dies.

Next I created my rocking half circle card base by using my large circle die leaving the fold in the center of the circle.

I die cut a piece of Craft Consortium "Ink Drops - Ocean" patterned paper to lay on the semi circle card base.  I also added a piece of Silver Glitter Cardstock under the blue patterned paper circle.

I used some watercolor powders to create a piece of cardstock with tones of blue.  I die cut the shape using a MFT "Stitch Rounded Arch Dies" and also a few pieces of torn edged vellum to add to the bottom of the shape.

I used the Echo Park "Wintertime Sky Stencil" and added some Embossing Paste snowflakes across the back.


Check out why this card is so fun.... it rocks...


I'm posting this early so I don't have a direct link to the next person.  Please visit the Scrap 'N Stamp blog for the next person on the list.

CHECK FOR THE NEXT PERSON: Scrap'n Stamp Blog

Now for the GIVEAWAY details...

 GIVEAWAY DETAILS!!

  1.  Hop along and LEAVE A COMMENT on each designers blog post.
  2. One WINNER will be chosen to receive a $50 gift certificate to the store.
  3.  Winners will posted on the Scrap 'N Stamp blog sometime in July.  Good luck!

Thanks for stopping by!  Happy hopping and GOOD LUCK!

~ Ally ~ 
 
09 10